Showing posts with label Dessert. Show all posts

Tuesday, September 8, 2020

Simplest, Easiest Chocolate Cake


If you do a reasonable amount of cooking or baking, it’s almost guaranteed that you will have the ingredients to make this ridiculously satisfying cake on hand at any given time. The needed equipment is even basic, with a cake pan being the most exotic requirement. It’s also super quick to make with nothing difficult to do. It even has a fun little trick to it.

This recipe is an adaptation of a “6-minute” chocolate cake in Moosewood Restaurant Book of Desserts. While the way I do it here, does take a bit longer than six minutes, I think it’s the fastest cake I’ve even made. This can totally be your well-kept secret, though, because the cake is fluffy and chocolaty and really much greater than the sum of its parts. Even if you consider effort one of the parts.


I added a layer of rich but equally simple peanut butter frosting to the top of this one-layer cake, which makes it just a tad more celebratory. You could use your favorite chocolate cake topping such as whipped cream, a classic buttery white frosting, cream cheese frosting, or ganache. It is pretty terrific with nothing on it at all, though, or just a dusting of powdered sugar for a finishing touch.

Without the frosting, this is a vegan cake. Instead of the richness of butter or egg yolks, it just gets some oil and a deep dark flavor from a cup of coffee. Instead of volume from egg whites, the batter gets a quick poof from a couple tablespoons of vinegar reacting to baking soda. It’s kind of neat to watch, actually, so if you’re a science-y type like me, it makes for kind of a grand finale. (That’s the fun little trick I mentioned above!)

 
Anyway, this cake is way more deeply, darkly, satisfyingly delicious than it has any right to be. It’s a great recipe to have in your back pocket, and can make you a last-minute dessert hero. Or you can just make it weekly to have on hand. Either way, it will be worth keeping these basic ingredients around (including the frosting ingredients or not) and a few minutes free. It's quick. It's easy. It's good.


Easy Chocolate Cake with Peanut Butter Frosting
Adapted from Moosewood Restaurant Book of Desserts

1 ½ cups all-purpose flour
1/3 cup cocoa powder
1 teaspoon baking soda
½ teaspoon fine salt
1 cup granulated sugar
½ cup canola or other neutral-tasting oil
1 cup cold coffee
2 teaspoons vanilla extract
2 tablespoons cider vinegar


For the frosting

½ cup creamy peanut butter
¼ cup (½ stick) unsalted butter, softened
1/3 cup powdered sugar
½ teaspoon vanilla extract

1. Preheat oven to 375 F. Prepare a 9-inch cake pan by greasing it or spraying it with cooking spray, and dusting with flour. Cut a parchment circle to fit the bottom of the pan and place it in the pan. Spray or grease the parchment. Set the pan aside.

2. In a medium-size bowl, combine the flour, cocoa, baking soda, salt, and sugar. Whisk together to combine well.

3. In another medium-size bowl, or a large measuring cup, mix together the oil, coffee, and vanilla. Pour into the flour mixture and whisk until smooth.

4. Pour in the vinegar and stir very quickly just until the vinegar is evenly distributed.

5. Immediately pour the batter into the prepared pan. Spread out to make even if needed. Bake at 375 F for 25-30 minutes or until wooden pick inserted in the center comes out clean.

6. Cool the cake in the pan on a wire rack about 10 minutes. Carefully turn the cake out of the pan, remove the parchment circle, and cool completely on the wire rack.

7. To make the frosting, combine the peanut butter and butter in a medium-size bowl. Beat together with a hand-held mixer at medium speed until smooth. Beat in the powdered sugar and vanilla and continue beating until light in color and fluffy, about 2-3 minutes.

8. Carefully transfer the cake to a serving plate. Spread the frosting just on the top of the cooled cake.

Makes about 8 servings.


Sunday, July 5, 2020

Sunday Dessert: Blackberry Peach Cobbler


I have mixed feelings about Sundays. I’m not scheduled to work weekends, and sometimes that pans out, but much too often, I end up working, for a variety of reasons that never fail to make me grumpy. If I do have the full day off, however, I love to spend it making delicious food. If time and energy allow, that includes dessert as often as possible.


Extra time doesn’t have to mean extra complication, though. This blackberry peach cobbler is relatively simple, somewhat rustic even. The topping involves easy quick-bread techniques and no complicated pastry procedures. I don’t even bother peeling the peaches. (You could if you are fussy.) The fat blackberries and sweet peaches melded together in a dark, jewel-toned, extra-juicy filling that soaked just enough into the slightly tangy buttermilk biscuit topping. Altogether it’s sweet enough to be unmistakably dessert, but the natural tartness of fresh fruit kept it flavorful and satisfying.

Just about any bake-able fruit would be at home under this soft biscuit lid, so I strongly encourage you to use the cobbler vehicle to feature what you like. Peaches and blackberries have strong tradition behind them, and would be just great individually, but other berries, other stone fruits, and rhubarb, alone or in combinations, would also be delicious.


I adapted Grandmama’s Buttermilk Biscuits to make the drop biscuit topping for my cobbler. It’s half a recipe with enough extra buttermilk to make it spoon-able rather than cut-able, and that’s it. I didn’t add any sugar to the topping, and it wasn’t needed. You could brush the top with egg wash or cream and sprinkle it with coarse sugar, though, and that might be pretty fabulous. There’s enough biscuit topping in this recipe to completely cover the fruit when it bakes, so if you like your cobbler more, well, cobbled, you may not want to use all of the dough. (Drop any extra on a baking pan, bake it off, and just eat it!)
  
I can’t remember that I ever made a fruit cobbler before I put this one together. I usually make fruit crisps instead. Unless I have the streusel for a crisp already in the freezer, however, I don’t see any reason why not to switch up to cobbler when sweet seasonal fruit is looking for an appropriate home. 


If there’s something sweet and comforting to help savor a waning Sunday, maybe Monday morning won’t hit so hard. Especially if there’s some leftover dessert to eat for breakfast. I won’t tell if you don’t.


Blackberry Peach Cobbler
Based on recipes in The Joy of Cooking

All 2-quart baking dishes aren’t the same! Make sure you use one that’s wide enough to spread lots of biscuit dough over the top, but deep enough to hold all of your cobbler without bubbling over.

Filling
4 cups blackberries
2 cups chopped peaches
½ cup granulated sugar
2 tablespoons cornstarch

Biscuit topping
1 ½ cups all-purpose flour
¼ teaspoon fine salt
2 ½ teaspoons baking powder
¼ teaspoon baking soda
¼ cup cold butter (1/2 stick)
1 cup buttermilk


1. Preheat oven to 375 F. Prepare a 2-quart baking dish by spraying it with cooking spray or greasing it with butter or oil.

2. In a large bowl, combine the blackberries and peaches. Add the sugar and cornstarch and toss together to combine well. Pour the filling into the prepared baking dish.

3. In a medium-size bowl, combine the flour, salt, baking powder and baking soda. Whisk or sift together to combine well. Cut the butter into small pieces. Add the butter and cut it into the flour with a pastry blender or with a fork or your hands until the butter is in small, well-coated pieces. Stir in the buttermilk until the flour mixture is just moistened.

4. Drop the biscuit batter onto the fruit mixture in large spoonfuls. I you want a more cobbled appearance to your baked dessert, you can hold back some of the biscuit mixture. As written here, it will cover the dish as it bakes.

5. Place the baking dish on a sheet pan if desired. This will help insure against drips on the bottom of the oven. Bake at 375 F for 45-50 minutes or until the top is golden brown and baked through, and the fruit mixture is bubbling and thickened. Cool for at least 30 minutes before serving. Serve warm or at room temperature with whipped cream or ice cream if desired.

Makes 6-8 servings.


Monday, September 9, 2019

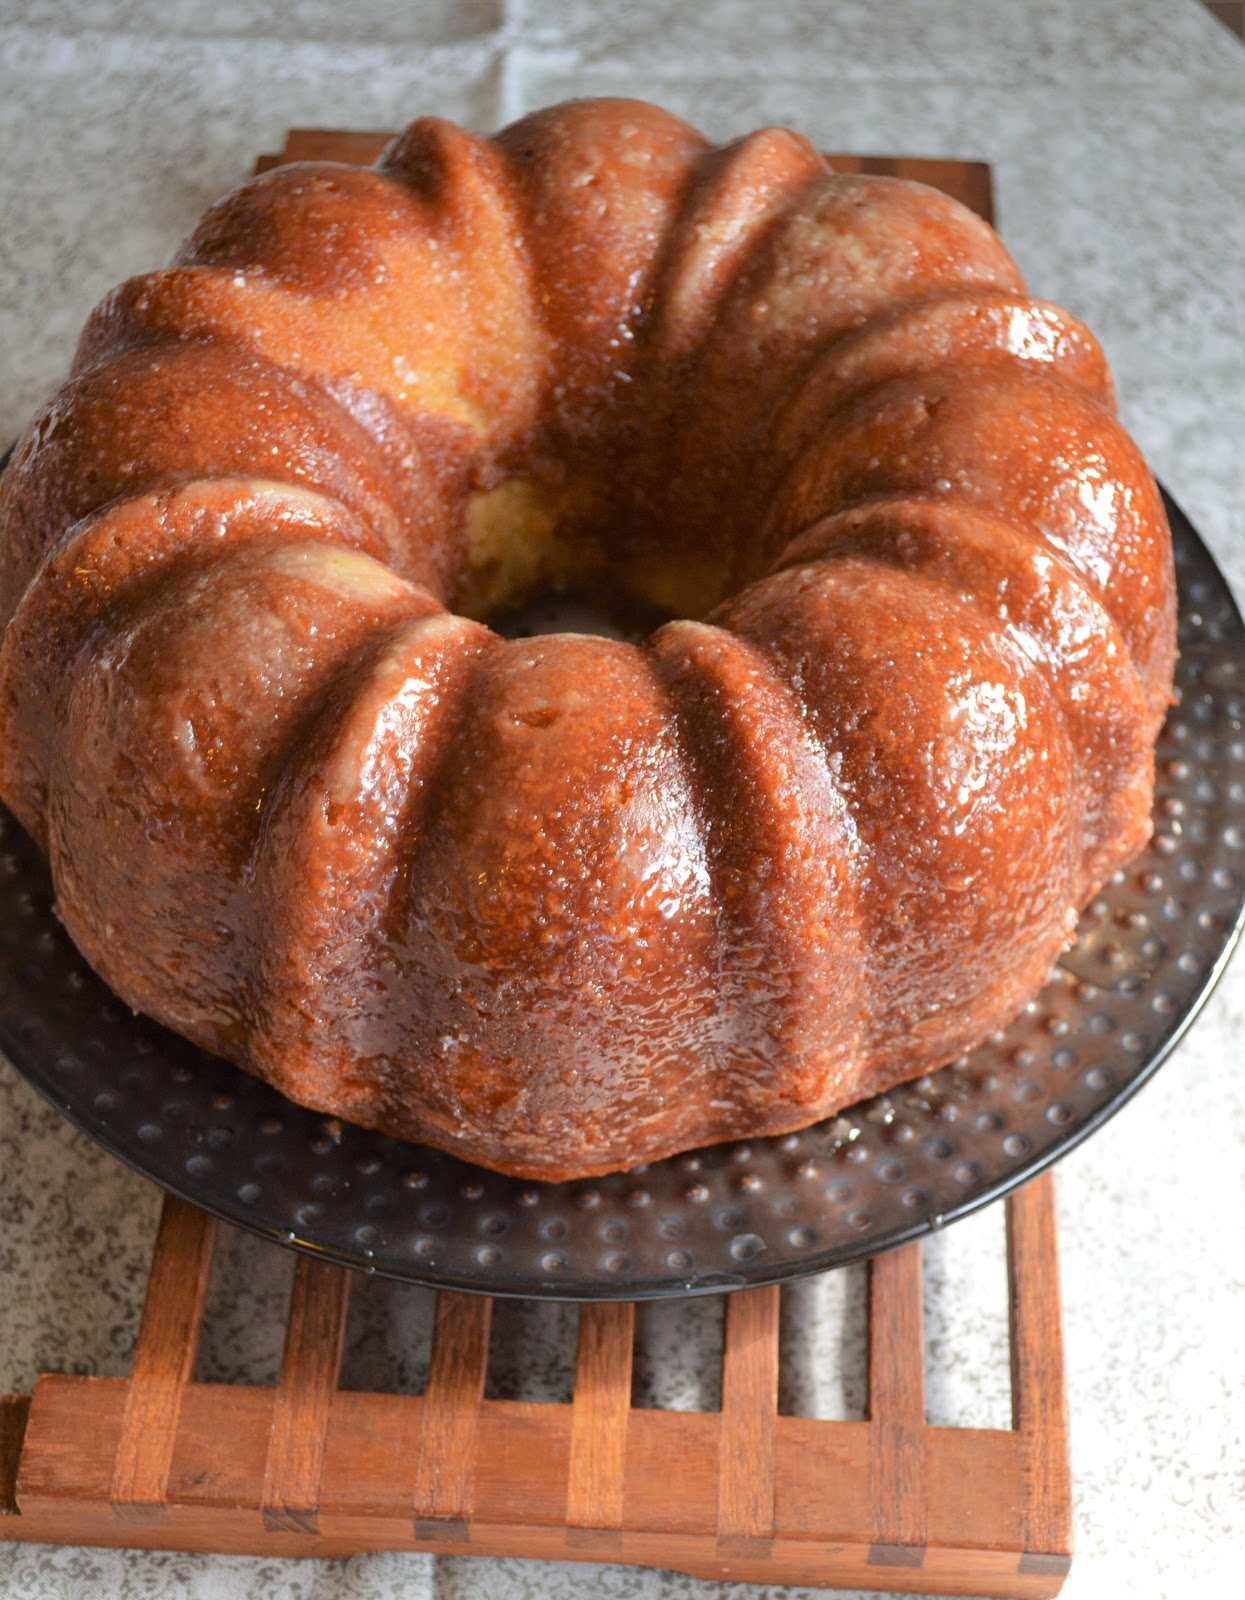
Rum Cake


I was beginning to forget when I had last baked something that didn’t have shredded zucchini in it. I think that must have been what drove me to finally make this cake, but I don’t remember that for sure either. And I hadn’t even been drinking any of the rum.


This all started with a bottle of spiced rum purchased from Door County Distillery while on vacation in Wisconsin. Harry bought it and described its sharp, clean, lightly spiced flavor. “I will make it into a cake,” I said.


Now, my mother in law is the undisputed Queen of Rum Cake. Her recipe has crossed family lines and become a favorite in my family, too. It makes a comforting cake with just the right sweetness and punch of rum. All that good stuff being said, this is not her rum cake recipe. You’ll have to acquire that another way.

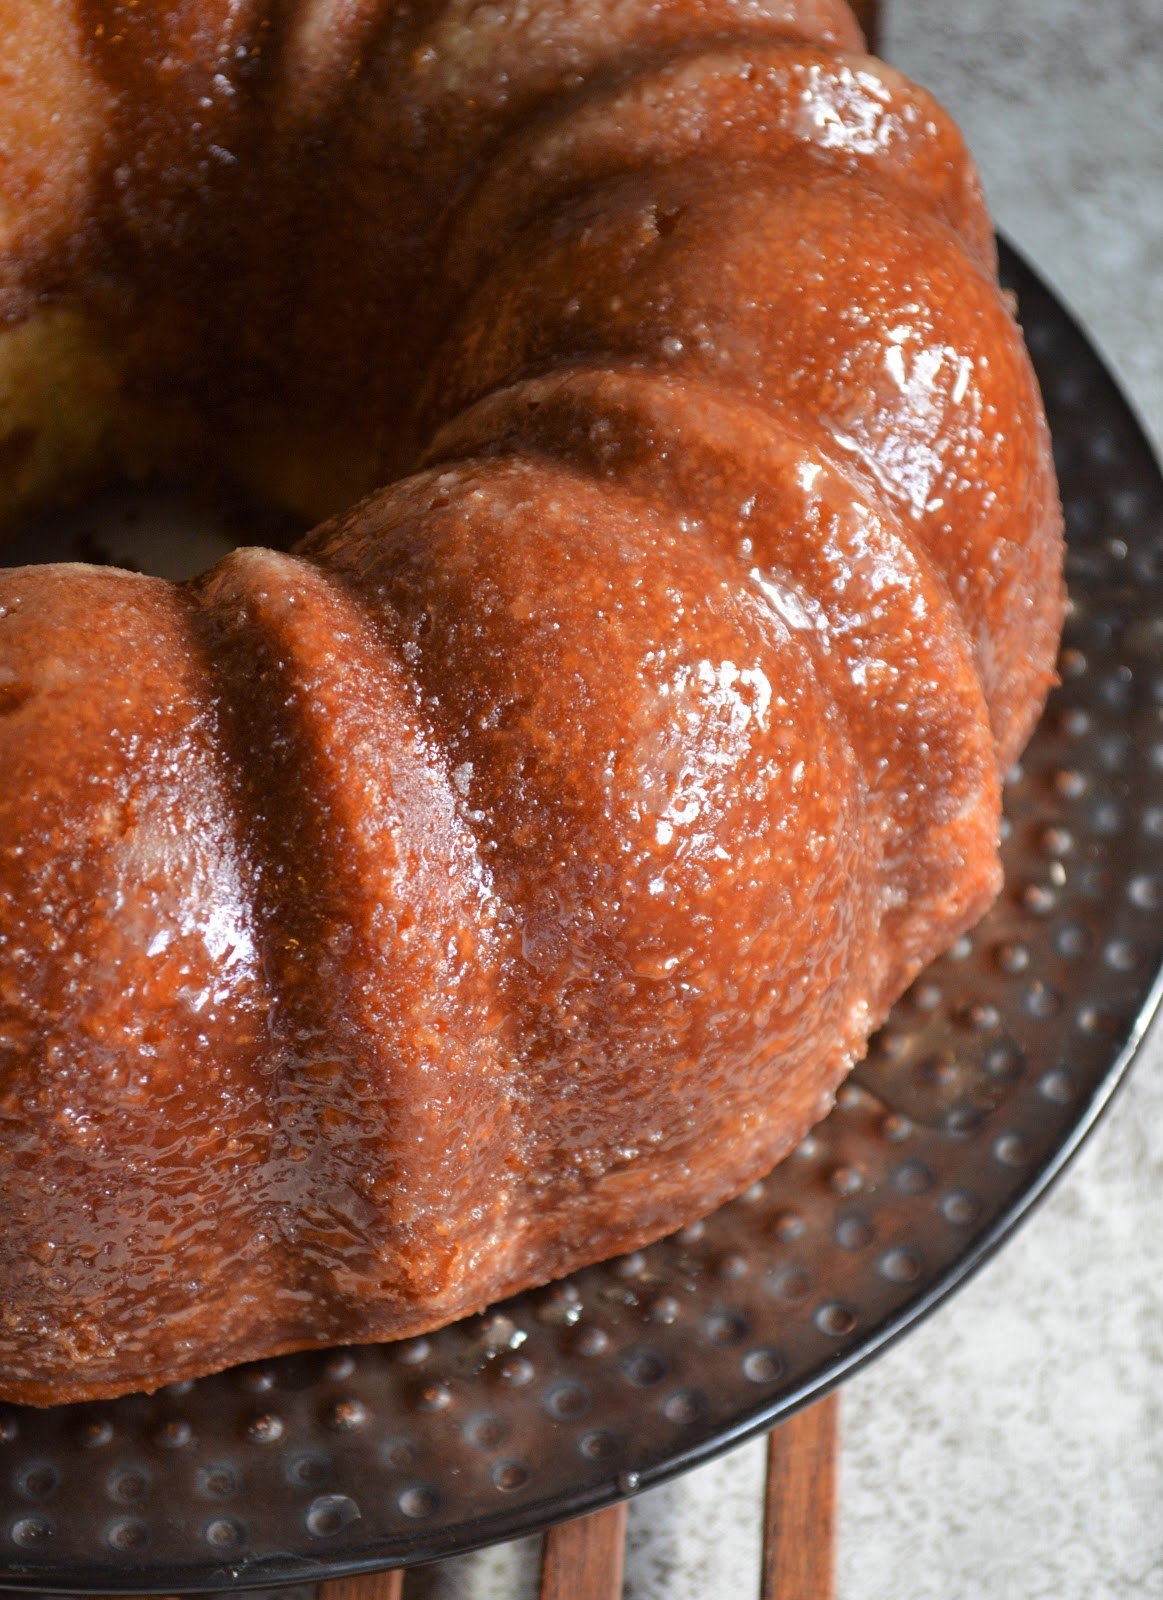
What this is, however, is a fluffy Bundt cake redolent with rum and glazed with a sugary butter-rum coating. It’s an adaptation of a bourbon cake with simple ingredients and no fancy techniques. It’s made with cake flour so it is especially soft, like, softer than I expected it could be. While I like this cake very well all on its own where its fluffy texture and bittersweet rum aroma can be especially appreciated, it was also very good with a scoop of vanilla ice cream or with sliced peach sautéed in butter, brown sugar, and more spiced rum.


I think you could swap other liquors or liqueurs for the rum (including, of course, bourbon), but I’d recommend using one with a flavor you like quite a lot. The rum is a big part of the taste of the cake, and anything you substitute for it would be, too. There isn’t much room for mix-ins, since the cake does fill a 10-cup Bundt pan, but if you want to add nuts or chocolate, you could try a larger pan. You certainly could add spices, especially if you really want to play up the spiced rum quality of your rum.

 
This has been a delicious dessert and a welcome change from compulsory zucchini-patch-to-table baking. If you like boozy cakes, this one really is for you. It’s also for you if you like easy cakes. It may even be for you if you just like cake. I know it works for me!


Glazed Rum Cake
Adapted from Vintage Cakes by Julie Richardson

For the cake:
12 ounces cake flour (3 cups)
1 teaspoon baking powder
½ teaspoon baking soda
1 teaspoon fine salt
1 cup (2 sticks) unsalted butter, at room temperature
1 ½ cups granulated sugar
½ cup packed brown sugar
4 large eggs
1 teaspoon vanilla extract
¼ cup light or golden rum or spiced rum
1 cup buttermilk

For the glaze:
6 tablespoons unsalted butter
¾ cup granulated sugar
¼ cup light or golden rum or spiced rum


1. Preheat oven to 350 F. Prepare a 10-cup Bundt pan by coating it with cooking spray or soft butter and coating the spray or butter with flour. Set aside.

2. In a medium-size bowl, combine the cake flour, baking powder, baking soda, and salt. Whisk or sift together to combine well. Set aside.

3. In the bowl of a stand mixer fitted with the paddle attachment, combine the 2 sticks butter, 1 ½ cup granulated sugar, and brown sugar. Beat at medium to medium-high speed until the mixture is light and fluffy. Give this time, about 3-5 minutes. Scrape any lumps of butter from the sides of the bowl and the paddle as you go to make sure they are incorporated.

4. Add the eggs one at a time and beat well after each addition to incorporate each egg. Beat in the vanilla extract.

5. In a measuring cup or a small bowl, combine ¼ cup rum and buttermilk. Add about 1/3 of the flour mixture to the butter mixture and beat until just combined. Add half the buttermilk mixture and beat it in. Repeat with the remaining flour and buttermilk mixture, ending with the flour mixture.

6. Spoon or pour the batter into the prepared Bundt pan. Bake at 350 F for 45-55 minutes, or until a cake tester or wooden pick inserted in the center of the cake comes out without any wet batter attached.

7. When the cake is about 10 minutes from being finished, make the glaze. Combine the 6 tablespoons butter, ¾ cup sugar, and ¼ cup rum in a small saucepan. Heat over low heat, stirring frequently, until the butter is melted, the sugar is dissolved, and the mixture is smooth.

8. When the cake is finished baking, leave it in the pan and place it on a wire cooling rack. Poke deep holes in the cake using a wooden skewer or chopstick. Slowly pour about ¾ of the hot glaze over the hot cake. Set the remaining glaze aside.

9. Cool the cake in the pan for 30 minutes. Invert the cake onto a serving plate or cake stand and remove it from the pan. (I find that the center of the pan tends to stick more than the outer edges, so I take special care to run a thin knife around that section between the cake and the pan to help release the cake.) Warm the remaining glaze over low heat. Brush the hot glaze over the outside of the cake. Let cool completely.

Makes 10-12 servings. This cake freezes well when wrapped in airtight packaging.