Thursday, June 27, 2013

Strawberry Rhubarb Freezer Jam


A few years ago, I really “got into” making jams, relishes, and other canned preserves. What has held back my enthusiasm more recently is 1) I couldn’t eat all that jam, jelly or what have you, and 2) canning took a significant chunk out of my day or evening and involved a non-trivial amount of labor. Last year, I got a hankering for strawberry rhubarb jam, so I tried a simple idea of adapting a strawberry jam recipe, adding the rhubarb, cooking it into a proper jam consistency, and freezing it instead of canning. The procedure was effective and gave delicious results, so I made it again this year. 

This recipe is not without its own significant time consumption. 
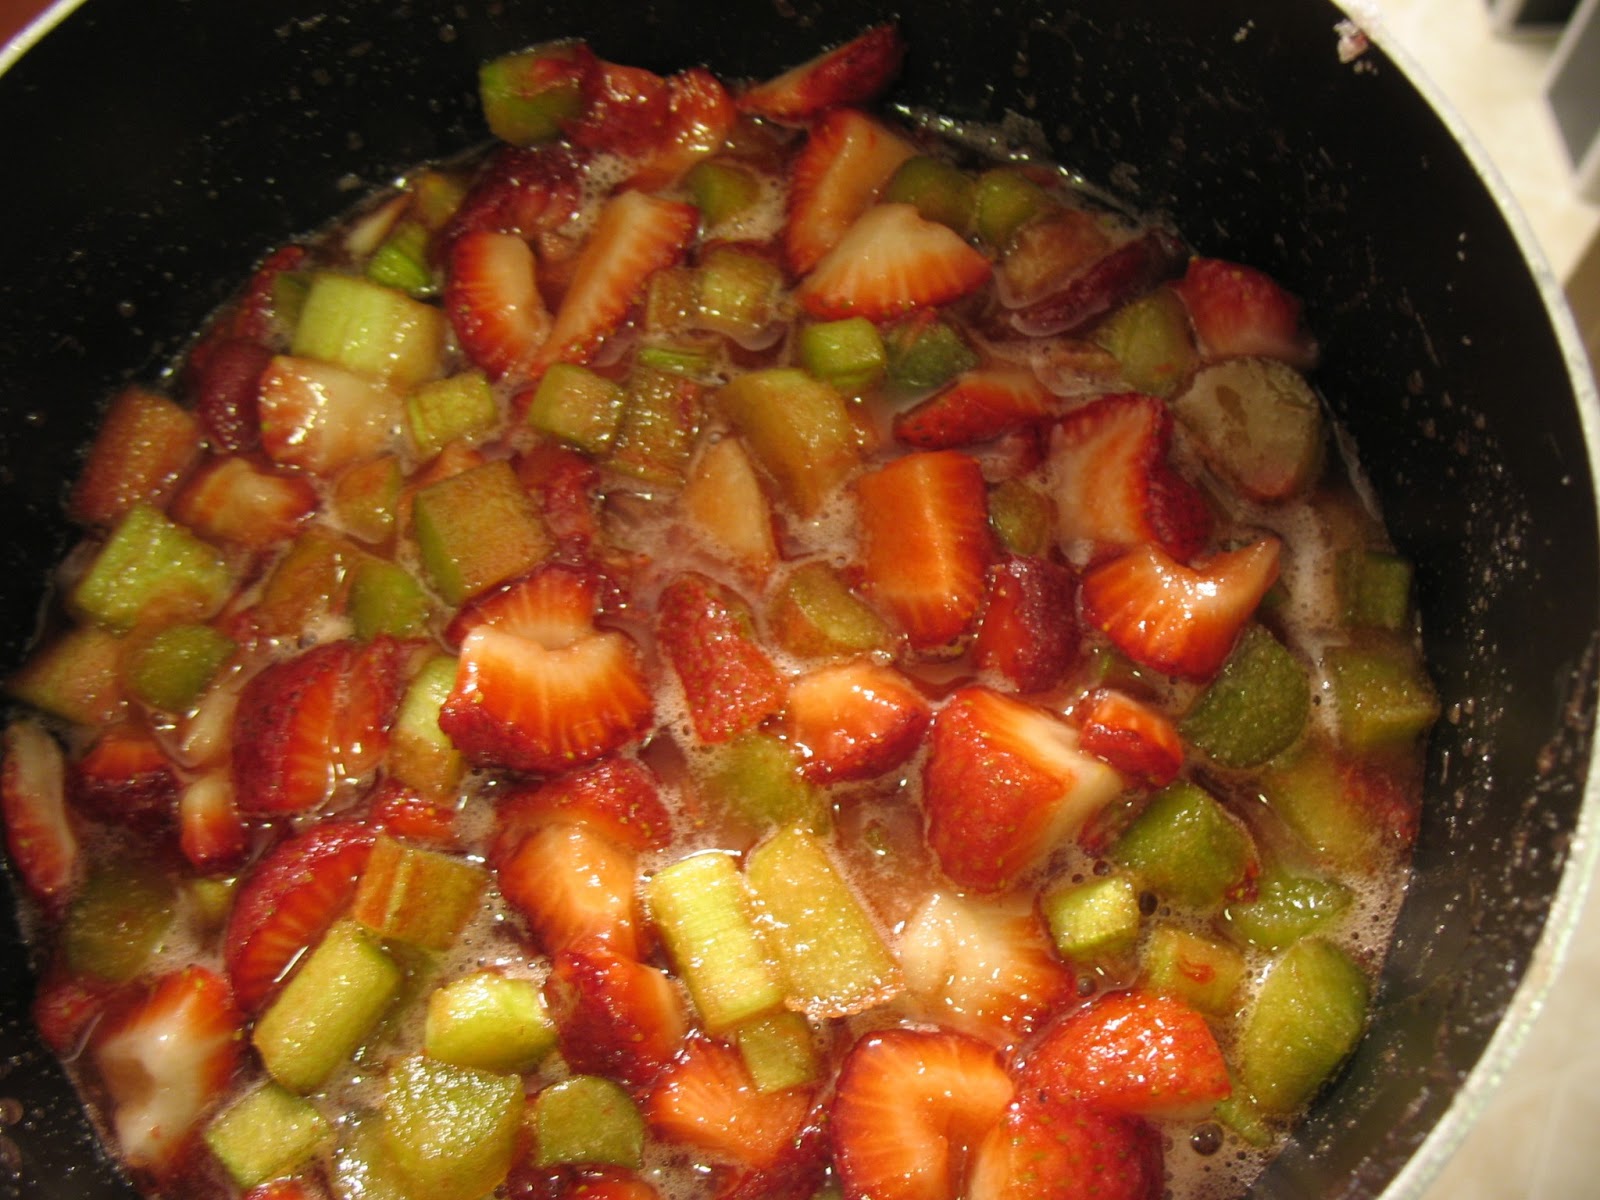
The jam takes at least an hour to an hour and a half to cook. But it’s so delicious! It tastes of sweet strawberries and tart rhubarb all at the same time. It has a soft consistency, maybe not has tightly gelled as store-bought jam, but that just makes it even more suitable for dolloping onto vanilla ice cream.

 
The ingredient list is short: just strawberries, rhubarb, lemon juice and sugar. I used roughly equal portions of rhubarb and strawberries, but I think you could vary that depending on what you have on hand. I use about an equal volume of sugar to fruit, which really seems like a lot of sugar, I know. Most traditional jams and jellies rely on this much sugar, however, for their texture and safety in preservation. Perhaps, since this is a freezer jam, it could be made less sugary, but I like the way it comes out so well now that I don’t want to mess with it.

 
This would be a good introduction to jam-making if you’ve always wanted to give it a shot. It doesn’t require any unusual ingredients (between you and me, you could use bottled lemon juice for convenience). The procedures are simple, too: mix everything up and cook it on the stove, then freeze when it’s done. It only makes about 4 to 5 cups of jam, so you don’t have to make new friends just to get rid of it all. Just be careful around that boiling sugar mixture, which is dangerously hot, and be sure not to wander too far away. I got a little cocky and tried to do some computer work while my jam was boiling and it boiled over. (Don’t do this.)

But this jam is delicious enough to overlook a few extra messes, no matter how embarrassing they may be. And it really is easy enough to make you look forward to the next stalks of rhubarb and cartons of strawberries you can get your hands on.


Strawberry Rhubarb Freezer Jam
Based on recipes and techniques in The Complete Book of Small-Batch Preserving by Ellie Topp and Margaret Howard

I used roughly equal parts strawberries and rhubarb. You can vary the ratio depending on what you have available.
 

4 cups mixed chopped strawberries and rhubarb
¼ cup lemon juice
4 cups white granulated sugar

 
1. Place one or two small plates in the freezer. (This will be used to test whether your jam is done.) Combine the ingredients in a medium to large saucepan. Stir well to distribute the sugar.

2. Cook on medium heat, stirring frequently until the sugar dissolves. As the sugar dissolves, the berries and rhubarb will release their juices making a more liquid mixture.
 
 
3. Bring to a boil and continue cooking at a moderate boil about 1 to 1 ½ hours, stirring occasionally. Be sure to watch your pan vigilantly (I didn’t) or it can easily boil over (like mine did). To test whether your jam is done, that is it forms a gel, remove one of the plates from the freezer. Pour a small spoonful of jam onto the plate and let it stand for 15-30 seconds or so. Tilt the plate to allow the jam to flow. If it flows slowly and thickly, the jam is done. If it runs off to plate quickly, continue cooking. Begin testing after about an hour of cooking.

4. When the jam is as thick as you desire, remove the saucepan from the heat. Let cool for 30 minutes or so. Spoon or pour into jars for the refrigerator or into freezer-containers. Freeze or refrigerate. (I put about half of my jam in the refrigerator for more immediate eating and half in the freezer for later.)


Makes 4-5 cups.


Other recipes like this one: Strawberry Rhubarb Sauce, Blueberry Rhubarb Sauce

Monday, June 24, 2013

Method: Pasta with Herbs and Optional Vegetables


Since produce has been pretty slow this year, and grocery shopping is less of an art form for me than it used to be (shifting to working full time outside the home will do that), I was facing some potentially boring or even potentially empty plates just because I didn’t feel like I had anything interesting to work with. One day I just decided to go with the fresh herbs I had on hand (actually, I’m not sure I had more than parsley in the refrigerator), garlic cooked in a mixture of butter and olive oil, and some heavy gratings of Parmesan cheese tossed with hot pasta. Supper. End of story.


This is an even simpler twist on pasta with cream and vegetables that I seemed to be making a lot over the last few years. For 8 ounces of pasta, which can be any shape, I get out my biggest skillet and melt 2 tablespoons unsalted butter with 2 tablespoons of decent extra-virgin olive oil over medium heat. I then chop up a few cloves of garlic and cook them in the butter-oil mixture with a heavy pinch of kosher salt for a minute or so, just until the garlic barely begins to suggest that it might be thinking of turning brown soon. But, hey, a little slightly browned garlic isn’t so bad, so I don’t get too uptight over it.

Once the garlic is a little cooked, I add 1-3 cups fresh herbs and/or greens, whatever I happen to have. I cook and stir this until the green things are well-wilted, then just toss in the cooked pasta. It helps to have things coordinated so that the pasta is done cooking at about the time the herbs and greens are ready so it can be scooped right from the cooking pot into the herby skillet. If the pasta is not yet ready when the herbs are, you can set the pan aside until the pasta is done and re-heat it when ready.

I toss the pasta in the herbs and oil, adding a splash or two of the pasta cooking water if I feel that everything is a little too dry. I then turn off the heat, add a half cup or so of freshly grated Parmesan (once I even used some provolone), mix that in, taste for seasoning (particularly salt and/or pepper) and adjust, and serve with additional Parmesan. Easy, right?


My most recent rendition of this little ditty was made of some parsley from the refrigerator and chives, a few leaves of baby kale, and some radish greens from the garden. I tossed that with a four-cheese tortellini and garnished it with chive flowers (quite edible; they taste like mild chives). The simplest version, which I mentioned above, consisted of simply flat-leaf parsley, garlic and Parmesan on spaghetti.

This basic method can also be a base for other seasonal vegetables. I would cook those vegetables in the garlicky butter-oil, then toss in the herbs. You could, of course, add meats or seafood, and I think this would be a good way to use up leftover portions of such things. You can’t go wrong as long as you like it, although I’d argue that if you made it overly complicated, you might be missing the point of such a simple, fresh, seasonal (easy, easy, easy) dish.

Thursday, June 20, 2013

Recipe Fantasies


Nobody wants to read about how I don’t have time to do all the things I want to do. Really, nobody has that kind of time, so I won’t waste the time that you do have with wailing and lamentations over all the recipes I have no time to try or posts I have no time to write or books I have no time to read. Instead, let us take a few moments to dream and imagine, whet our appetites with wishes of new, delicious dishes.

I’m missing rhubarb season so I’m dreaming of rhubarb recipes daily. This recipe for Rhubarb Buckle with Ginger Crumb at Oui Chef is sure to satisfy all my rhubarb desires. Of course, just about all the rhubarb recipes I’ve posted to The Messy Apron could stand to be revisited. And there’s my ridiculously massive “recipes to try” collection, which contains more than enough rhubarb recipes to last a lifetime (…cheesecake, waffles, pavlova, oh my!)


The spring vegetable season is still lagging in my neck of the woods, so I’m still waiting (impatiently) for peas. I planted both English peas and sugar snap peas in my garden this year, and they’re all blossoming now, so, with any luck, pea recipes are just days away. In the meantime, I hope to try a recipe for a green pea hummus that can be made with frozen peas and tell you about it soon.


Lettuces are still coming into the farmer’s market and I have visions of green goddess dressing this year. There are so many different versions – anchovies or no, avocado or just herbs, lighter or positively decadent – that it should be fun comparing them. Of course, there are plenty of other salad dressings to fall back on, and I’ve got a jar (actually, the Oxo brand dressing shaker I mentioned here) of Sweet Asian Dressing waiting for me to buy some more greens or even cook some noodles.

And I can’t deny that grilling season is upon us. I grill potatoes to go with just about anything all summer long, and I’m looking forward to getting my hands on some fresh green beans to grill, too. Of course I’d like to make these turkey burgers again, perhaps with this homemade vegan mayonnaise, but my lack of time and energy have made simple turkey burgers grilled and slathered with barbecue sauce about all I can get around to making. They’re good, however, so I make no apologies.

Of course, my summer stand-bys are simple pasta dishes with vegetables and herbs and stir frys with whatever I happen to have around (recently, it was radishes and asparagus). I hope to write a little more about those pasta dishes soon. Wish me luck on applying fingertips to keyboard in that simple endeavor.

 …and then there are hundreds of fruit desserts and jams, a couple of almond butter cookie recipes I want to try, and then, who knows what will be showing up soon in the farmer’s market or even in my own garden. What can I say? I have a rich fantasy life….when it comes to recipes, anyway!

Tuesday, June 4, 2013

Blueberry Rhubarb Sauce


This fruity sauce is simple and versatile and another nice and easy and delicious use of rhubarb. It’s inspired by this sauce and this sauce and a fabulous blueberry rhubarb jam recipe in The Complete Book of Small Batch Preserving by Margaret Howard. Oh, and I made it long enough ago that an additional inspiration was last year’s rhubarb and some very fine blueberries languishing in the freezer.


Now, I’ve got plenty of rhubarb growing next to the backyard shed, so I plan to use the fresh stuff to make some more. I used most of the first batch on slices of this yogurt cake, and it was a great combination. I also think it would be perfectly wonderful on vanilla ice cream.


This sauce is a good balance of the berries and the rhubarb with neither flavor taking over the final product completely. We usually think of strawberries with rhubarb but I think just about any berry would work well with those tart and fruity stems. Since rhubarb is often available most of the summer, I see no reason why we shouldn’t keep the fruit sauces coming. Whatever berry is in season might benefit from a tart and saucy rhubarb boost.

I can certainly vouch for the deliciousness of the blueberry-rhubarb combo! And since this works well with frozen fruit as well as fresh, it’s not just something we could be making all summer, but all year long.


Blueberry Rhubarb Sauce
You can use fresh or frozen berries and rhubarb to make this sauce.

2 cups blueberries
2 cups chopped rhubarb
2 tablespoons lemon juice
½ cup sugar
1 tablespoon cornstarch
1 tablespoon water


1. Combine the blueberries, rhubarb, sugar and lemon juice in a medium-size saucepan. Cook over medium heat, stirring often until the berries and rhubarb begin to give off some liquid and the sugar has dissolved.

2. Coarsely mash the fruit and continue to cook, bringing the mixture to a boil.

3. In a small bowl, combine the cornstarch and water, stirring to combine well. Stir into the blueberry mixture and return to a boil. Boil for 30 seconds to 1 minute or until the mixture thickens. Remove from the heat. Serve slightly warm, at room temperature or even cold.