Sunday, July 31, 2016

Recipe Revisit: Buttermilk Herb Dressing


Most of us have one of those special foods that is very close to our hearts. One of those ingredients that makes everything a little bit better for us. Many of us even say we would eat even the most inedible things if they were drenched in our favorite deliciousness vehicle.

Actually, I probably have several of those special loves. It’s best I say less about that rather than more, and keep this post focused solely on creamy, ranch-style buttermilk salad dressing. I just love it!

I try to have homemade foods when I can, even though my time is a bit crunched these days. I will certainly buy bottled dressings rather than do without, but if I’m feeling even slightly un-lazy, I will whisk together my own salad dressing. I was being mostly un-lazy a while back when I threw together a quick ranch dressing, just going from what sounded good, rather than looking up the recipe in this post (which I hadn’t referenced in a long time.)

After taking a peek back at that old recipe, I decided my revisit was better. I kept it simple so it can be quick and easy, using garlic and onion powders for flavoring. I also love fresh dill in this dressing, although other fresh or even dried herbs would be good, too. This dressing could also be the foundation upon which to add lots of other flavors. You could use cilantro and add a splash of lime juice, stir in salsa, or add smoked paprika, cumin or chili powder to make a Southwestern flavored dressing. Throw everything in a blender with avocado. Use tarragon for your herb and add some Dijon mustard.


In its simplest form, which I offer below, this is a delicious salad dressing and dipping sauce. I’ve been eating that dressing on green salads as well as on a chopped vegetable salad with chickpeas that I hope to tell you about soon. I can’t wait to try some of those other flavor ideas to expand the use of this recipe as my go-to, homemade, I’d-eat-a-stick-if-it-was-dipped-in-this-stuff Ranch-style dressing.  


Buttermilk Herb Salad Dressing

1 cup buttermilk
¼ mayonnaise
¼ teaspoon garlic powder
¼ teaspoon onion powder
1 tablespoon minced fresh or dried dill
1 tablespoon minced fresh parsley
¼ teaspoon salt
1/8 teaspoon freshly ground black pepper

1. Combine the buttermilk, mayonnaise, garlic powder, and onion powder in a small bowl. Whisk together to combine well. Stir in the remaining ingredients. Keep refrigerated for a week or so.

Makes about 1 ¼ cup.


Sunday, July 24, 2016

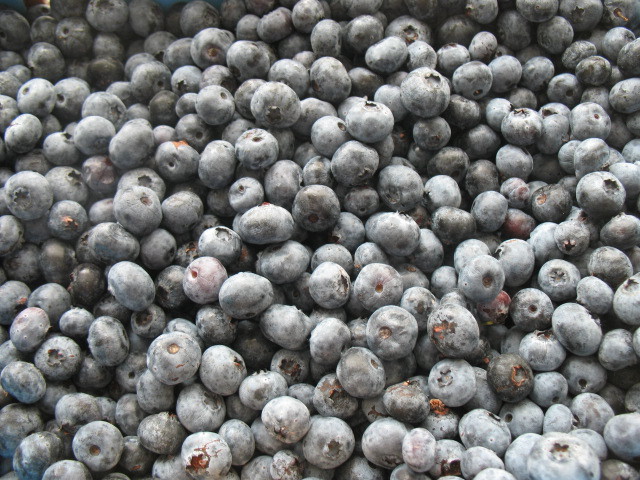
Featured Ingredient: Blueberries


“Blueberries as big as the end of your thumb,
Real sky-blue, and heavy, and ready to drum
In the cavernous pail of the first one to come!”

-Robert Frost, from “Blueberries”


I love the photos that my friends and family post on various online outlets of buckets or trunks full of berries that they just picked. They remind me of the buckets of wild blueberries that in turn filled a trunk that my mother, grandmother, and my teenaged self picked one fine day in Michigan’s Upper Peninsula. (I used to live there.) At the end of our adventure, Grandma said that she didn’t really like blueberries. I guess she just couldn’t stand to let all that good food go to waste.

I’m quite fond of blueberries myself, although I don’t get a chance to pick them, or any other fruit, anymore. Happily, there are people out there who will pick berries and put them in boxes and let me exchange my wages for their goods and services. Each year, I try to pick up a 5-pound box of blueberries at my local co-op store. They come from Michigan, so I can feel nostalgic.


And then, I get to decide what to do with them. Of course, blueberries freeze very well and with minimum preparation. Just wash them, then put them in a single layer on a sheet pan or some kind of tray, set that in the freezer and let them freeze for a few hours. Later, you can take them out of the freezer and off the pan, then scoop them into a freezer bag or freezer-safe container and put them back in the freezer, where they will be good for a few months. Since you froze them individually on the pan, they won’t be all clumped together.

Most of the recipes I refer to in this post can be made with either fresh or frozen blueberries. One notable exception is this beautiful Open Face Blueberry Pie. It needs fresh blueberries, because most of the berries in the pie filling don’t even get cooked, just stirred into a thick sauce of cooked blueberries. Absolutely, deliciously phenomenal!


Of course, blueberry muffins probably come to mind right away. I know they do for me, and I’ve posted two different blueberry muffin recipes: Blueberry Coconut Muffins with a double dose of flavor from coconut milk and shredded coconut, and Blueberry Oatmeal Muffins, sweet and breakfast-y.

 
Muffins aren’t the only quick breads that do well with a boost from blueberries. This Blueberry Thyme Cornbread is both savory and a little sweet, equally at home alongside a pot of beans or chili and with a cup of coffee for breakfast.


And speaking of breakfast, I probably don’t need to remind you that blueberries are great in pancakes, like these Blueberry Ricotta Pancakes, but they can be sprinkled in to just about any pancake recipe whether from scratch, like this one or from a quick and easy mix.

This Blueberry Muffin Coffee Cake with Crumb Topping might involve a little more effort to get on the breakfast table, but if you don’t get around to it until the afternoon, it’s great for a coffee break or for dessert as well.


For an even easier dessert, pour this Blueberry Rhubarb Sauce on a plain cake. You could use a store-bought pound cake, but I particularly like it with this Simple Vanilla Yogurt Cake. It’s also great over Vanilla Ice Cream.


Blueberries also play well with any other berries you might have on hand in this Berry and Rhubarb Galette or this White Cake with Berries and Lemon Glaze


They’re beautiful in fruit salads or even on top of a green salad, especially with a sweeter dressing like this one. You can sprinkle them on your morning bowl of cereal or yogurt. Lately I’ve been putting them on my Granola.

Loaded with antioxidants, vitamins, fiber and other healthy phytochemicals, it’s not a surprise blueberries have been labeled a “superfood” by the folks who want to teach us how to eat healthfully. Lucky for us these little blue jewels are beautiful and delicious as well, making them a true summer darling all the way around!

Wednesday, July 20, 2016

Gumdrop Cookies


I wanted to make these cookies while I had my Christmas License to Cookie, back in November and December. Not only did I miss that opportunity, but I completely forgot about the gumdrops I had bought to make them until very recently. I was looking for something else in my crammed pantry closet, saw the bag of candy, and almost asked my husband why he was buying such things.

Luckily I remembered their original purpose before I accused a good man of going to the dietary dark side. I still put off the actually making of the cookies, however, until the night before I was leaving on vacation (the vacation I mentioned here). There was nothing to do but take those cookies along with us. Luckily (or sadly?), I love eating cookies in the car.


Anyway, this recipe is a simple adaptation of this basic chocolate chip cookie, which I love. I changed the ratio of white to brown sugar in favor of the white, in hopes of carrying that sugary goodness from the coating on the gumdrops through the rest of the cookie and to avoid any contrast with the fruit flavors that might be caused by the molasses in the brown sugar. I’d say that worked very well, and, since the chewy, gooeyness of the gumdrops helps keep the cookies nice and soft, the moisture from additional brown sugar is not missed.

I really wanted to make these cookies with the small, thimble-shaped gumdrops that are about the size of the end of a thumb. I also, however, wanted to use fruit-flavored, rather than spice-flavored, gumdrops to make a fruity-sweet cookie. I could not find small, fruit-flavored drops anywhere, however, so I opted for “fruit slices,” the larger, wedge-shaped gumdrops and chopped them up for my cookies.


Since the candy gets mixed into the dough, the colorful gumdrops don’t show much in resulting pale blond cookie. If you wanted to make a prettier cookie, you might be able to press additional gumdrops into the tops of the unbaked cookies (see the method I used for M&Ms in this post.)

The flavor and textural success of this experiment suggests that plenty of other candies could go into this basic drop-cookie dough and make really yummy cookies. I’m thinking crushed peppermint candies would be good in a holiday cookie, or some really wild cookies might result from the addition of intensely flavored black licorice. In any case, a bit of a sweet tooth is required, since there’s nothing to compromise with that sweet candy, the way, say, slightly bitter chocolate might. For better or for worse, at this point in my life, I’m okay with that!


Gumdrop Cookies
If you use small gumdrops, you do not need to chop them.

This dough freezes well if wrapped in air-tight packaging. Thaw and bake as directed below.

2 ½ cups all-purpose flour
1 teaspoon baking soda
½ teaspoon fine salt
1 ½ sticks butter, soft
1 cup granulated sugar
½ cup light brown sugar
2 large eggs
1 teaspoon vanilla extract
2 cups chopped or snipped fruit-flavored gumdrops

1. In a medium-size bowl, combine the flour, baking soda and salt. Whisk together to combine well. Set aside.

2. Place the butter, granulated sugar and brown sugar in the bowl of a stand mixer fitted with the paddle attachment (or in a large bowl if stirring by hand). Cream together on medium-low speed until very smooth and fluffy, about 2 minutes.

3. Add the eggs one at a time, beating until completely combined after each addition. Beat in the vanilla extract.

4. On low speed, beat in the flour mixture a little at a time until just combined. Add the gumdrops and stir in at low speed until well-distributed.

5. Wrap the dough in plastic wrap, or place in a covered bowl and refrigerate for about 2 hours or up to 48 hours. (This resting step is not absolutely necessary, but I feel that it improves the cookies. The dough can also be frozen at this point.)

6. Preheat oven to 375 F. Lightly grease cookie sheets or line with parchment.

7. Scoop the dough onto the prepared sheets in about 2-tablespoon balls. Bake at 375 F for 10-12 minutes or until golden brown and set in the middle.

8. Remove from the oven and cool on the pan on a wire rack for 2 minutes. Remove from the cookie sheets and cool completely on a wire rack. Repeat with the remaining cookie dough.

Makes about 4 dozen cookies.