Wednesday, September 27, 2017

Cheesy Baked Pasta


This dish is the ultimate weeknight fare for me right now. It can be made in pieces, or cobbled together from leftovers, then baked and served in the kind of time that allows for a meal earlier in the evening than just before bedtime.

I made a pot of Basic Tomato Pasta Sauce one evening, and enjoyed it on pasta the next evening. I then took a third evening to cook some more noodles, shred some mozzarella, chop some olives, and pile everything together in a casserole dish. I’d done this before, of course, with leftover pasta sauce, but this time I measured the ingredients so I could write up a recipe.


As a recipe, this is not very concrete. I usually just use whatever I have on hand. The basic recipe below is a good representation of what usually happens, although sometimes I also use leftover cooked noodles, or stir in other things. Most commonly, I’ll add or replace some of the mozzarella with other cheeses, such Parmesan or ricotta.

Some other good additions would be sautéed bell peppers and onions, sun-dried tomatoes, leftover cooked winter squash or other roasted vegetables, sautéed greens, or cooked or cured meats. Think favorites pasta and pizza toppings here. A good combination might be pepperoni, cooked Italian sausage, and sautéed peppers for a pizza-flavored pasta bake. Or sneak in just about any vegetable you’re trying to make yourself or someone else eat, such as shredded or sautéed zucchini. I used black olives, but you could use Kalamata or even green olives. Add some feta and capers for a whole new flavor profile. 


You can make this dish up a day or two ahead of time. Cover it and refrigerate it until you wish to bake and serve it. Keep in mind that if you are starting with a cold dish, you will need a longer baking time to turn it into a properly hot dish. You can even make as much of this as you want and warm up the leftovers all week if you are experiencing busy times and want to streamline weeknight dinners, or liven up your reheated lunch possibilities.


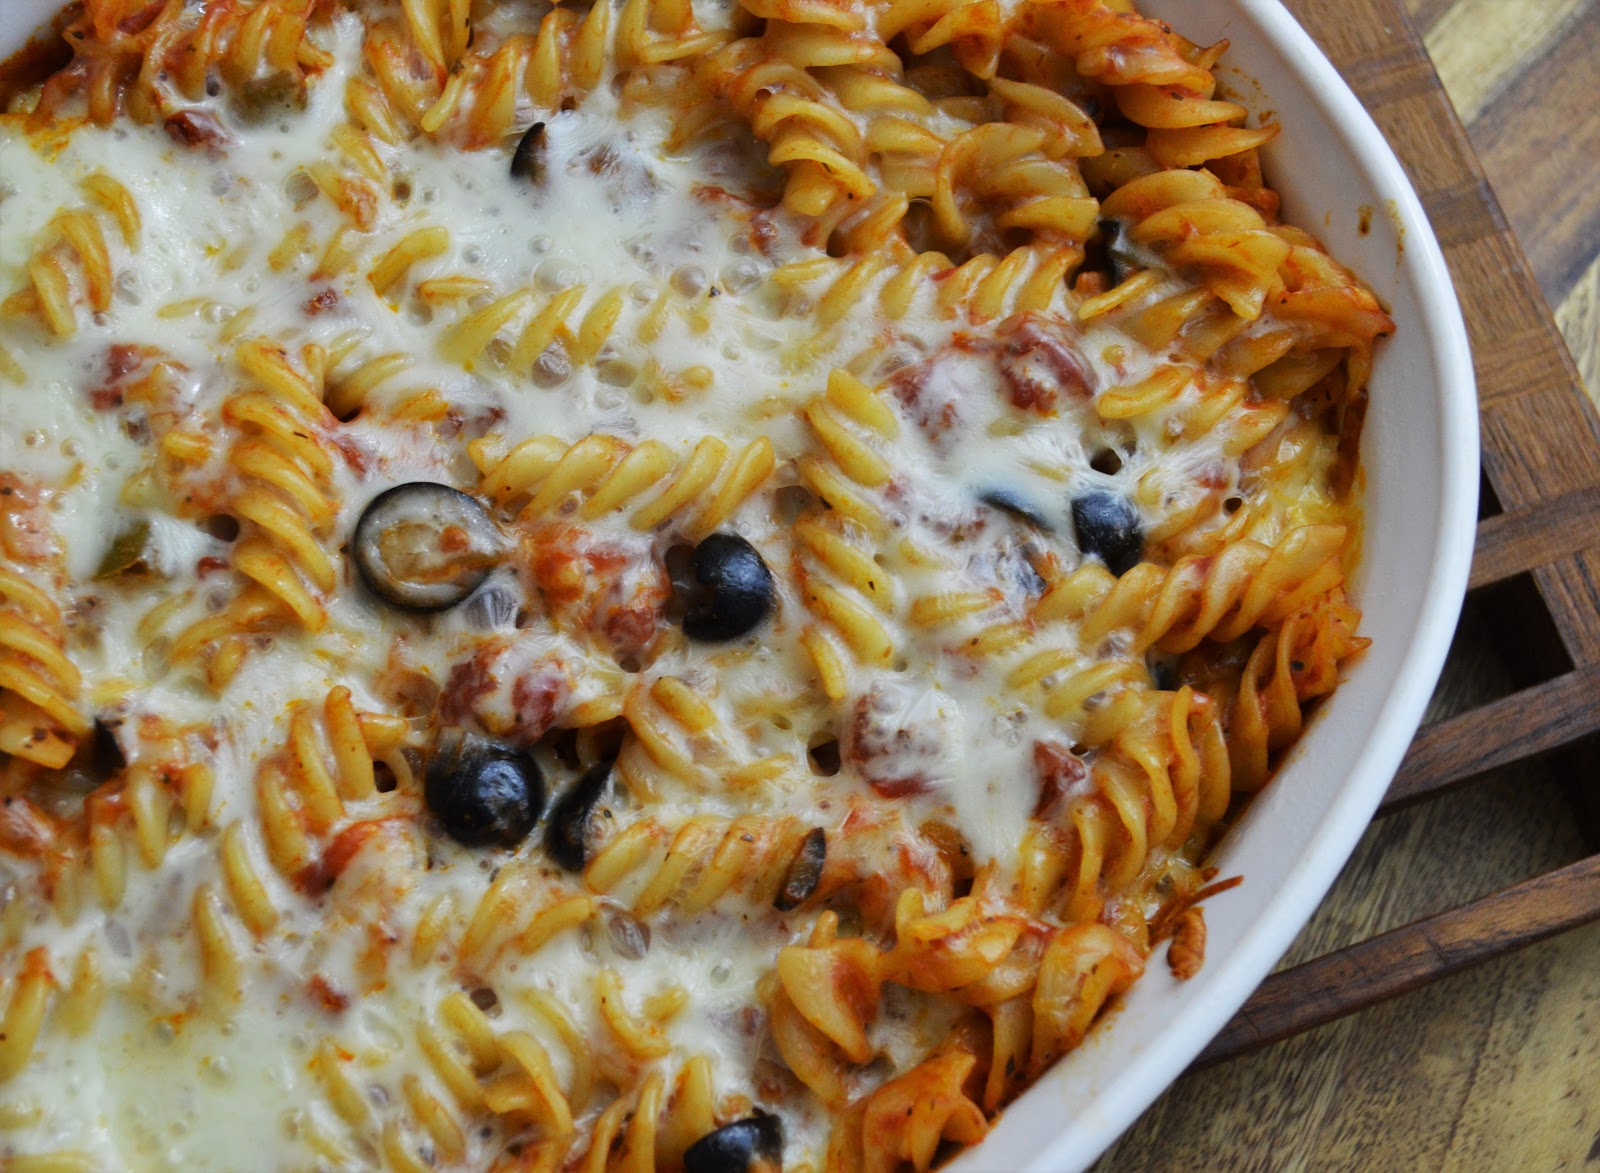
Mozzarella and Olive Baked Pasta

I used Basic Tomato Pasta Sauce to make this dish

Add, subtract, mix and match your favorite pizza and pasta dish ingredients to enhance this to your personal taste.

This dish can be made ahead and refrigerated for a day or two. Increase the baking time if starting with a refrigerated mixture.


8 ounces uncooked short cut pasta (such as rotini or penne)
2 ½ cups chunky tomato-based pasta sauce (your favorite)
3 cups shredded mozzarella cheese, divided
1 cup chopped black olives

1. Preheat oven to 350 F. Spray a shallow 2-quart baking dish with cooking spray, or grease it with olive oil.

2. Cook the pasta in boiling salted water until it is slightly firmer than you like to eat it. (It will cook more in the oven and you don’t want the pasta to get too mushy.) Drain the pasta and transfer it to a large bowl.

3. Add the pasta sauce, 2 cups shredded mozzarella and olives to the pasta. Stir together to combine well.

4. Transfer the pasta mixture to the prepared baking dish. Cover and bake at 350 F for 30 minutes, or until the mix is bubbly and the cheese is melted. Uncover and bake about 5 more minutes until the cheese on top is bubbly, or however you like it. Let stand about 5 minutes and serve.

Makes about 6 main-dish servings.


Friday, September 22, 2017

Pear and Blackberry Galette


When I found some lovely locally-grown Summercrisp pears at about the same time that the local apple harvest was coming into the markets, I was planning to make both a fancy pear and almond tart and some kind simple apple pie. Time (not to mention calorie budgets) did not allow for both, so I ate the apples one at a time for week-day lunches and put the pears into a pie. Finding some nice blackberries as well put in mind a recipe I had bookmarked for an apple and blackberry galette, which was easily adapted for pears.


The original recipe called for peeling and partially cooking the apples before baking them in the galette. Since the pears were quite ripe, soft, and thin-skinned, I could skip both of those steps. If you have larger pears with thicker skins, you could peel them if you’d like. You shouldn’t have to pre-cook them. Just slice them thin and they should bake up just fine.


I’m absolutely addicted to the combination of pears and cardamom, so there was no way I was going to miss an opportunity to celebrate it here. I kept the vanilla extract from the ingredient list in the inspiration recipe, and its harmony with the cardamom, pears, and berries was wonderful: floral, but not cloying, and a little exotic. The ginger in the original recipe would also be very good, I’m sure, as would cinnamon or a combination of warm spices, such as Pumpkin Pie Spice.

I didn’t make a pastry from scratch for this dessert (*disappointed sigh*). I used a store-bought refrigerated crust instead and, while the galette was good this way, I can’t help thinking that a good homemade crust would have made it even better. Use whatever you like or whatever helps you celebrate seasonal fruits and your favorite spices in the time that you have.


I served this galette with lightly sweetened whipped cream, and, when I had some left, Vanilla Ice Cream. I think it would be great with Ginger Spice Ice Cream. I also served it plain, which was very good, too, but a bit of something cold and creamy is a nice accompaniment to a warm and fruity autumn dessert. Don’t you agree?


Pear and Blackberry Galette
Based on a recipe in Food Network Magazine

This pie is great served with whipped cream, Vanilla Ice Cream, or Ginger Spice Ice Cream

1-1 ¼ pounds ripe pears, thinly sliced (peeled if you like)
1 cup blackberries
1/3 cup sugar
1 tablespoon cornstarch
¼ teaspoon freshly ground cardamom
1 teaspoon vanilla extract
Pastry for a single-crust pie, homemade or store-bought
Milk for brushing the crust
Coarse sugar for sprinkling the crust

1. Preheat oven to 400 F. Line a baking sheet with parchment paper or a silicone baking mat. Set aside.

2. In a large bowl, combine the pears, blackberries, sugar, and cornstarch. Gently toss to coat the fruit well. Add the cardamom and vanilla and gently stir to distribute.

3. Roll the pie crust into a about a 12-inch circle. Place the pastry on the prepared baking sheet.

4. Mound the pear mixture onto the center of the pastry leaving about a 2-inch border. Fold the border pastry up over the edges of the fruit filling. Brush the pastry with milk and sprinkle with coarse sugar.

5. Bake at 400 F for 40-50 minutes, or until the fruit filling is tender and bubbling and the crust is crisp and golden brown. Cool on the pan on a wire rack. Carefully transfer the galette to a cutting surface to cut and serve. Serve with a dollop of whipped cream or a scoop of ice cream.

Makes about 6 servings.


Wednesday, September 20, 2017

14 Favorite Apple Recipes


I get so excited about the local September apple scene! I live in the state that developed the Honeycrisp apple, so there’s plenty of regional pride to go along with all those bushels of delicious, fresh, crisp, sweet, tart, all-around-wonderful apples.

 
And so I’ve put together a list of my favorite sweet or at least sweet-ish recipes from The Messy Apron Archives that feature apples, apple cider, and applesauce. There are quick breads, cookies, cakes, desserts and other delicious dishes in this list, many of them requiring an oven, but not all.

To start, there’s breakfast with:


For sweeter breakfast or afternoon snacks:


More quick bread and cake:


Cookies and bars:


More desserts:


And “The Rest”:


Lucky for me, fresh and uniquely delicious apples are available in local markets well into the coldest months, so I have plenty of time to make and enjoy these old favorites as well as try new recipes. I hope you enjoy apple season as much as I do!