Sunday, May 30, 2010

Arugula Pesto

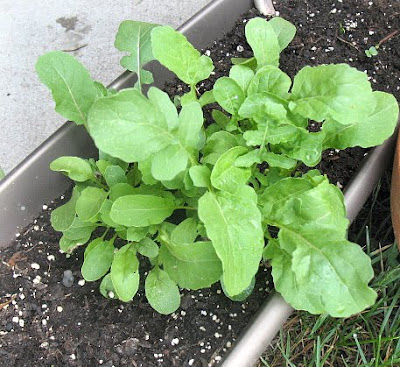
One of my favorite new green things of spring is arugula. (You may see it under other names, including rocket, which is just cool.) Its long, narrow, curvy leaves can range from peppery to downright bitter. It makes a great salad, especially when mixed with other tender lettuces that tame its strength a little. Arugula also grows easily from seed, even in containers, which means I can grow some on my porch. It also seems to prefer the cooler weather (just like me) so, if you’re on the ball with your spring planting, it can be one of the first things in the garden that’s ready to eat.


A couple years ago, I tried a recipe for a pesto sauce made with arugula and kalamata olives. It was delicious. The nutty, peppery bitterness of the arugula was well balanced by the briny olives. I’d been thinking about that recipe ever since. Recently, when I had a little arugula I had grown myself, plus a nice bunch that had been grown locally, I found out why I hadn’t made arugula pesto a second time. I had lost the recipe.

Since I have a pretty firm grasp of the theory of pesto (I make basil pesto every summer), and I remembered the two most important ingredients (fresh arugula and kalamata olives), I was able to put together something that was probably pretty close to the original. I included some toasted almonds to give the sauce body. Walnuts would probably be just as good, if not even better. I also added some flat leaf parsley to tame the arugula a bit, and whirled everything together in the food processor with some decent extra virgin olive oil. The result was pretty close to the original recipe or at least close to what I can remember, which is close enough.

I not only served this sauce with pasta, but I also stirred some into a pan of white beans simmered with garlic (about 1/3 cup in 3 cups of beans). I topped both dishes with crumbled feta cheese, which tasted like it was born to be there. This pesto probably could be spread on garlic bread or sandwiches, or maybe even whisked into a vinaigrette served over milder salad greens or spring vegetables. Or how about potatoes? Well, the pesto will last for a few days in the refrigerator (I haven’t tried freezing it, but that might work, too), so I can try them all. Then, if I can get my hands on some more arugula, I can try some more! And since the recipe is now recorded here, I should never lose it again!


Arugula Pesto with Kalamata Olives

1/3 cup chopped almonds
2 cups (loosely packed) arugula leaves, any tough stems trimmed
1 cup (loosely packed) parsley leaves and tender stems
¼ cup pitted kalamata olives, coarsely chopped
¾ teaspoon salt
1/8 teaspoon freshly ground black pepper
¼ cup extra-virgin olive oil

1. Place the almonds in a small skillet over medium heat. Heat, stirring often, until just beginning to brown. Be very careful not to burn them. Remove from the heat and cool completely.

2. Place the cooled almonds in a food processor and pulse until coarsely but evenly ground.

3. Add the arugula, parsley, olives, salt and pepper to the food processor. Process until everything is well ground into a coarse paste.
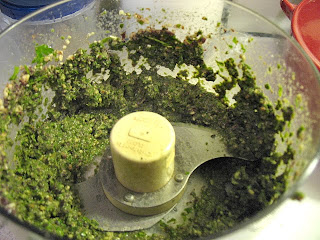

4. With the processor running, slowly add the olive oil and process until completely smooth. Your processor should have a feed tube or opening at the top to allow you to do this. (Add a little more olive oil if the pesto is too thick.)


Makes about 1 ½ cups

To serve, toss with hot pasta, thinning with a little pasta-cooking water if desired. You can also stir it into cooked beans, spread it on breads or add it to dressings.

Other recipes like this one: Basic Basil Pesto

Friday, May 28, 2010

Peanutty Noodles

I’m pretty sure that this dish was my first exposure to noodles and vegetables in a spicy peanut sauce. It certainly was one of the first dishes I learned to cook with some confidence. (It was in the same magazine issue as the Spaghetti Pie.) We loved it and it quickly became something I kept in the back of my mind as an item that could fill in our weekly menu on a regular basis. Unfortunately, all too often I would be missing an ingredient or two and, too hungry to wait to remedy that, we would end up with a quick dinner at a fast food joint. “Having Peanutty Noodles for dinner,” soon became a euphemism for bailing out of kitchen duties and guiltily grabbing something cheap, starchy and fatty.

I am now much more vigilant against the fast food fall-back and, while we still joke about whether we’re going to actually eat the noodles and vegetables in their spicy peanut sauce as planned, I’ve rarely dropped the ball on this one in recent years. It is a relatively simple dish, although the sauce may seem to have a lot of ingredients. The sauce, noodles and bell peppers and snow peas (pea pods) are all cooked separately, then tossed together with ribbons of carrot. It can be served hot (which I prefer) or at room temperature.

I’ve pared down the recipe from its original crowd-pleasing proportions, and made it spicier and more garlicky. I’ve tried just about every color of bell pepper (anything will work, but red, yellow or orange are sweeter and prettier) and resorted to frozen snow peas (or even sugar snap peas) when they were out of season. I’ve used linguine and fettuccine (I can’t remember if I’ve ever tried spaghetti) and, while I think any long noodle would work, I prefer the wider fettuccine.

I’ve tried plenty of other versions of noodles with peanut sauce, including some with chicken or shrimp, but I keep going back to this one. The sweet and spicy peanut-buttery sauce stays creamy rather than clotted and sticky (although the leftovers will have a dryer and sort of chunky sauce that is still very good). We like it pretty spicy, but you could add less of the chile garlic sauce if you want (or more if you dare!) I suppose I could add other things to it, but, to be honest, I’m a little afraid of screwing it up. I’d hate to make something unsatisfactory that would send us out for fast food again.

Our 2010 CSA deliveries start on Tuesday! The salad days begin again soon!!!


Peanutty Noodles
Adapted from Cooking Light magazine

8 ounces uncooked fettuccine or linguine
2 tablespoons canola, peanut or vegetable oil, divided
1 tablespoon peeled fresh ginger, grated or finely minced
4 garlic cloves, minced
½ cup reduced-sodium chicken broth
¼ cup peanut butter
¼ cup low-sodium soy sauce
1 ½ tablespoons rice vinegar
1 tablespoons chili garlic sauce (or to taste)
1 cup red bell pepper, cut into 2-3-inch long strips
1 heaping cup snow peas, trimmed and cut into about 2-inch pieces
1 carrot, peeled and shaved lengthwise into ribbons with a vegetable peeler

1. Cook the fettuccine in boiling salted water until al dente (fully cooked, but still a bit firm). Drain and set aside.

2. While the noodles are cooking, heat 1 tablespoon oil in a small saucepan over medium heat. Add the ginger and garlic and sauté 30 seconds. Add chicken broth, peanut butter, soy sauce, rice vinegar and chili garlic sauce. Cook and stir until smooth. Bring to a boil, reduce the heat and simmer about 10 minutes. Keep warm.

3. Return the noodle-cooking pot to medium heat and add the remaining 1 tablespoon oil. Add bell peppers and snow peas and sauté about 8 minutes or until tender-crisp and just beginning to brown.

4. Reduce the heat to low and add the cooked noodles, finished sauce and carrot ribbons. Toss to combine. Serve hot or at room temperature.

Yield 3-4 servings

Other recipes like this one: Pasta with Cauliflower and Cashew Sauce

Wednesday, May 26, 2010

Seasonal 'Shrooms

You would think that the idea of spring would be thrilling enough in the upper Midwest. Warmer, longer days, lack of snow, green grass and lilacs are like paradise after the long, cold winter. But then comes the food-lover’s gift of spring, the morel mushroom, with its elusive nature and delicate floral and nutty flavor.
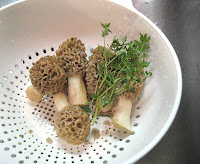
I don’t know much about the morel or foraging for it, so I let the experts do that for me (a good idea when it comes to wild mushrooms of any kind.) They’ve been available for the last few weeks and, while I’d only eaten them once or twice before this year, I was determined not to let this limited-time opportunity pass me by in 2010.

When I bought the most recent bunch, I couldn’t find much in the stores to accompany them that was fresh and local. Thinking they’re probably best appreciated on their own anyway, I raided my recipe stash (it’s actually catalogued, at least partially, in a database, so it was a less messy process than it sounds.) A single recipe presented itself and since I had all the necessary ingredients on hand, I pounced upon it.


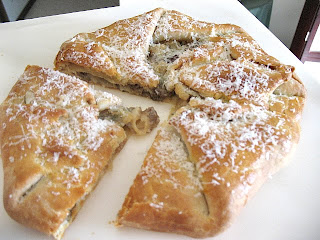
The recipe was for some fancy little appetizer tarts with a morel and sour cream filling. I adapted it for the amount of mushrooms I had and the amount of effort I was willing to make. In short, I made and easy free-form tart or galette with a simple filling and a delicious crust that is so easy to make, it might just become my go-to pastry. If you have a heavy-duty mixer, this crust takes just minutes to put together. It bakes up tender and flaky and flavorful. All I did to change it was bump up its WFQ* by swapping in some whole wheat pastry flour. Where have you been all my life, little crust? Buried in an overwhelming file of untested recipes, you say? My apologies.

I won’t apologize for getting excited about this dish, though. I might not be able to make it again until those ‘shrooms are back in season, but that multi-purpose pastry will be back in the kitchen sooner than that. Hmm….and the CSA deliveries begin next Tuesday…so many things to be excited about!


Easy Cream Cheese Pastry
Adapted from a recipe in Midwest Living Magazine

If you don’t have whole wheat pastry flour, you can use regular all-purpose flour in its place.

4 ounces cream cheese (I used the 1/3-less fat variety), at room temperature
4 tablespoons butter, at room temperature
¼ cup whole wheat pastry flour
½ cup all purpose flour

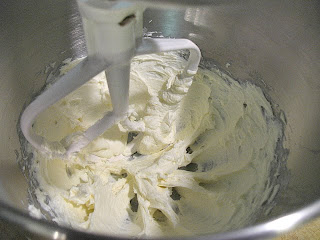
1. Combine the cream cheese and butter in the bowl of a heavy duty mixer. Beat at medium speed until smooth and fluffy. (You may also be able to mix this crust together by hand. I haven’t tried it.)


2. Add the whole wheat pastry flour and all-purpose flour. Beat on low speed until all the flour is incorporated and the mixture comes together into a moist ball.


3. Form the dough into a disk and wrap in plastic wrap. Refrigerate at least 1 hour before using.


Makes enough dough for one 8-10 inch tart or galette


Morel Mushroom Galette with Cream Cheese Pastry
Based on a recipe in Midwest Living Magazine

2 tablespoons butter
½ cup chopped onion
4 ounces fresh morel mushrooms, very well cleaned and coarsely chopped
2 tablespoons dry white wine (or vegetable broth)
3 tablespoons sour cream
1 tablespoon all-purpose flour
¼ teaspoon salt
1 tablespoon chopped fresh thyme leaves
1 recipe Easy Cream Cheese Pastry (see above), chilled
1 egg beaten with 1 tablespoon water (optional)
1-2 tablespoons grated parmesan cheese (optional)

1. Preheat the oven to 350 F. In a medium sized skillet, melt the butter over medium heat. Add the onion and cook until tender and just beginning to brown, about 5-8 minutes.

2. Add the mushrooms and wine and cook, stirring occasionally, until most of the liquid has evaporated, about 5-8 minutes. Remove from the heat and set aside.


3. In a small bowl, combine the sour cream, flour, salt and thyme. Stir well.

4. Stir the sour cream mixture into the mushroom mixture and set aside.


5. On a floured surface, roll the Easy Cream Cheese Pastry into a 12-inch circle (or close to it, no need to be exact.) Carefully transfer the dough to a large baking sheet lined with parchment paper or a silicone baking mat (or you can brush it with oil.)


6. Spoon the mushroom mixture into the center of the pastry. Fold the edges of the pastry up over the filling. Brush with the egg mixture if desired.


7. Bake at 350 for 25-35 minutes or until the crust is golden brown. Remove from the oven and sprinkle with parmesan if desired.


Makes 4 servings.

WFQ: Whole Food Quotient

One year ago: Baguette

Friday, May 21, 2010

Celebrating Spinach

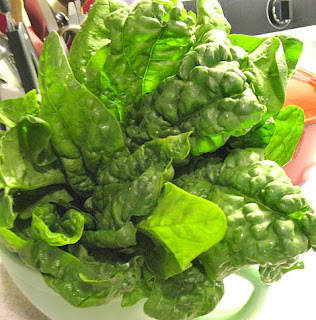
After a lovely trip to Featherstone Farm, the farm with the CSA program in which we participate, we lucky subscribers were offered a parting gift of impossibly fresh lettuces or spinach. I had visions of a celebratory meal rather than the usual near-instant gratification of a gigantic salad with tender baby lettuces, and selected the spinach. It was a tough choice, but I was determined to learn to make soufflé this spring and the spinach was a prime flavoring candidate.

I can’t believe I’m getting this excited about a bundle of spinach, but boy, oh boy, was this great stuff! At least as tender as the so-called baby spinach you might buy in a plastic bag, but with large, deep-dark, curly leaves, so fresh as to be completely innocent of the concept of wilt. It almost seemed a shame to eat it. Perhaps I should have made it into a bouquet.


Anyway, I did get around that celebratory soufflé. I’d never made a soufflé of any kind before, but thanks to Alice Waters and her book, The Art of Simple Food, I was pretty confident that I knew what I was doing. This is a lovely book filled with basic (but by no means simplistic) recipes and guidelines for essential traditional dishes that feature high-quality ingredients and allow them to shine. The descriptions and instructions are so detailed, so minute, that you might just feel like a master before you even turn on the kitchen light. And so, with this book, I felt like I had learned how to make a soufflé and I just had to follow through.

The basic concept of the soufflé, sweet or savory, is a white sauce (or pastry cream for a sweet soufflé) flavored (in my case with fresh spinach and feta cheese), combined with egg yolks and folded together with foamy beaten egg whites. It seemed pretty complicated to me until The Art of Simple Food helped me to take everything apart and consider each step in the process individually. The good news is that each preliminary step can be done separately and the results held until you’re ready for them. There’s no real hurry from stage to stage. You have to fold the egg whites into the base as soon as they are beaten, but you don’t have to beat them until you are ready for that step.

The only thing you must do quickly is eat the soufflé when it comes out of the oven, which is the best part anyway. If you delay, this airy dish will deflate and your carefully planned procedure will have been for naught. That doesn’t mean you can’t eat a fallen (or even leftover) soufflé. It just means you’ll have something more like a frittata or a thick omelet.

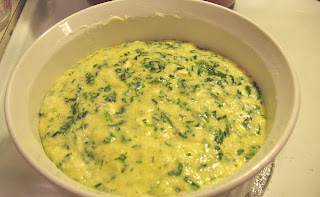
For my first attempt at soufflé, this went extremely well. The spinach was beautiful and tasty and was complimented well by the intermittent pockets of semi-melted feta cheese. The dish was nice and puffy with a golden-brown surface, and I was glad that I had made some effort to find a nice round dish to make it in. A smaller dish (or bigger soufflé) would have allowed for more dramatic rising of the soufflé over the edges, but who needs drama? Especially when all you really want to do is celebrate the first fresh spinach of the season.


Spinach and Feta Souffle

Depending on how salty your feta cheese is, you might want to use less salt in this dish than I did. I prefer my egg dishes well-salted, so may have used more salt than you would like or need.

1 tablespoon butter, plus more for buttering the baking dish
2 cloves garlic, minced
1 tablespoon all purpose flour
1 cup milk
½ teaspoon coarse (kosher) salt (plus more for blanching spinach if desired)
1/8 teaspoon black pepper
1/8 teaspoon nutmeg
8 ounces fresh spinach
4 eggs, separated
3 ounces crumbled feta cheese

1. In a medium-size saucepan, melt the butter over medium-low heat. Add the garlic and sauté about 1 minute. Whisk the flour into the butter mixture. Cook about 1 minute more, stirring frequently.


2. Slowly whisk in the milk. Try to keep the flour mixture (roux) from forming lumps. Cook, keeping the heat at about medium-low and stirring or whisking frequently, until the mixture comes to a boil and thickens. Add salt, pepper and nutmeg. Remove from heat and set aside.
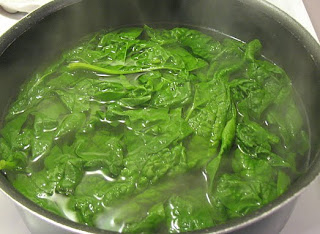

3. Bring a large pot of salted (if desired) water to a boil. Add the spinach and cook about 2 minutes or until wilted. Remove the spinach, drain and rinse in cold water or plunge into a bowl of ice water. Squeeze dry and chop. (You will not need the pot of water any more for this recipe.)


4. Pour the milk mixture (white sauce) into a large bowl. Whisk in the egg yolks one at a time. When each yolk has been incorporated, stir in the chopped spinach and feta cheese.


5. Butter the bottom and sides of a 1-1.5 liter (about 1 -1 ½ quart) soufflé dish. Preheat oven to 375 F.

6. With an electric mixer (or by hand, if you’re so inclined) beat the egg whites until they form stiff peaks. That is, when you lift the beater or whisk out of the egg white foam, it will stand up in peaks that do not collapse. Be careful not to overbeat the egg whites.

7. Fold the beaten egg whites into the base mixture, preferably with a rubber spatula or wide, flat spoon. To do this, spoon about one third of the whites at a time onto the base. Cut down through the whites with the edge of the spatula and turn it to bring some of the base up over the whites. Gently stir this way until the whites are incorporated with the base, leaving a puffy mixture. Try not to deflate the egg whites.
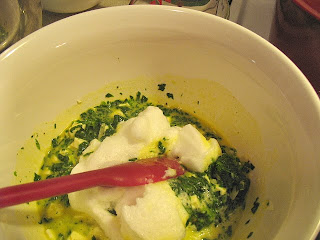
8. Spoon the mixture into the buttered soufflé dish. Bake at 375 F for 35 minutes or until the soufflé has puffed up significantly, but is still a bit wobbly if very gently shaken and the top is golden brown. Serve immediately.


Wednesday, May 19, 2010

Farm Visit

Each year Featherstone Farm, the farm that runs the Community Supported Agriculture (CSA) program to which we subscribe, holds an open house, complete with guided farm tours at their main facility in Rushford, MN. I’ve subscribed to this CSA for three years, and am about to begin the fourth, but I have never taken the trip out to the farm to participate in the open house. I don’t have any good excuses, really. One year I had visitors on that weekend, but in other years, I just missed the boat (or the hayride, as it were.)

When I had the good fortune to speak briefly with Michael Pollan after a talk he gave in town, I told him that I was a subscriber to the Featherstone CSA. When he found out that I hadn’t been there yet, he, who had just toured the farm, told me I had to go. Since I’ve already changed large parts of my life based on things Pollan recommends, I supposed I should go to the open house (there was also a bit of reminding and nudging from Harry). I’m really glad I did.


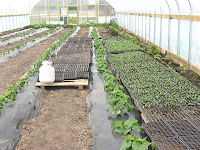
Even after a pretty big breakfast, the fields and greenhouses full of vegetables to come conspired to make me hungry. Strawberry and raspberry patches, rows of delicate salad greens, and a whole field of garlic (a field of garlic, people!), and this was just the tip of the iceberg! Still, when you’ve seen the acreage devoted in this country to commodity corn, soybeans and other such products, it’s quite surprising how little land is actually required to organically grow so much real food. (Did you know that growing vegetables and fruits on land designated for commodity crops can result in large fines? Yes, growing healthy food is bad for America, apparently…sorry to be cranky about this. You can read an intelligent treatment of the issue by Jack Hedin, farmer/owner of Featherstone, published in the New York Times here. Please do.)


Even though I know that fabulous fruits and vegetables are grown at Featherstone, the people involved in all ways with the farm are even better. The subscribers are dedicated to this sane and sustainable method of producing and procuring food. The people who work on the farm and its administration are smart and friendly with that kind of enviable energy that makes one glad they are on the side of good. These are the kind of can-do people that we could use a lot more of in this crazy world of ours!

And then there was me, practically drooling over the lanes of lacy lettuce, the little tufts of leaves marking the spots where potatoes will be dug in a couple months (or less), and the field of young garlic (a field of garlic, people!). I always get impatient in these last couple weeks of May as I wait for our first box of produce from Featherstone. Now that I’ve seen the farm in action, I’m more excited than ever. Those friendly, energetic people at the farm must be mind-readers as well, because they sent us home with a bunch of spinach so beautiful, so tender, so super-mega-ultra fresh and so brilliantly green it would make something from the Emerald City blush pink with shame.

More on that lovely spinach in the next post….


One year ago: Corn and Green Onion Tart with Bacon

Monday, May 17, 2010

Herbs on Demand

I have to admit that I just don’t keep up very well in this on-demand world of ours. Unlike the creators of the Six-Million Dollar Man, I don’t have the technology. On the lower-tech end of things, however, I do like to keep herb plants in containers on my porch in the warmer weather for on-demand flavor enhancement.

I usually try to keep these plants alive over the winter in a spare room, but this never works, and most of them die. That just means I get to shop for more herbs in the spring, which is what I did recently. This year, I’m trying not to go overboard and plant more than I can use, but we’ll see how that goes. Of course, as soon as I declared that spring was here, winter gave one final gasp, and I had to keep my little herb plants inside at night. I still haven’t got around to transplanting them, but I can still eat them.
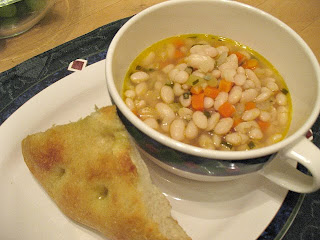
I had been waiting since my previous herb plantings met their demise to make a white bean soup with lots of herbs that I came up with last year, and the few cold and rainy days we had provided the perfect opportunity. I love white beans with herbs, especially sage, rosemary and thyme, and lots of garlic never hurts such a concoction. Add the usual carrot, onion and celery and simmer it all in broth and it’s soup. But it’s more than soup, really. It’s creamy white beans and perky, flavorful herbs that were picked less than an hour before they are eaten.
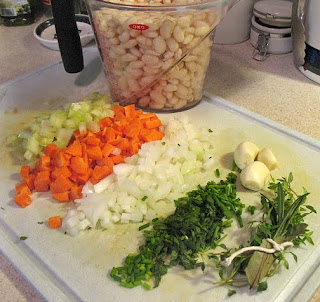
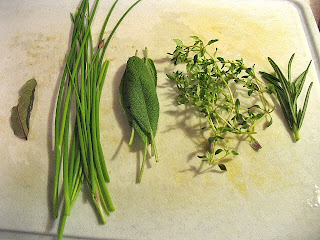
Usually when I make this, the ingredient list (in my head) reads more like “a big carrot, a couple ribs of celery, some onion, a handful of herbs from the porch, some broth (chicken is a little better, but vegetable will do) and some beans. Season to taste.” Well, since I’m now excited enough about this soup to post it to The Messy Apron, I tried to put some more discreet quantities in the recipe below. You can play a little fast and loose with most of the ingredients and use whatever herbs you have or like. I used sage, chives, rosemary, thyme and a dried bay leaf. (I think the sage is absolutely essential with white beans.) The sage and chives, I minced and added directly to the broth, and the rosemary, thyme and bay leaf I tied together into a bouquet garni and removed them when the soup was done. It saves the trouble of de-leafing the thyme or having to chew on rosemary leaves, but still gets the flavors of those herbs into the soup.


I don’t suppose I really have to wait for the next cold day to make this soup again. In fact, since I cooked up a whole big bunch of dried Great Northern beans and froze what didn’t fit in the soup (you could use canned beans, but they will probably be less firm in the final product), I probably won’t wait. And I’ve got plenty more herbs just waiting to offer their services on demand.

White Bean Soup with Fresh Herbs
I like to cut the carrots, onions and celery into quite small pieces, about the size of the beans.

This herb mixture of herbs is what I used last time I made this. You can use whatever you like, but, with the exception of the bay leaf, it is best to use fresh herbs.

2 tablespoons olive oil
½ cup finely chopped onion
½ cup finely chopped carrot
½ cup finely chopped celery
½ teaspoon salt, plus more to taste
3 cloves garlic, minced
1 3-inch sprig rosemary
3-4 6-inch thyme stems
1 dried bay leaf
1 tablespoon fresh sage leaves, minced
2 tablespoons fresh chives, minced
4 cups cooked or canned white beans, such as navy or Great Northern (drained and rinsed if canned)
6 cups reduced sodium chicken broth (vegetable broth will do as well)

1. Heat the oil in a large pot over medium heat. Add onion, carrot, celery and ½ teaspoon salt. Saute 5-8 minutes or until the onion is translucent and the carrot and celery are beginning to become tender.

2. Tie the rosemary, thyme and bay leaf together with a piece of kitchen twine. Add this bundle along with the sage, chives and chicken broth. Bring to a boil, reduce heat, cover and boil gently for about 30 minutes or until the vegetables are tender. Remove the herb bundle. Taste for salt and add more if desired.

Makes 4-6 servings.

Other recipes for on-demand herbs: Chickpea and Olive Salad with Greek Flavors