Showing posts with label Olives. Show all posts

Friday, January 23, 2015

Archive Recipe: Roasted Cauliflower, Chickpeas and Olives


I’ve been approaching much of the cooking I’ve done so far this year a little differently, applying a bit more care and patience in recording recipes, photographing dishes, and, probably most importantly, pronouncing something “just right” (or at least “pretty good”). Something like this bulgur pilaf is inherently simple and became presentable quickly and easily, but not everything goes quite that well. Honestly, I think serious flops are funny, and wouldn’t hesitate to share them, but I’ve been more guilty of pronouncing iffy recipes or lackluster photos “good-enough-and-I-need-to-get-something-posted.” I’d like this space to be more of a well-functioning online cookbook, so, let’s do a little better than that, shall we?

 
This means that a few culinary adventures, specifically a very good cinnamon swirl raisin bread that needs one more run to see if the dough could be improved with additional liquid, and some delicious vegan chickpea burgers that weren’t quite ready for their close-ups (and I neglected to record how long I fried them) are going to be revisited before making any Messy Apron appearances. But speaking of revisiting, I’m also trying to revisit some old posts, specifically those with bad (bad, bad!) photos or oh, let’s call them “under-tested” recipes. This is great, because I get to cook lots of dishes that I already know are good! And I get to eat them, too!

Recently, I pulled this recipe for Roasted Cauliflower, Chickpeas and Olives out of the archives. When I first posted it almost 5 years ago, I had all kinds of ideas for delicious variations. And in that 5 years, I tried exactly zero of them. While I love variety and I love recipes as variations on a theme, I’m here to tell you that in this case, never getting around to trying those ideas isn’t really such a bad thing. This dish is still delicious as it is!

The cauliflower gets a bit nutty and toasty with roasting while the chickpeas get even nuttier and chewy. The briny olives give a nice, concentrated punch in contrast, complemented by a squeeze of lemon juice applied just before serving. Lots of garlic and some crushed red pepper flakes give even more lovely layers of flavor making this dish amazingly complex for having relatively few ingredients. 

 
I still think that some other variations could be applied to the basic concept of this recipe. Kalamata olives would be nice. Perhaps some broccoli or broccoli rabe could accompany the cauliflower. Sundried tomatoes and roasted peppers might make good additions. A few sprinkles of smoked paprika could come along for the ride, or sherry vinegar could replace the lemon juice. Instead of serving this with a grain-based side dish, it could be tossed with pasta or stuffed into a pita.

 
I originally posted this as a vegetable side dish, but I recently served it as part of a vegetarian supper where it was sort of a co-main dish along with Bulgur Pilaf with Almonds and Apricots. Together, the two dishes provide protein, starch, vegetable and fruit (I also had a salad with Maple Walnut Vinaigrette in this meal), and what more do you need to make a real meal? Okay, perhaps a semi-sweet bottle of white wine.


Roasted Cauliflower, Chickpeas and Olives
Based on a recipe in Cooking Light magazine

1 medium cauliflower, about 1-1 ¼ pounds, cut into florets
½ cup pimiento-stuffed green olives
6 garlic cloves, coarsely chopped
1 ½ to 2 cups cooked chickpeas, rinsed and drained if canned
3 tablespoons olive oil
½ teaspoon red pepper flakes
½ teaspoon coarse salt
1 tablespoon lemon juice
½ cup minced parsley

1. Preheat the oven to 450 F. Place the cauliflower florets, olives, garlic and chickpeas in a roasting pan.
 
 2. Add the olive oil, salt and pepper and toss to coat well (I used my hands).

3. Bake at 450 F for about 25 minutes or until the cauliflower is beginning to brown. Stir occasionally. The cauliflower will not be completely tender, but will still have a bit of crispness to it.

4. Remove from the oven. Drizzle with lemon juice and add the parsley. Stir to combine well.

Makes about 4 side dish or 2-3 main dish servings.


Tuesday, October 28, 2014

Pasta with Sausage, Peppers and Olives


I often wonder how I was able, in some deep, dark past, to put together relatively elaborate meals on any given week night. Of course, it has a lot to do with not working full time back then. Now quicker, simpler things have a much better chance getting on the table, but I’ve come to the conclusion that it’s not even so much a matter of not having enough time for bigger spreads as it is not having enough energy. Something tells me that other busy folks, especially parents of young children, feel similarly.

That’s where this delicious but easy dish comes in. While I don’t think it would be an quick sell to hungry kids, especially if you use a spicy Italian sausage, it’s got a good chance of keeping us drained adults going, while not taking that much time and energy. This is simply pasta with sausage and peppers, but with some big flavor boost from olives (any kind will do, but I like Kalamata or other “fancy” olives) and feta cheese.


This is one of those recipes for which you don’t really need a recipe. In fact, last time I made it, I could not find any printed or electronic version of what I had always done and, though it had been a long time since I made it, I remembered the recipe pretty well. (I did eventually find a battered printout and my memory got me pretty close to the original!) And once you’ve made it a few times, you’ll know what you want to add and/or take away to make it more suited to your tastes or to what you tend to have on hand.

Really, I just need this kind of thing in front of me in recipe form to remind myself of the idea that spicy sausage, bell peppers, briny olives and funky feta are a great combination. And that they take just a little of my precious time and energy to throw together with pasta for a simple but satisfying supper.


Pasta with Sausage, Peppers and Olives
Adapted from Cooking Light, May 2003

8 ounces uncooked short pasta, such as orecchiette, farfalle, penne or shells
8 ounces spicy Italian sausage (remove from casing if not purchased in bulk)
olive oil, if needed
3 cups bell pepper (any color; a mix is nice), cut into short, ¼ wide strips
1 large clove garlic, minced
1 teaspoon dried oregano
½ cup chopped pitted olives
¾ cup feta cheese, crumbled

1. Cook pasta in boiling salted water according to package directions until al dente. Drain, reserving a cup or so of cooking water, and keep warm.

2. Heat a large skillet over medium heat. Add the sausage and cook, breaking apart, until just browned. Add the peppers and continue cooking until the peppers are lightly browned and tender-crisp and the sausage is fully cooked. If the sausage has little fat and the pan is getting too dry to keep the sausage and peppers from sticking, add some olive oil as needed.

3. Stir in the garlic, oregano and olives. Cook about 2 minutes. Add the hot cooked pasta and feta cheese. Pour in some of the reserved pasta cooking water if desired to moisten. Toss together and cook until warmed through.

Makes about 4 servings.


One year ago: Pumpkin Alfredo Sauce

Monday, May 5, 2014

Olive and Green Peppercorn Flatbread


I tried this recipe to accomplish a few things. For one, I wanted to finally get to a recipe in a magazine clipping that I’ve been dragging through my life for many years. This happens a lot. Too much. For another, I wanted to find other good ways to use the brined green peppercorns I buy every spring to make this stew. I can always toss them into various dishes in place of black pepper, but I like their flavor enough to want to feature them.

The third reason I tried this recipe was to make what I hoped would be really good food, and, as happens more in my kitchen than just about anywhere else I roam, my hopes were happily realized. Olives are great in bread, which isn’t a surprise, but it’s lovely to be reminded of that once in a while. And the green peppercorns, with their ever-so-slight touch of clinging briny flavor, worked well with the green olives I used. They also contribute their own unique peppery deliciousness.

 
This flatbread, which I made into two circles, takes a bit of time to prepare, but most of it is hands-off waiting time. There is less yeast and a longer first rise (aka bulk rise) than in something like this sandwich bread, but a second rise isn’t needed as the breads go right into a very hot oven just after being rolled out. I used a pizza peel to transfer the dough into a pizza stone in the oven, but you could use a couple of cookie sheets if you don’t have such pizza-making equipment. Put one cookie sheet upside down in the oven and use the other, preferably one without a rim, to transfer the dough.

 
I really was quite excited about the taste and the texture of this flatbread. The green olives and peppercorns add a lot, of course, but the bread itself has good flavor and a pleasant chewiness all on its own. The long rising time no doubt contributes some extra flavor as the dough ferments a bit longer, developing some complexity. If you bake it just until a brown spot or two appears, it is soft and flexible enough to fold around some kind of sandwich filling, or it’s great served alongside a perky salad or a hearty soup. And, of course, it’s a delicious way to use up some of a jar of brined green peppercorns.


Olive and Green Peppercorn Flatbread
Adapted from Cooking Light magazine

1/3 cup warm water (about 100 F)
1 teaspoon active dry yeast
1 ¼ cups all-purpose flour, divided
1 teaspoon olive oil (preferably extra-virgin)
¼ teaspoon salt
1/3 cup pitted, chopped green olives
1 teaspoon brined green peppercorns, finely chopped

1. In the bowl of a stand mixer, or another large bowl if you will be mixing by hand, combine the water and yeast. Let stand about 5 minutes or until the yeast appears foamy.

2. Add ½ cup flour. Stir to form a loose batter. Cover and let stand 20 minutes.

3. Add the olive oil, salt and about half of the remaining flour. Knead the dough using the hook attachment for the stand mixer (or knead by hand on a lightly floured surface), adding as much of the rest of the flour as possible without making the dough too dry. Continue kneading until the dough is very smooth and stretchy, about 10 minutes.

4. On a lightly floured surface, stretch or roll the dough out into a thin layer. It does not have to be a regular shape. Distribute the olives and peppercorns over the surface of the dough and roll the dough up to enclose them. Knead the dough a few more times to distribute the olives and peppercorns.

5. Shape the dough into a round ball. Grease a large bowl or spray it with cooking spray. Place the dough ball in the bowl and spray or grease the top of the dough. Place a sheet of plastic wrap directly on the sprayed dough surface. Cover with a towel and let stand for about 2 hours, or until roughly doubled in size.

6. Place a pizza stone or an inverted cookie sheet on the bottom rack of the oven. Preheat the oven to 500 F. Lightly dust a pizza peel (or a rimless baking sheet) with cornmeal. Set aside.

7. Divide the dough into 2 equal pieces and shape each into a ball. Let stand about 5 minutes. On a lightly floured surface, roll one dough ball into an 8-inch circle. Place the dough circle onto the cornmeal-coated peel (or baking sheet). Transfer the dough to the preheated pizza stone by sliding it off the peel.

8. Bake at 500 F for 6-7 minutes or until just beginning to brown. Remove from the oven and cool on a wire rack. Repeat the rolling and baking process with the remaining dough.

Makes 2 8-inch flatbreads.

Monday, February 4, 2013

White Beans with Tomatoes and Olives

As happens so many times on these pages, I wish I had a great story to go with this dish. Something about my plump Tuscan grandmother who taught me everything I know (she doesn’t exist), or how I dried my own tomatoes or cured my own olives or grew my own navy beans. Nope. Not gonna happen. To be painfully truthful, I can’t even remember how I got the idea to put these ingredients together in this fashion. This simple pan of white beans with sundried tomatoes and kalamata olives with plenty of garlic and olive oil will have to be its own story.

 
But doesn’t that tell you a lot? Creamy white beans enrobed in flavorful oil and enhanced with the tangy flavor of sundried tomatoes and the briny brightness of olives. I made it warm for the simple reason that it’s just too cold for salads. I made it with dried beans I cooked myself because I happened to have a lot of them waiting around for their chance to be useful (you could use canned beans). I made it with lots of parsley because that’s an easy herb to get nice and fresh in the dead of winter. I made it totally delicious quite by accident.

I highly recommend using very tender sundried tomatoes in this recipe. Those packed in oil and sold in jars will be quite soft, but I happened to find some that were delightfully pliable in a re-sealable package without any oil. I think either form will work. If your dry-packed tomatoes are too hard to chew easily, you may be able to soften them by soaking them in boiling water for 30 minutes or so.
 
 
As you can see, I really didn’t get any good photos of this dish. Unfortunately, if I’m going to share a recipe for something I made for supper, unless by some freak happenstance of time and energy I make something ahead of time, there’s just not going to be enough sunlight for a quality representative picture. This is pretty much true from November through February, so you might have to use your imagination on some of my dishes.

And using that good imagination of yours on this one could lead to any number of variations. When the days get warmer, I’d like to try this as a cold salad with the oil turned into a dressing by merging it with some vinegar. I’m also wondering if Roasted Cherry Tomatoes would be a good replacement for the sundried tomatoes. Perhaps the tale of these very simple beans can live on as a Choose Your Own Adventure story. Perhaps just being very simple and extremely delicious is enough.


White Beans with Sundried Tomatoes and Olives

I used unsalted beans in this recipe. If you are using canned beans you may want to use the lesser amount of salt. Taste after adding the olives to determine if more salt is needed.

 
¼ cup extra virgin olive oil
4 cloves garlic, finely chopped
3 cups white beans, drained (and rinsed if canned), about 2 16-ounce cans
¼- ½ teaspoon coarse salt, to taste
a few grinds of black pepper
¼ cup chopped soft sundried tomatoes
¼ cup chopped kalamata olives
½ cup finely chopped parsley

1. Pour the oil in a large skillet. Warm over low heat. Add the garlic and cook very gently, stirring frequently, until just beginning to brown.

2. Add the remaining ingredients and cook until the parsley is well wilted and the dish is warm throughout, about 5 minutes. Serve warm.

Makes about 4 main-dish servings.

Other recipes like this one: White Beans with Arugula and Sun-Dried Tomatoes (I had completely forgotten about this recipe, which is quite similar); White Beans with Sage and Garlic; White Bean Soup with Fresh Herbs

Wednesday, April 6, 2011

Lemon, Olives and Feta

I don’t know why I didn’t think of this before.  I rarely hesitate to put feta cheese and kalamata olives in salads with greens or beans, pasta dishes, and tarts and on pizzas, but for some reason it never occurred to me to put them in a cabbage slaw.  That is, until I read the interpretation of “Lahanosalata” in Recipes from the Root Cellar by Andrea Chesman.


I’ve put various vinaigrettes and creamy dressings on cabbage slaws and flavored them up with caraway, coriander, apple jelly, and horseradish. I’ve applied sesame vinaigrettes and spicy peanut dressings. I’ve added carrots, apples, cauliflower, radishes, turnips and packaged ramen noodles. But never feta cheese and kalamata olives. Huh. Well. I’m glad I was able to remedy that flaw in my repertoire.


This salad is a less summer-weather-dependent version of the Greek salad with which we’re all probably somewhat familiar. It leaves out the tomatoes and cucumber, which are unreliable at best in the supermarkets this time of year. In lieu of the more familiar lettuce or spinach that demand to be eaten as soon as the lemony dressing is poured upon them is sturdier shredded cabbage. It’s quite simple, really, and if, like me, you have a lonely cabbage threatening to dry up in your neglected refrigerator and you can’t quite face another traditional slaw, it’s a revelation. It’s exciting. It’s delicious.

I added even more lemon juice and a little lemon zest to the dressing. I liked its pucker-y zing, but if you don’t care for foods so tart or acidic, you might want to leave out a tablespoon of juice just to be safe. You can always add more if you want it. The same goes with salt. I kept the amount small, since the feta and olives contribute a lot of their own saltiness, and the acidity of the lemon juice fills in some of the flavor necessity for me that salt might in a blander dish. I recommend tasting for salt after the salad has been sitting for the recommended time in the recipe below and deciding then if it needs more.


I also added a bit of fresh parsley and a smidgeon of fresh rosemary. The rosemary just gives that little, little piney note that I like in a lemony, feta-y, olive-y dish, but I wouldn’t want it to dominate the flavors like it so easily can. Just a tiny bit is enough, and if you don’t have rosemary on hand, it probably wouldn’t be worth buying a bunch just for the pinch I added to this slaw.

Whatever you do, at least try to remember this treatment of cabbage slaw. In fact, go make it right now. Okay, at least write the idea down. It’s really great.


Cabbage Slaw with Feta and Olives
Adapted from Recipes from the Root Cellar by Andrea Chesman

6 cups thinly sliced or shredded cabbage (about ¾-1 whole small head)
½ cup thinly sliced red onion
½ cup kalamata olives, pitted and coarsely chopped
2 ounces feta cheese, crumbled
¼ cup chopped fresh parsley
1 teaspoon minced fresh rosemary (optional)
1 teaspoon finely grated lemon zest
¼ cup fresh lemon juice
¼ cup extra-virgin olive oil
¼ teaspoon salt, plus more to taste if needed
¼ teaspoon freshly ground black pepper

1. Combine cabbage, red onion, olives, feta, parsley and rosemary in a very large bowl. Toss gently to combine.

2. In a small bowl, whisk together the lemon zest and juice, olive oil, salt and pepper until very well blended. Pour over cabbage mixture and toss gently to coat evenly. Let stand 30 minutes refrigerated or at room temperature. Taste for salt and adjusting seasoning before serving. Refrigerate leftovers for a few days

Makes 6-8 servings.


Other recipes like this one: Radish and Carrot Slaw with Zesty Citrus Dressing, Deconstructed Spanakopita Salad, Chickpea and Olive Salad with Greek Flavors

One year ago: Chicken and Vegetable Tetrazzini

Wednesday, September 1, 2010

Roasting Cherry Tomatoes

For me, there is no such thing as too many tomatoes. There can be, however, enough tomatoes. That is, enough of eating them raw to take advantage of their exceptional seasonal specialness. Enough salads, gazpacho, and eating them out of hand like apples, or in the case of cherry tomatoes, berries or, um, cherries. When that enough stage has been reached, it is okay to cook some of those tomatoes. Really. It is.


This is just what I did recently with my bumper crop of porch-grown, container-bound cherry tomatoes. (I also had a few from the CSA, but I’ve been getting more from my own eager vines.) I followed the advice of Sally Schneider in her fabulous book The Improvisational Cook (currently in transition between hardcover and paperback editions) on how to roast them and it turned out to be easy as pie. Actually, it was even easier than pie, so I also made them into a pie.

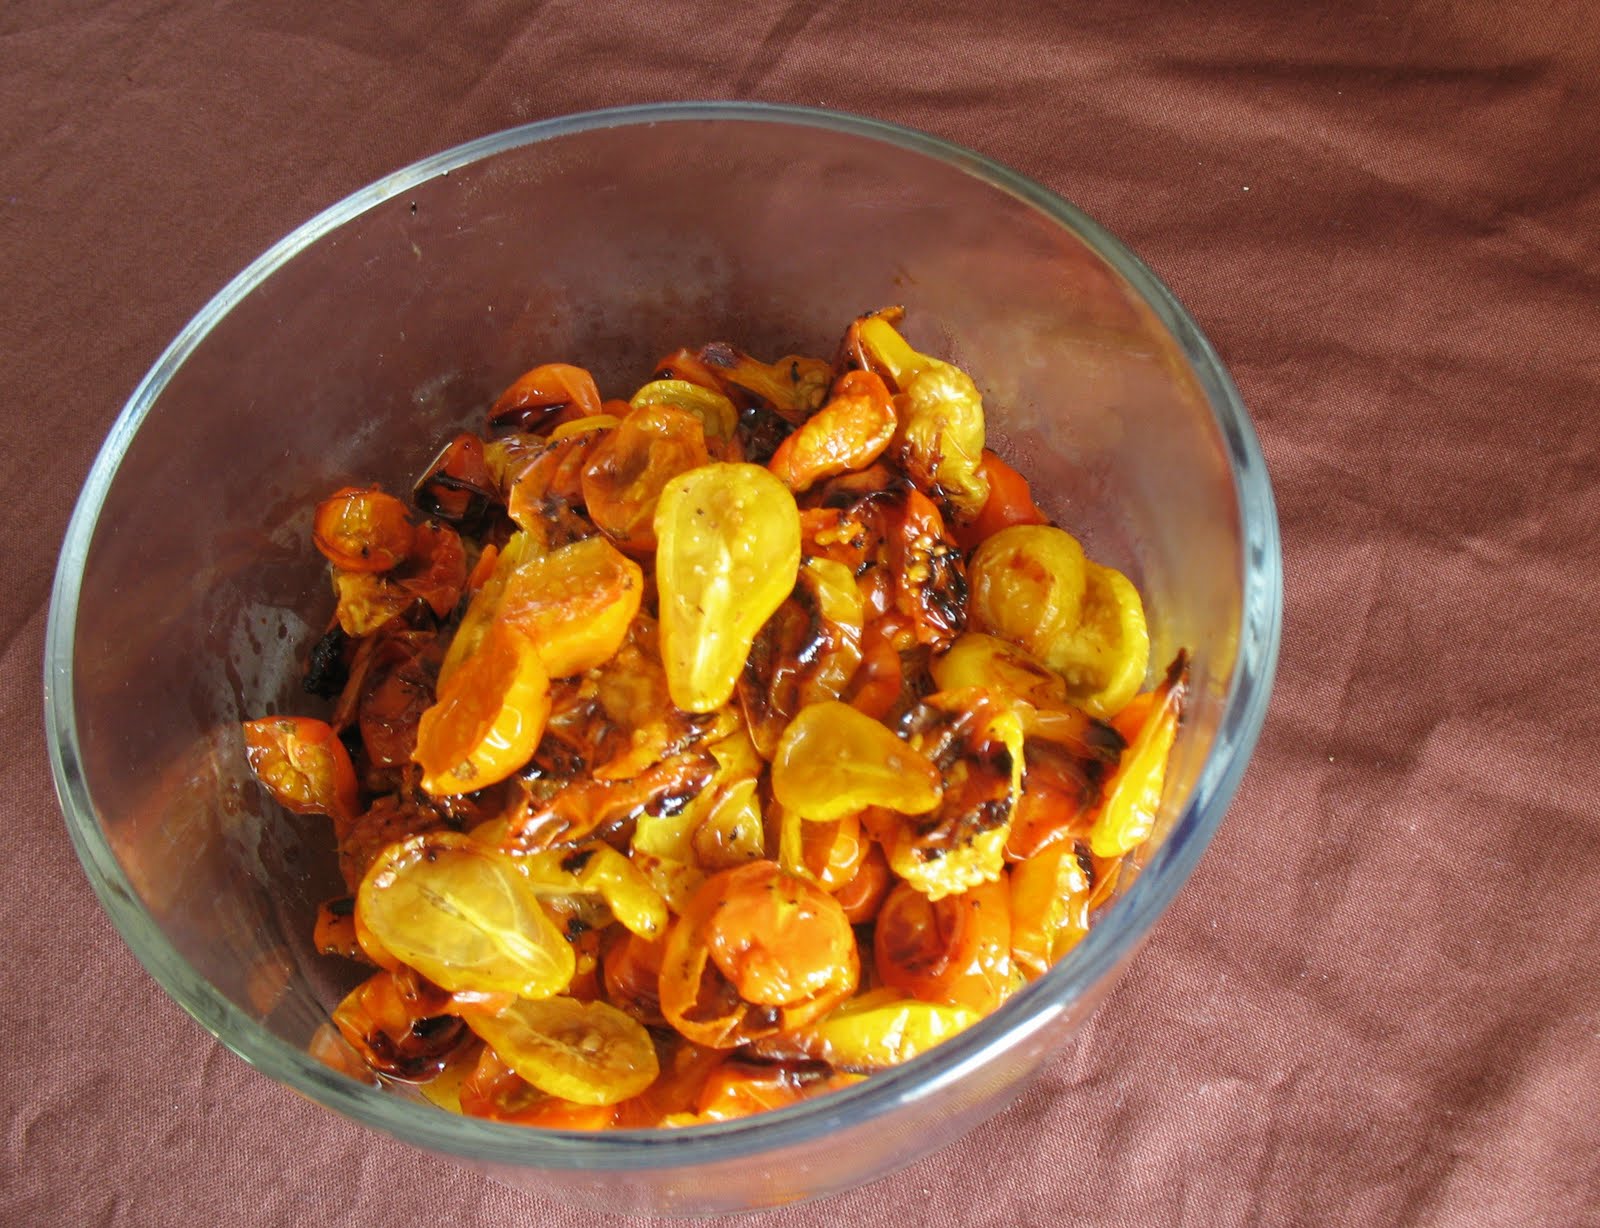
Roasting my cherry tomatoes simply involved cutting them in half and arranging them on a lined baking sheet, sprinkling them lightly with coarse salt, black pepper, and just a bit of sugar, then letting them go in the oven at 350 F for about an hour. That’s it. That’s all there is to it. And boy, oh, boy were the results delicious! The flavors of the slightly caramelized tomatoes became so concentrated I found it hard to believe all those tastes were packed into that little fruit in the first place. I was genuinely surprised by how good these were: a little bit of caramel, a lot of sweetness, and such concentrated tomato flavor that it felt like eating more than one at a time would knock me right down.


I paired my roasted tomatoes with kalamata olives and wrapped them all in a garlic-infused olive oil and a simple pie pastry. You could use any single-crust pastry recipe you like (or half of the whole wheat version in this post), or a store-bought pie crust, but I offered a simple crust recipe below as well.

I was worried that the olives would overwhelm the tomatoes in this galette, but such was not the case. The tomatoes seem to be too super-flavorful to be overwhelmed by anything. And roasting them seems to be the key to avoiding a soggy pie, since this free-form tart was crisp enough to be picked up and eaten without a fork. I served it as a main dish, but I think that it could also be a nice appetizer if cut into smaller pieces, especially since it is good at room temperature as well as warm from the oven.

I neglected to make note of the exact volume or mass of cherry tomatoes I roasted and then used in the galette, but I think it was about three cups. They shrink down quite a bit as they cook and I think I had about 1 ½ to 2 cups of roasted tomatoes in the end. You can use the roasted tomatoes for dishes other than this rustic tart. I think they would be good over pasta or on bruschetta and I recently roasted some more that I put in a wheat berry salad with mozzarella and herbs using a method and a vinaigrette very similar to the recipe in this post. Now that the weather charts are promising cooler days, and I really love this simple galette, I think I may just be firing up to oven to roast as many cherry tomatoes as I can get my hands on!


Basic Pie Crust Dough
The water for this recipe should be very cold. I usually put a measuring cup with ice and water in the freezer while I prepare the rest of the ingredients.

1 ¼ cup all-purpose flour
½ teaspoon salt
4 tablespoons unsalted butter, cut into small pieces
2 tablespoons vegetable shortening
4-5 tablespoons ice water

1. In a medium-sized bowl, combine the flour and salt. Add the butter and shortening and cut into the flour mixture using a pastry blender, knives or your hands until the mixture is very crumbly and all the butter and shortening is in small, flour-coated pieces.


2. Add 4 tablespoons water and gently toss it with the flour mixture until all the flour is moistened. If the mixture is still dry, add the remaining tablespoon of water (or more if necessary). Continue mixing gently until the entire mixture can be pressed together to form a ball.

3. Shape the dough into a disk, wrap it in plastic wrap and refrigerate at least 15 minutes and up to one day before rolling out. If you wish to hold it longer than one day, wrap it well and freeze it. Allow the dough to thaw completely in the refrigerator before using.


Makes enough pastry for 1 pie crust.

Roasted Cherry Tomatoes
Adapted from The Improvisational Cook by Sally Schneider.

I think any variety of cherry or grape tomato will work here. I’ve been using Sungold and Yellow Pear.

The measurements for these do not have to be exact, but about 2 ½ to 3 cups of cherry tomatoes will fill a large baking sheet and will yield enough for one Roasted Tomato and Olive Tart.


2 ½ to 3 cups cherry tomatoes
Salt
Black pepper
Sugar

1. Preheat oven to 350 F. Cut the tomatoes in half and lay them in a single layer on a lined or oiled baking sheet (I use a silicone baking mat), cut side up.

2. Very lightly sprinkle the tomatoes with just a pinch each of salt, pepper and sugar. Roast at 350F for about 1 hour, or until the tomatoes are shriveled and beginning to brown. Begin checking them at 45 minutes. If the tomatoes are getting too dark, remove them from the oven. If some are getting dark faster than others, remove them from the pan.

3. Allow to cool on the pan until easy to handle and remove them with a spatula. Use in recipes immediately or refrigerate until ready to use.


Makes about 1 ½ cups roasted tomatoes, or enough for one Roasted Tomato and Olive Tart.

Roasted Tomato and Olive Galette
Once again, the measurements do not need to be precise. The pastry and the roasted tomatoes can be made at least a day ahead. The garlic-infused oil can be made up to a few hours ahead.

2 tablespoons olive oil
1 large garlic clove, thinly sliced
1/3 cup pitted and chopped kalamata olives
1 recipe Roasted Cherry Tomatoes
1 recipe Basic Pie Crust Dough, chilled
Egg wash (1 egg beaten with 1 tablespoon water or milk), optional
Freshly grated Parmesan cheese

1. Combine the olive oil and garlic in a small saucepan. Heat over low heat for about 10 minutes. The garlic should just sizzle a little bit. If the garlic begins to brown, remove it from the heat. Set aside and cool.

2. Preheat the oven to 400 F. In a medium-sized bowl, combine the olives and Roasted Cherry Tomatoes. Add the garlic and oil and stir to coat well. Set aside.

3. Roll out the Basic Pie Crust Dough into roughly a 12-inch circle. Carefully transfer to a baking sheet. Spread the tomato and olive mixture over the pastry circle, leaving at least a 2-inch border. Fold the border up over the tomato mixture


4. Brush the pastry with egg wash if desired. Sprinkle the tart with freshly grated Parmesan cheese.


5. Bake at 400 F for 40 to 45 minutes, or until the crust is crispy and golden brown. Serve hot, warm or cooled to room temperature.


Makes about 4 light main dish servings.

Sunday, May 30, 2010

Arugula Pesto

One of my favorite new green things of spring is arugula. (You may see it under other names, including rocket, which is just cool.) Its long, narrow, curvy leaves can range from peppery to downright bitter. It makes a great salad, especially when mixed with other tender lettuces that tame its strength a little. Arugula also grows easily from seed, even in containers, which means I can grow some on my porch. It also seems to prefer the cooler weather (just like me) so, if you’re on the ball with your spring planting, it can be one of the first things in the garden that’s ready to eat.


A couple years ago, I tried a recipe for a pesto sauce made with arugula and kalamata olives. It was delicious. The nutty, peppery bitterness of the arugula was well balanced by the briny olives. I’d been thinking about that recipe ever since. Recently, when I had a little arugula I had grown myself, plus a nice bunch that had been grown locally, I found out why I hadn’t made arugula pesto a second time. I had lost the recipe.

Since I have a pretty firm grasp of the theory of pesto (I make basil pesto every summer), and I remembered the two most important ingredients (fresh arugula and kalamata olives), I was able to put together something that was probably pretty close to the original. I included some toasted almonds to give the sauce body. Walnuts would probably be just as good, if not even better. I also added some flat leaf parsley to tame the arugula a bit, and whirled everything together in the food processor with some decent extra virgin olive oil. The result was pretty close to the original recipe or at least close to what I can remember, which is close enough.

I not only served this sauce with pasta, but I also stirred some into a pan of white beans simmered with garlic (about 1/3 cup in 3 cups of beans). I topped both dishes with crumbled feta cheese, which tasted like it was born to be there. This pesto probably could be spread on garlic bread or sandwiches, or maybe even whisked into a vinaigrette served over milder salad greens or spring vegetables. Or how about potatoes? Well, the pesto will last for a few days in the refrigerator (I haven’t tried freezing it, but that might work, too), so I can try them all. Then, if I can get my hands on some more arugula, I can try some more! And since the recipe is now recorded here, I should never lose it again!


Arugula Pesto with Kalamata Olives

1/3 cup chopped almonds
2 cups (loosely packed) arugula leaves, any tough stems trimmed
1 cup (loosely packed) parsley leaves and tender stems
¼ cup pitted kalamata olives, coarsely chopped
¾ teaspoon salt
1/8 teaspoon freshly ground black pepper
¼ cup extra-virgin olive oil

1. Place the almonds in a small skillet over medium heat. Heat, stirring often, until just beginning to brown. Be very careful not to burn them. Remove from the heat and cool completely.

2. Place the cooled almonds in a food processor and pulse until coarsely but evenly ground.

3. Add the arugula, parsley, olives, salt and pepper to the food processor. Process until everything is well ground into a coarse paste.


4. With the processor running, slowly add the olive oil and process until completely smooth. Your processor should have a feed tube or opening at the top to allow you to do this. (Add a little more olive oil if the pesto is too thick.)


Makes about 1 ½ cups

To serve, toss with hot pasta, thinning with a little pasta-cooking water if desired. You can also stir it into cooked beans, spread it on breads or add it to dressings.

Other recipes like this one: Basic Basil Pesto