Showing posts with label Herbs. Show all posts

Monday, June 24, 2013

Method: Pasta with Herbs and Optional Vegetables


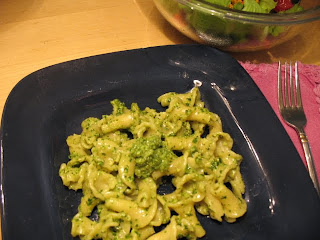
Since produce has been pretty slow this year, and grocery shopping is less of an art form for me than it used to be (shifting to working full time outside the home will do that), I was facing some potentially boring or even potentially empty plates just because I didn’t feel like I had anything interesting to work with. One day I just decided to go with the fresh herbs I had on hand (actually, I’m not sure I had more than parsley in the refrigerator), garlic cooked in a mixture of butter and olive oil, and some heavy gratings of Parmesan cheese tossed with hot pasta. Supper. End of story.


This is an even simpler twist on pasta with cream and vegetables that I seemed to be making a lot over the last few years. For 8 ounces of pasta, which can be any shape, I get out my biggest skillet and melt 2 tablespoons unsalted butter with 2 tablespoons of decent extra-virgin olive oil over medium heat. I then chop up a few cloves of garlic and cook them in the butter-oil mixture with a heavy pinch of kosher salt for a minute or so, just until the garlic barely begins to suggest that it might be thinking of turning brown soon. But, hey, a little slightly browned garlic isn’t so bad, so I don’t get too uptight over it.

Once the garlic is a little cooked, I add 1-3 cups fresh herbs and/or greens, whatever I happen to have. I cook and stir this until the green things are well-wilted, then just toss in the cooked pasta. It helps to have things coordinated so that the pasta is done cooking at about the time the herbs and greens are ready so it can be scooped right from the cooking pot into the herby skillet. If the pasta is not yet ready when the herbs are, you can set the pan aside until the pasta is done and re-heat it when ready.

I toss the pasta in the herbs and oil, adding a splash or two of the pasta cooking water if I feel that everything is a little too dry. I then turn off the heat, add a half cup or so of freshly grated Parmesan (once I even used some provolone), mix that in, taste for seasoning (particularly salt and/or pepper) and adjust, and serve with additional Parmesan. Easy, right?


My most recent rendition of this little ditty was made of some parsley from the refrigerator and chives, a few leaves of baby kale, and some radish greens from the garden. I tossed that with a four-cheese tortellini and garnished it with chive flowers (quite edible; they taste like mild chives). The simplest version, which I mentioned above, consisted of simply flat-leaf parsley, garlic and Parmesan on spaghetti.

This basic method can also be a base for other seasonal vegetables. I would cook those vegetables in the garlicky butter-oil, then toss in the herbs. You could, of course, add meats or seafood, and I think this would be a good way to use up leftover portions of such things. You can’t go wrong as long as you like it, although I’d argue that if you made it overly complicated, you might be missing the point of such a simple, fresh, seasonal (easy, easy, easy) dish.

Tuesday, May 17, 2011

Cookbooks and Tuscan Beans

I’ve decided I’ve been neglecting my cookbooks.  I love them dearly, so this hurts me much more than it hurts them.  It’s not that I abuse them or keep them in a dank, spider-infested cupboard or anything like that.  It’s just that with all the magazine clippings and internet bookmarks I’ve acquired, I really haven’t been cooking from them nearly enough.

And so I gave myself a bit of a Cookshelf Challenge.  I’m going to try to cook at least one new recipe from each of the cookbooks I own.  On the way, I will probably revisit a few old favorites (such as the recipe in this post) as a way to get a running start.  I hope to journal these messy adventures on these pages, sharing recipes when I’ve adapted or rewritten them and offering amateur commentary and page numbers when I haven’t, giving you the chance to look up the original recipe yourself if you’re interested.  There will be lists of the books I’ve cooked from and recipes I’ve tried here as well as links to relevant posts.

Last week, I kind of dug into two cookbooks to get things started: A New Way to Cook by Sally Schneider and Good to the Grain by Kim Boyce.  I have a sneaking suspicion that I’ll be cooking my way through most of Good to the Grain.  I love this book, love Boyce’s philosophy, and love baked goods, so I think it’s going to be a fun ride.  More on that book in another post.

While I’ve only owned Good to the Grain for a couple weeks, I’ve had A New Way to Cook since it came out in 2001.  It was probably the first cookbook that I ever just read though, taking in the introductions, descriptions and author enthusiasm for good, fresh home-cooked food.  The first sentence of the introduction is, “The purpose of this book is to introduce you to a way of cooking truly delicious food simply, easily, healthfully, and with pleasure, and to enhance the joy of sharing it.”  In that case, I’m in.


And I have been “in” to this book for years, even though I haven’t cooked from it nearly enough.  It’s not just a collection of traditional recipes re-thought and redesigned to be more healthful, but a guide to varying and improvising upon basic recipes and creating menus based on what’s in season.  Reading and trying a few recipes from this book really allowed me to change the way I approached my pantry, my kitchen and my meals and helped me develop my own “new way to cook.”


When I found lots of cooked white beans in the freezer and bought a new sage plant for the patio garden, I knew I would go straight to the Tuscan Beans with Sage and Garlic.  This is either the first or second recipe I tried in this book. (I can’t remember whether I tried the Cold Spicy Sesame Noodles first.) I’ve made it so often that I don’t tend to go back and look at the recipe before setting out to make it.  I’ve changed a few things, but mostly because I sort of inadvertently migrated from the exact ingredients and procedures.


The recipe is based on the classic Tuscan fagioli al fiasco, which is a wine bottle full of beans, lots of olive oil, fresh sage and garlic that is allowed to bubble away on the embers of the kitchen hearth.  The beans absorb the olive oil and the flavors of the sage and garlic.  Sounds luxurious and heart-warming and decadent beyond belief.  I, however, don’t have a kitchen hearth, so I’m glad that Ms. Schneider shared her technique for cooking the beans in sage- and garlic-infused olive oil in a pan on the stove.  It’s delicious.


First, garlic and sage are cooked over low heat in a small amount (compared to the traditional recipe) of olive oil, then removed from the oil leaving behind their flavorful essence.  The beans are cooked in the oil with a little liquid (I’ve been using white wine, but chicken broth is very good) and absorb the subtle but wonderful flavors the cook has created.  It’s so simple, takes very little time, assuming you have cooked or canned beans on hand, and tastes so good…well, it just tastes so good!


White Beans with Sage and Garlic
Adapted from A New Way to Cook by Sally Schneider

5-6 medium to large garlic cloves
about 10 large sage leaves (or up to 20 very small ones)
¼ cup extra-virgin olive oil
3 cups cooked white beans (about 2 16-ounce cans) drained and rinsed
¼ cup dry white wine or chicken broth
coarse salt and black pepper to taste

1. Peel the garlic and thinly slice it.  Cut the sage leaves into ¼-inch slices.

2.  Heat the olive oil in a large skillet over medium-low heat.  Add the garlic slices and cook a few minutes, just until they begin to brown slightly.  Remove the lightly-browned garlic with a slotted spoon and set aside.

3.  Add the sage to the oil.  Cook for about 1 minute or until the leaves look darker and somewhat crisp.  Remove with a slotted spoon and set aside with the garlic.

4.  Add the beans and wine or broth to the oil.  Increase the heat to medium.  Cook, stirring gently, until only a little thickened liquid remains in the pan.  Transfer to a serving dish and sprinkle with the cooked garlic and sage.

Makes about 2-3 main dish or 4-6 side dish servings.


Monday, August 2, 2010

Eggplant Enlightenment: Spicy Dip with Herbs

Mary, Mary quite contrary
How does your garden grow?
“With silver bells and cockle shells
And one big hairy eggplant!”

-traditional (adapted by my dad)


I don’t know how old I was before I knew for certain that eggplants aren’t hairy. The fruit is quite the opposite, in fact, with skin so smooth it squeaks when you run your fingers along it. Perhaps Mom, who knows more about plants than Dad and I combined, enlightened me early on, so I could avoid any future botanical faux pas. I did know they weren’t hairy long before I ever had a chance to eat one, and by the time I did eat one, I may have wished they were hairy because that would have made them more interesting.


To me, the taste of eggplant always needs a significant amount of doctoring up. That’s why I was thrilled to find a recipe for a spicy eggplant dip in Vegetarian Cooking for Everyone by Deborah Madison. There’s a lot of added flavor, including fresh herbs I grow on my patio, sesame oil (one of my favorite flavors in the world) and plenty of hot pepper. I put a bit of my own spin on this recipe, such as adding mint and using crushed red pepper flakes (because I was too lazy to seed and dice a fresh chile pepper.)
We recently got a couple nice Japanese eggplants in our CSA box. They are longer and narrower than the dark purple, bulbous Mediterranean variety, but as far as I can tell, they taste about the same. When eggplants are small and don’t have big seeds in them, they don’t need any extra preparation, such as salting and rinsing, to extract any especially bitter flavors. At least I didn’t do anything of the sort when I used these long, skinny babies with the lovely, pale purple skin.

If you can get Thai basil for this dip, so much the better. It has a bit more of an anise flavor that works well with the sweetness of the brown sugar and plays well with the sesame oil. I’m not sure what kind of basil I used, although it might have been a variety called Cinnamon Basil. I planted it, but failed to label it. It did, however have a hint of sweet spice to it, and I think it stood in well for Thai basil. The more common varieties of Italian basil would work just fine here as well.

The eggplant for this dish needs to be grilled or roasted (I used the grill to cut down on the indoor heat) and peeled before it is stir-fried with all its flavorful buddies. This can be done ahead of time, however, and you can whip up the dip in a wok or skillet just before you want to serve it. It seems to be best warm or at room temperature so that the aromatic elements of the herbs and sesame and even the vinegar can waft up as you bring it to your lips on your favorite dip vehicle (tortilla chips or pita chips are great here). Perhaps this is the true key to eggplant-eating enlightenment.


Spicy Eggplant Dip with Basil and Mint
Adapted from Vegetarian Cooking for Everyone by Deborah Madison

1 (1 pound) eggplant
1 ½ tablespoons light brown sugar
2 tablespoons rice vinegar
2 tablespoons soy sauce (I use reduced-sodium)
½ teaspoon crushed red pepper flakes
2 tablespoons dark sesame oil
3 garlic cloves, minced
1 tablespoon finely chopped fresh basil (preferably Thai basil)
2 tablespoons finely chopped fresh mint

1. Preheat a gas or charcoal grill (or preheat oven to 425 F). Slash the skin of the eggplant to keep it from splitting open while cooking. Place it on the grill rack and grill, covered, until the flesh of the eggplant is soft and the skin is well-browned and charred in places, turning occasionally. This should take about 20 minutes. Alternatively, place the eggplant on a baking sheet and bake at 425 F. Baking time may be longer.

2. Remove the eggplant from the grill or oven. Cool until easy to handle.

3. Peel off the eggplant skin and coarsely chop the roasted flesh.


4. In a small bowl, mix the brown sugar, rice vinegar, soy sauce and red pepper flakes. Stir or whisk until the sugar is dissolved.

5. Place the sesame oil in a wok or large frying pan and heat over medium heat. Add the garlic and stir fry 30 seconds. Add the chopped eggplant and stir fry 2-3 minutes or until the eggplant is quite soft.


6. Add the sauce mixture (from step 4) and cook about 1 minute more. Stir in the basil and mint. Serve warm with tortilla or pita chips, or spread on crostini.


Makes about 2 cups dip.

Another recipe like this one: Roasted Red Pepper, Garlic and Onion Dip

Monday, May 17, 2010

Herbs on Demand

I have to admit that I just don’t keep up very well in this on-demand world of ours. Unlike the creators of the Six-Million Dollar Man, I don’t have the technology. On the lower-tech end of things, however, I do like to keep herb plants in containers on my porch in the warmer weather for on-demand flavor enhancement.

I usually try to keep these plants alive over the winter in a spare room, but this never works, and most of them die. That just means I get to shop for more herbs in the spring, which is what I did recently. This year, I’m trying not to go overboard and plant more than I can use, but we’ll see how that goes. Of course, as soon as I declared that spring was here, winter gave one final gasp, and I had to keep my little herb plants inside at night. I still haven’t got around to transplanting them, but I can still eat them.

I had been waiting since my previous herb plantings met their demise to make a white bean soup with lots of herbs that I came up with last year, and the few cold and rainy days we had provided the perfect opportunity. I love white beans with herbs, especially sage, rosemary and thyme, and lots of garlic never hurts such a concoction. Add the usual carrot, onion and celery and simmer it all in broth and it’s soup. But it’s more than soup, really. It’s creamy white beans and perky, flavorful herbs that were picked less than an hour before they are eaten.

Usually when I make this, the ingredient list (in my head) reads more like “a big carrot, a couple ribs of celery, some onion, a handful of herbs from the porch, some broth (chicken is a little better, but vegetable will do) and some beans. Season to taste.” Well, since I’m now excited enough about this soup to post it to The Messy Apron, I tried to put some more discreet quantities in the recipe below. You can play a little fast and loose with most of the ingredients and use whatever herbs you have or like. I used sage, chives, rosemary, thyme and a dried bay leaf. (I think the sage is absolutely essential with white beans.) The sage and chives, I minced and added directly to the broth, and the rosemary, thyme and bay leaf I tied together into a bouquet garni and removed them when the soup was done. It saves the trouble of de-leafing the thyme or having to chew on rosemary leaves, but still gets the flavors of those herbs into the soup.


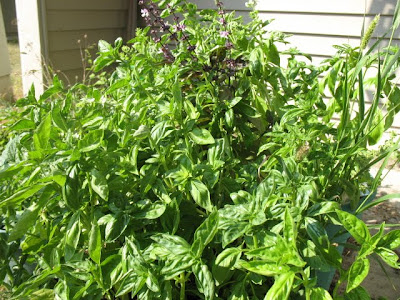
I don’t suppose I really have to wait for the next cold day to make this soup again. In fact, since I cooked up a whole big bunch of dried Great Northern beans and froze what didn’t fit in the soup (you could use canned beans, but they will probably be less firm in the final product), I probably won’t wait. And I’ve got plenty more herbs just waiting to offer their services on demand.

White Bean Soup with Fresh Herbs
I like to cut the carrots, onions and celery into quite small pieces, about the size of the beans.

This herb mixture of herbs is what I used last time I made this. You can use whatever you like, but, with the exception of the bay leaf, it is best to use fresh herbs.

2 tablespoons olive oil
½ cup finely chopped onion
½ cup finely chopped carrot
½ cup finely chopped celery
½ teaspoon salt, plus more to taste
3 cloves garlic, minced
1 3-inch sprig rosemary
3-4 6-inch thyme stems
1 dried bay leaf
1 tablespoon fresh sage leaves, minced
2 tablespoons fresh chives, minced
4 cups cooked or canned white beans, such as navy or Great Northern (drained and rinsed if canned)
6 cups reduced sodium chicken broth (vegetable broth will do as well)

1. Heat the oil in a large pot over medium heat. Add onion, carrot, celery and ½ teaspoon salt. Saute 5-8 minutes or until the onion is translucent and the carrot and celery are beginning to become tender.

2. Tie the rosemary, thyme and bay leaf together with a piece of kitchen twine. Add this bundle along with the sage, chives and chicken broth. Bring to a boil, reduce heat, cover and boil gently for about 30 minutes or until the vegetables are tender. Remove the herb bundle. Taste for salt and add more if desired.

Makes 4-6 servings.

Other recipes for on-demand herbs: Chickpea and Olive Salad with Greek Flavors

Wednesday, September 16, 2009

Basil Jungle

It’s that time of year. Peppers and tomatoes are mounded up in markets. There are a few more zucchini and summer squash plants that just won’t give up their ghosts, but continue to give just a little more fruit (a persistent vegetative state, perhaps?). Acorn, butternut and spaghetti squash are peeking in the doors, and apples have arrived. And my back porch resembles a jungle.

Last year, my aunt, upon gazing at my patio garden, asked if I thought I had enough basil. I’m always a little worried that there won’t be enough for a year’s supply of frozen pesto, so it took me a few moments to realize she was teasing me. And, yes, I had enough basil. I had more than enough basil. I still have pesto in the freezer from last year’s harvest. …And I did it all over again this year.

I don’t buy fresh basil in the “off season.” It’s pretty expensive, and probably came from far away. To me, basil is summer food and I try to get as much out of the season as I can. Dishes like Pasta with Cherry Tomatoes, Olives and Basil just have to wait for basil season. When its growing on the porch, I put fresh basil (as well as oregano, rosemary and thyme) in pizza and pasta sauces (like this simple one) where I would usually use it dried the rest of the year.

A die hard basil farmer like myself, however, would be lost (in the basil jungle) without pesto. It is the only recipe I know that uses enough basil to put a dent in my over-exuberant crop. There’s an added bonus to making pesto, too. It can easily be packaged and frozen, extending the season of pure basil satisfaction for many months …or until you’re really tired of pesto.

I wasn’t going to post a pesto recipe, since there are a zillion of them that you can find anywhere from your Italian grandmother’s recipe box (okay, so she probably doesn’t refer to a recipe, but you get the point) to the latest internet recipe sites. Besides, I rarely measure anything when making pesto, and really just cram a bunch of basil into the food processor with some parsley (I like the balance in flavor between the two herbs), Parmigiano-Reggiano cheese, walnuts (you could use pine nuts, which are more traditional, or almonds), garlic, salt and olive oil, and process it into submission. I decided to make this post anyway, since The Messy Apron is really a recipe and cooking journal, and this is what I’m doing this week. I’ve tried to approximate the amounts I used in my most recent batch of the green stuff in the recipe below.

Really, the pesto technique can be used with many different herbs and other green leaves as well as other kinds of nuts. I’ve seen recipes (and tried many of them) with arugula, spinach, cilantro and mint (one of my favorites), and sage, as well as with other nuts, such as macadamias and pistachios. I suppose the possibilities depend mostly on your personal taste, and what you planted too much of this year.

Now, if you’ll excuse me, I’ve got to take my machete back out to harvest the jungle and make some more pesto!


Basic Basil Pesto
This recipe makes a relatively thick pesto. If you like it thinner, simply add more olive oil.

3 cups basil leaves
1 cup parsley leaves
½ cup grated Parmesan cheese
½ cup walnuts, toasted
4 cloves garlic
2 teaspoons coarse salt
¼ cup olive oil, preferably extra-virgin

1. Place basil, parsley, Parmesan cheese, walnuts, garlic and salt in a food processor. Process until everything is well ground into a coarse paste.


2. With the processor running, slowly add the olive oil and process until completely smooth. Add more olive oil if the pesto is too thick.


To serve, toss pesto with hot pasta. Thin with a little pasta cooking water if desired. You can also add pesto to soups, spread it on garlic bread or pizza, or add it to sauces.

The pesto will turn a very dark green, almost brown color after storing. This is natural and still tastes good. Pouring a thin layer of olive oil over the stored pesto can help keep it bright green.

To freeze pesto, portion it out into plastic bags or freezable containers. Seal them into a freezer bag and freeze for a few months (or probably longer). You can also freeze small portions in ice cube trays.

Sunday, July 26, 2009

Potato Salad

“They call me Tater Salad.”
- Ron White, comedian


If I don't know what to make for a potluck event, I put together a potato salad. If I want to make something ahead to go with grilled meats or veggie burgers, I make potato salad. If I were going to plan a picnic, I'd plan potato salad. And the best part is that it doesn't have to be the same thing all the time. I make traditional potato salads with mayonnaise dressings, bell peppers, and hard boiled eggs. I make one with Chinese flavors. I've made one with barbecue sauce in it. And for lighter fare that has less chance of going "bad" if it sits out a while I've recently started making potato salads with vinaigrettes.

A lemon vinaigrette with lots of herbs from the container garden, which is now flourishing, is just right when I get some thin-skinned organic potatoes in our CSA box. In the recipe below, I used a mix of basil, tarragon, and lemon thyme. The little tickle of anise flavor from the tarragon compliments similar flavors in the basil, and the lemon thyme works well with, well, the lemon.


Besides, the lemon thyme is somehow significantly more prolific than common thyme in my humble porch garden.


You could use whatever herbs you like, or have readily available. I've also used green onions (scallions) in place of the sliced onions, or you could also use chives. Grilled vegetables such as zucchini or yellow squash, or possibly bell peppers would also be nice additions. Mixing the potatoes with the vinaigrette while they are still a little warm allows them to soak up some of the lemon and olive oil flavors. To peel or not to peel is up to you. When I can get my hands on thin-skinned, young, organic potatoes, I feel like doing more than scrubbing off the dirt is somehow and insult to the tuber.

I like having this extra addition to my potato salad repertoire, especially since it uses up lots of the herbs I planted in my springtime fit of over-ambition. Mayonnaise, Chinese flavors, or vinaigrettes, Ithink I'll have plenty of potato salad variations to keep me from getting bored all summer. I've been known to overcook a potato or two in preparation for salads, but that just makes the salad a little creamier. There's nothing wrong with a creamy potato salad.


Lemon Herb Potato Salad
Inspired by a recipe in Cooking Light magazine

2 pounds red potatoes, or other thin-skinned, potatoes
1/4 cup extra virgin olive oil
grated zest of 1 lemon
3 tablespoons fresh lemon juice
2 tablespoons dill relish
1/2 teaspoon kosher salt
1/8 teaspoon freshly ground black pepper
2 tablespoons minced fresh basil
2 tablespoons fresh thyme leaves, preferably lemon thyme
1 tablespoon chopped fresh tarragon
1/3 cup sliced onion or chopped scallions or chives

1. Place potatoes in a large pot and cover with cold water by a few inches. Cover the pot and bring to aboil. Reduce to a simmer and cook until potatoes can be easily pierced with a fork. Drain and cool.

2. In a large bowl, combine olive oil, lemon zest and juice, dill relish, salt and pepper. Whisk until well combined. Stir in basil, thyme and tarragon.

3. When the potatoes have cooled (preferably still a little warm) peel if desired and chop into 1-inch cubes. Add to the dressing in the bowl. Add the onions. Stir gently to coat the potatoes well. Taste for seasoning and add lemon juice or salt if necessary.

Serve at room temperature or chilled. Makes about 6 servings.

Sunday, May 31, 2009

Patio Herbs

I began to fully understand how the term “container garden” came to be in use, when I started thinking about writing to tell you about my “pot garden.” I might eat granola and have a slightly more laid-back lifestyle than is in vogue these days, but if you really know me, you know that really is oregano growing on my porch. To keep myself out of trouble, I’ll try to refer to my stash of culinary herbs on the back patio as a container garden or patio or porch garden (although I might become more google-able if I use the word “pot”).

Anyway, the herbs are growing, and only a few need to be transplanted to larger pots. (I had to buy some more potting soil…don’t you just hate buying dirt?) I should be able to supplement my dishes quite favorably (or flavorably) all summer. I have the “Scarborough Fair” quartet (parsley, sage, rosemary and thyme), oregano, four kinds of mint (spearmint, peppermint, orange, and chocolate), dill, tarragon, and summer savory, something new to my cooking that goes well with tomatoes and green beans. I also have a spicy salad greens mix just coming up from seed, and I planted two kinds of basil seeds that were pretty old, and I don’t know if they’ll come up.

I bought most of the herbs as plants from garden centers, but a few are leftovers from last year that I managed to keep alive over the winter. The oregano has actually survived two winters, at least. In magazines and such, they’ll tell you that you can keep a fresh herb garden at a sunny window all winter, but I think those bits of advice were written from places where the angle of the sun is higher in the winter than it is here in southeastern Minnesota. I can keep some things from dying during the cold months, but nothing really grows.

The thyme plants I bought were very well developed and there’s a lot that’s ready to eat, so, to celebrate my porch’s bounty, I used thyme to flavor some quick and easy drop biscuits. I didn’t have buttermilk or yogurt in the house, so I tried sour cream to make these (I had juuuuuust enough), with good results. We enjoyed these biscuits with scrambled eggs with more fresh herbs and cheese for Sunday brunch.

You could use knives or even your fingers to cut the butter into the flour mixture for these biscuits (or anything else that uses a similar procedure), but I really like using a pastry blender. The one I like is in the photo below, and has blades rather than thick wires as I have seen in other models. I also strongly recommend a Microplane grater for removing lemon zest. It takes off just the nice fragrant, flavorful yellow part, leaving the bitter pith behind. (I used my kitchen shears to harvest the thyme and the whisk to stir the flour mixture, so they got in the shot too.)

The dough for these biscuits is quite wet, but results in a nice crust and moist interior. They can be simply dropped onto a baking pan rather than rolled and cut.


Sour Cream Drop Biscuits with Lemon and Thyme
adapted from Cooking Pleasures magazine

1 cup all purpose flour
1 teaspoon baking powder
¼ teaspoon baking soda
¼ teaspoon salt
3 tablespoons cold butter, cut into small cubes
½ cup sour cream
¼ cup milk
zest of 1 lemon
1 tablespoon lemon juice
3 tablespoons fresh thyme leaves

Preheat oven to 425 F.
1. Place flour, baking powder, baking soda, and salt in a medium bowl. Stir well with a whisk. Add butter and cut in with a pastry blender until the butter is well-distributed and the mixture resembles coarse crumbs.

2. Mix the sour cream, milk and lemon juice together in a measuring cup or small bowl. Add to the flour mixture. Add thyme leaves. Stir gently just until the mixture is no longer dry. Do not beat or overmix.

3. Scoop out dough in equal portions and place on a baking sheet that has been greased, or lined with parchment paper or a silicone baking mat. I made large biscuits and got 5 out of the dough.

4. Bake at 425 for 12-15 minutes or until the outside of the biscuit is beginning to brown. Cool slightly before consuming. These are best right away, but are just fine later, and can be frozen as well.

Makes 5-6 large biscuits