Monday, October 28, 2013

Winter Squash and Rice Casserole


I can’t remember clipping this recipe from a magazine. (Maybe because it was published in September 2002!) I can’t remember how it sifted itself to the top of my recipe to-do list. I can’t even remember how I decided that I had to make this NOW, rather than some other time this fall, except that I had a squash laying around and all the rest of the ingredients seemed to be on hand.

Remembering all that stuff might be overrated, however, as long as I remember to make this Winter Squash and Rice Casserole whenever squash is in season. Since it is made with hot broth and Arborio rice, it’s kind of like an oven risotto, but less soupy and creamy. And less demanding of your undivided attention. The squash is roasted first, some aromatics are sautéed, the rice gets a quick blast in the sauté pan, and then everything is tossed into a baking dish and the oven does the rest of the work. Oh yeah, it all gets topped with Parmesan cheese near the end. What could be bad about that?


I loved the flavors of the sweet squash, sage, garlic and onion in this fairly simple casserole. I used a butternut squash, since butternuts seem to be the easiest to peel and chop. If you happen to have a tougher squash to handle, you could pierce the skin several times with a knife, roast it whole at 350 F for 20-30 minutes, cool it until you can handle it easily, and then peel it and cut it into cubes. These cubes of squash might be tender enough to add right to the recipe as described, or you might need to cook them a little more. However you cook the squash, that part of the recipe could even be done a day or two ahead of time.

I also think this might work with another variety of rice. I’d like to try it with brown rice to bump up its Whole Food Quotient and add some nutty, whole grain flavor. Perhaps if that works, other grains, such as barley or quinoa, might work as well. Cooking times are likely to vary with these other grains, of course. I’m getting away from the risotto idea with these thoughts, but the casserole that comes out of the oven isn’t much like risotto in texture anyway.


This Winter Squash and Rice Casserole is really, really delicious, though, and quite simple to put together. I’m glad this recipe reached out and grabbed my attention from amidst the ancient recipe stacks and archives in my ridiculous collection. Even if I don’t remember how it got there.
 

Note: Sorry about the bad pics, folks. It’s that time of year when there’s no sunshine at suppertime, and food photos by a rank amateur like me suffer greatly.


Winter Squash and Rice Casserole
Adapted from Cooking Light magazine

I find butternut squash to be easiest to use here, but any good squash that you don’t mind taking the time to peel and cut into small cubes will work.

1 pound peeled winter squash cut into 1-inch cubes
2 tablespoons olive oil, divided
¾ teaspoon coarse salt, divided
3 cups vegetable broth
1 tablespoon chopped fresh sage
1 cup finely chopped onion
2 garlic cloves, minced
1 cup uncooked Arborio rice, or other short-grain rice
¼ cup dry white wine
¼ teaspoon black pepper, preferably freshly ground
½ cup freshly grated or shredded Parmesan cheese


1. Preheat oven to 350 F. In a large bowl, toss the squash cubes with 1 tablespoon olive oil and ¼ teaspoon salt. Place in a single layer on a lined or greased baking sheet or in a roasting pan. Bake at 350 F for about 30 minutes or until the squash is tender, but still holding its shape.

2. Remove the squash from the oven and increase the oven temperature to 400 F. Prepare a 13 x 9-inch baking dish by coating it with cooking spray or by greasing it with your preferred method. Set aside.

3. In a medium-size saucepan, combine the vegetable broth and sage. Bring just to a simmer. Do not boil. Keep warm.

4. In a large skillet, heat the remaining 1 tablespoon olive oil over medium-high heat. Add the onion and ¼ teaspoon salt and sauté, stirring frequently, until tender, about 5-6 minutes. Add the garlic and cook about 30 seconds more. Add the rice and cook 1 minute, stirring often.

5. Add the wine and scrape up any browned bits from the bottom of the pan. Add the cooked squash, hot broth, remaining ¼ teaspoon salt and black pepper. Cook 5 minutes, stirring occasionally.

6. Transfer the rice mixture to the prepared baking dish. Bake at 400 F for 30 minutes. Stir the mixture gently. Top with the Parmesan cheese. Bake 5 minutes more or until the cheese is melted.


Makes about 6 1-cup servings.

 
Another recipe like this one: Winter Squash Risotto

Monday, October 21, 2013

Archive Recipe of the Week: Pumpkin Alfredo

Pumpkin Alfredo Sauce is great in so many ways and for so many reasons. It’s easy. It’s delicious. It ushers in pumpkin season without much fuss. In the original post, I had served it over cheese tortellini, but I recently served it with some delicious four-cheese ravioli, and it would be great tossed with just about any noodle you like.


This recipe is quite rich, which, to me, means I can enjoy a small serving and stretch one pan of sauce and pasta over a few meals (although the sauce can separate a little when reheated. I don’t mind.) I’m beginning to think this could be lightened a bit by using half and half instead of heavy cream, or by adding a little or a lot more pureed pumpkin or squash. Next time I make it, I think I’ll try the latter idea, since I rarely have anything against more squash, at least for the next month or so.

You could also stir some sautéed or roasted vegetables into your pasta and Pumpkin Alfredo Sauce. Since this is so simple there’s lots of room for trying new variations. And since it’s so delicious, it would be pretty difficult to ruin it by trying some of those brilliant ideas I know you have.


Pumpkin Alfredo Sauce
Adapted from Food Network Magazine

hot cooked tortellini or ravioli, from about18-20 ounces fresh or frozen
about ½ cup cooking water from the pasta

1 tablespoon unsalted butter
3 tablespoons finely minced onion
2 cloves garlic, minced
½ cup pumpkin or winter squash puree (canned is fine)
1 ¼ cups heavy cream
about 1/8 teaspoon freshly grated nutmeg
½ cup grated parmesan cheese, preferably Parmigiano-Reggiano

¼ teaspoon salt
1/8 teaspoon black pepper
finely chopped parsley and additional parmesan for garnish, if desired
 

1. In a large skillet, melt the butter over medium-high heat. Add the onion and cook, stirring occasionally until soft and just beginning to brown, about 3-5 minutes. Add the garlic and cook about 1 minute more.

2. Add the pumpkin and cook about 1 minute more, stirring frequently. Add the cream and stir until smooth. Bring to a boil. Reduce the heat and boil gently for about 5 minutes or until the cream begins to thicken.

4. Stir in the nutmeg, Parmesan cheese and black pepper. Taste for salt and adjust as needed. Stir in the cooked pasta and cook just until well coated and heated through. Add some of the reserved cooking water if the sauce seems too thick. Serve with parsley garnish and additional parmesan cheese if desired.

Makes about 4 servings.
 

Thursday, October 17, 2013

Beef Empanada Pot Pie

When posting another of my husband’s favorite recipes, I referred to my great aunt’s bridal shower advice to cook my new husband’s favorite meal every once in a while as a surprise. Well, I don’t really do surprises so well, and I’m always trying new recipes, so I was in danger of neglecting that very good advice. I recently devised a list of several favorite recipes, however, and I’m trying to make one of those recipes each week. Some are simple (thank goodness for simple tastes!), but some, like this Beef Empanada Pot Pie, require a little more forethought and preparation.


This is a rich and savory pot pie, originally from the pages of Cooking Light magazine. I’m afraid I may have “un-lightened” it somewhat, adding more flour to a filling that I though was too runny and adding more olives. (I wish “light” didn’t have to mean skimping on the olives.) This makes a big stew with a flavorful crust that can feed us most of the week if we let it. It’s very beefy, but there are also a lot of diced potatoes that make the filling very, well, filling.

Speaking of those potatoes, I highly recommend cutting them into very small chunks so they cook through and aren’t unpleasantly hard. I used thin-skinned potatoes this time around, and they only needed to be scrubbed, but you can peel yours if you wish. Actually I had made this potpie just a week before I made the one in these photos, which is an unprecedented level of repeat around here, but it wasn’t until I got it into the oven, crust and all, that I realized that I had left the potatoes out entirely. I hadn’t even cleaned and chopped them. Total neglect. (The pot pie was actually very good without them, really, but it didn’t stretch to as many servings without the potatoes’ extra bulk.)


This is a delicious meal, and, although I can’t handle quite so much beef, nor as large a serving as my husband, I like it almost as much as he does. It’s like a stewy-er version of a perky, savory, slightly spicy empanada with an empanada crust on top rather than enfolding the filling. I reserve it for meals in the colder months, since it requires some hot oven time and is so filling and hearty. Since the colder days seem to be here to stay for a while, Beef Empanada Pot Pie goes on the “Deserving Husband’s Favorites” list for a while. I can’t help it if I really enjoy this one, too.

Other recipes from the archives on the “Deserving Husband’s Favorites” list:

Italian Chickpeas
Soup Beans
Spaghetti Pie
Beef and Guinness Pot Pie


Beef Empanada Pot Pie
Adapted from Cooking Light magazine

I use the dark Mexican beer, Negra Modello, for this pot pie. I also usually use a fairly lean ground beef and do not feel I need to drain any fat after browning it. If yours is less lean, you can drain some of it off before adding the vegetables to the pot.

for the crust:
1 cup all-purpose flour
½ teaspoon ground cumin
½ teaspoon chili powder
¼ teaspoon fine salt
¼ cup cold butter, cut into small pieces
3-5 tablespoons ice water
1 tablespoon cider vinegar

for the filling:
1 pound ground beef
1 ½ pounds diced potato, peeled if desired (about 4 cups)
1 cup chopped onion
½ cup chopped bell pepper
2 large garlic cloves, minced
1 small fresh chile pepper, minced
1 ½ teaspoons dried oregano
1 ½ teaspoons chili powder
1 teaspoon ground cumin
½ teaspoon fine salt
½ cup all-purpose flour
½ cup beer (I use a dark Mexican beer)
1 (10.5 ounce) can beef consommé
1 (14.5 ounce) can diced tomatoes
¼ cup chopped green olives (pimiento-stuffed are fine)
1 tablespoon cider vinegar

1. To make the crust: combine the flour, cumin, chili powder and salt in the bowl of a food processor. Pulse to combine. Add the butter and process until the butter is in very small, flour-coated pieces.

2. Add the vinegar and about 3 tablespoons ice water. Pulse until the mixture just begins to come together in a ball, adding more water as needed.

3. Turn out the dough onto a surface lined with a large sheet of plastic wrap. Press mixture gently into a rectangle and cover with another sheet of plastic wrap. Roll the dough between the plastic wrap sheets into an oval or rectangle roughly the size of the dish you plan on using to make the potpie, about 12 inches by 8 inches. Refrigerate until ready to use.

4. Preheat oven to 400 F. Place the ground beef in a very large pot or Dutch oven over medium heat. Cook until the meat is browned. Drain excess fat from the meat if desired and return the meat to the pan.

5. Add the onion, bell pepper and potato. Cook about 10 minutes or until the onions and peppers are tender. Add the chile and garlic and cook about 30 seconds more. Stir in the oregano, chili powder, cumin and salt. Add the flour and cook, stirring for about 1 minute.

6. Add the beer and scrape the browned bits from the bottom of the pan. Add the beef consommé and tomatoes. Cook, stirring often, for a few minutes or until the liquid has thickened. Stir in the olives and cider vinegar.

7. Pour the mixture into a deep casserole dish, approximately 11 inches by 7 inches. (I used a 3-quart oval casserole.) Remove the plastic wrap from one side of the crust. Place that side of the crust down onto the filling. Remove the remaining sheet of plastic wrap. Fit the crust to the sides of the dish, folding over as needed. With a sharp knife, make 3-4 slashes in the crust.

8. Bake at 400 for 35 minutes or until the crust is golden brown and the filling is bubbly. Cool 10 minutes before serving. Cover and refrigerate leftovers for re-heating.

Makes 6-8 servings.


Monday, October 14, 2013

Archive Recipe of the Week: Pumpkin Pie Spice


You don’t need me to tell you how to use the warm blend of sweet and sassy spices known as Pumpkin Pie Spice. You just have to stare hard at your Google machine this time of year and a million and one recipes for sweets containing pumpkin (including, of course, pumpkin pie) will come boiling to the surface. That’s why I decided to feature The Messy Apron Pumpkin Pie Spice as this week’s Archive Recipe of the Week (ARoW).

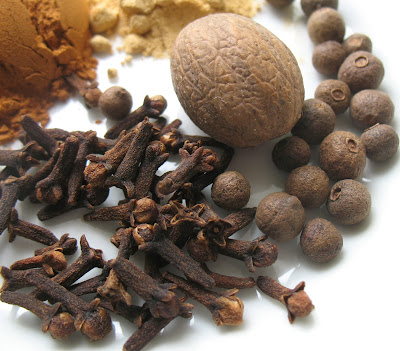
There’s definitely more than one way to combine spices into a mix and call it Pumpkin Pie Spice, and you can save yourself some time by buying a prepared Pumpkin Pie Spice from the spice rack of any supermarket. I like to make my own, however, largely because I tend to have all the ingredients that I use in The Messy Apron Pumpkin Pie Spice blend in my cupboard…in bulk. And what else am I going to do with many dozens of whole cloves and allspice berries anyway? 

 
I tend to start with whole spices when I can, at least in the case of nutmeg, cloves, and allspice (also cardamom when it comes up), because they really do keep their flavor longer than ground spices do. When it comes to nutmeg, I actually find the freshly-ground version to have such an entirely different, and much better, flavor that it would have to be a pretty extreme emergency for me to ever buy ground nutmeg. I grind a little of each spice at a time and maybe use some in this spice blend or maybe in something else (like this cake), trying to use up the little that I grind before it loses its superior flavor.

I first posted The Messy Apron Pumpkin Pie Spice along with the recipe for these frosted pumpkin cookies, but it would be useful in Grandmama’s Pumpkin Pie, and just about any of the sweets listed here. And, of course, in all those delicious pumpkin recipes everywhere else out there, too.


The Messy Apron Pumpkin Pie Spice

1 ½ tablespoons ground cinnamon
1 teaspoon ground ginger
1 teaspoon ground nutmeg
1 teaspoon ground cloves
1 teaspoon ground allspice

1. Combine all the spices and mix well. Keep in an airtight container for a few months.

Makes a scant 3 tablespoons.

Thursday, October 10, 2013

Plum Poppy Seed Almond Muffins


Sometimes I just need to present a recipe on The Messy Apron to share how good somebody else’s idea is. In this case, I’m talking about the plum and poppy seed muffins in The Smitten Kitchen Cookbook by Deb Perelman. So, do fresh plums make a good addition to muffins? Oh, yes! Do they go well with poppy seeds? You bet.


I fiddled with the flavors of this recipe a little bit by adding some more spice, a little crunch in the form of chopped almonds, and some vanilla and almond extracts. I love almond with stone fruits and, since I didn’t brown the butter for these muffins as in the original recipe, I thought some almond extract would give me a little additional compatible flavor.
 

As far as the proportions of fruit, flour, liquid and leavening go, I didn’t mess around with this already very good recipe. If you own a copy of The Smitten Kitchen Cookbook and were wondering where to start sampling its delights, I can highly recommend the plum and poppy seed muffin recipe. The batter is quite thick but the big dose of chopped plums contributes significantly to the moisture of the baked muffins making them soft and fruity…and delicious. I do recommend “dicing,” that is, cutting the plums into very small cubes so they can be well-distributed and to avoid soggy portions in your muffins.
 

I used roughly equal amounts of some nice, sweet, plump, dark-skinned plums and some small, red, slightly tart, locally grown plums that I had sitting in the refrigerator (waiting for me to get around to trying this recipe). This combination worked really well, and I think you can use any plums that taste good. Of course, any recipe is better with good-quality ingredients, but starting with a good-quality recipe is even better. My own changes are a matter of taste, but you don’t have to trust me at all. Trust The Smitten Kitchen Cookbook for the great ideas.


Poppy Seed and Plum Muffins with Almond
Adapted from The Smitten Kitchen Cookbook by Deb Perelman

6 tablespoons unsalted butter
1 cup all-purpose flour
½ cup whole wheat pastry flour
¾ teaspoon baking powder
¾ teaspoon baking soda
¼ teaspoon salt
½ teaspoon cinnamon
1/8 teaspoon nutmeg, preferably freshly grated
2 tablespoons poppy seeds
1 large egg
¼ cup granulated sugar
¼ cup dark brown sugar
¾ cup sour cream
½ teaspoon vanilla extract
½ teaspoon almond extract
2 cups diced fresh plums (any variety)
½ cup finely chopped almonds

 
1. Preheat oven to 375 F. Spray a 12-cup muffin pan with cooking spray (or grease it with butter or oil.) Or you can line the muffin cups with paper liners if you prefer.

2. Melt the butter and set aside to cool.

3. In a medium-size bowl, combine the all-purpose flour, whole wheat pastry flour, baking powder, baking soda, salt, cinnamon, nutmeg, and poppy seeds. Stir together with a whisk (or you can sift if you prefer).  Set aside.

4. Beat the egg lightly with a whisk. Whisk in the butter. Whisk in the granulated and brown sugar, then whisk in the sour cream, vanilla and almond extracts until smooth.

5. Pour the egg mixture into the flour mixture and stir until just a few dry spots remain. The batter will be thick. Stir in the plums and almonds.

6. Distribute the batter evenly among the prepared muffin cups. Bake at 375 F for 15 to 18 minutes or until a wooden pick inserted in the center of a muffin comes out free of wet batter.

7. Cool in the pan on a wire rack for about 5 minutes. Carefully remove the muffins from the pan. If they are difficult to remove, cool a little longer. Cool completely on a wire rack, or at least until they are just a little warm.
 

Makes 12 muffins


Monday, October 7, 2013

New Feature: Archive Recipe of the Week


I’m introducing a new feature to The Messy Apron: Archive Recipe of the Week (ARoW). While trying new recipes and sharing the details is the main objective of this space, I can’t help but wish to revisit some of the good ones.

In some cases, these dishes deserve new, better photos than the ones I posted in the early days, or the ones I took after I had some experience, but still didn’t have proper lighting or even an especially good sample to photograph. In other cases, the written recipe itself needs some improvement. Mostly, though, I want to revisit some of these recipes because I like them. They result in good food that I want to make and serve again and again, and as the seasons in which they are best featured approach, I want to present them here again.

 
So let’s kick this off with the simple but absolutely delicious Apple Cinnamon Coffee Cake. I made it this weekend for breakfast and was reminded of what a good fall go-to recipe it should really be. The ingredient measurements are quick and easy and if you do even a little baking, those ingredients should be close at hand. You could even replace the whole wheat pastry flour, which I added to bump up the cake’s Whole Food Quotient, with more white all-purpose flour if that’s what’s in your kitchen.

To make things even easier, you can measure and mix the dry ingredients and the topping ingredients ahead of time, cover them and let then stand until they are ready for you (I would refrigerate the topping mixture). Also to make things easy, I never measure the chopped apple for this cake, but just peel and chop a largish apple and stir it in.


I think this basic, simple cake could be adapted for use with other fruits and nuts, which would make this an even more important recipe to have right in the kitchen at all times, or even to commit to memory. Right now, apples rule, and even if I don’t have time to try anything new, I still have time to make Apple Cinnamon Coffee Cake.


Apple Cinnamon Coffeecake
Adapted from Cooking Light magazine.

for the streusel topping
¼ cup packed brown sugar
2 tablespoons all-purpose flour
½ teaspoon cinnamon
2 tablespoons cold butter cut into small pieces
 

for the cake
1 cup all-purpose flour
½ cup whole wheat pastry flour
1 cup sugar
1 ½ teaspoons baking powder
2 teaspoons cinnamon
½ teaspoon salt
1 large egg
2 tablespoons butter, melted and cooled
¾ cup milk
1 teaspoon vanilla extract
1 cup diced peeled apple, or about 1 large apple

1. Preheat oven to 350 F.  To make the streusel topping, combine the brown sugar, 2 tablespoons all-purpose flour and ½ teaspoon cinnamon in a small bowl.  Whisk together to combine.  Add the cold butter pieces and work into the flour mixture with a fork or your hands until the butter is evenly distributed in small, crumbly pieces.  Set aside.  (Cover and refrigerate if making ahead.)


2. Combine 1 cup all-purpose flour, whole wheat pastry flour, sugar, baking powder, 2 teaspoons cinnamon and salt in a medium-size bowl.  Whisk or sift to combine.  Set aside.  (Cover and store at room temperature if making ahead.)

3.  In another medium-size bowl beat the egg with a whisk.  Whisk in the melted butter.  Whisk in the milk and vanilla extract.  (Cover and refrigerate if making ahead.)

4. (Preheat oven to 350 F and peel and chop the apple before proceeding if the other ingredients have been prepared ahead.)  Add the egg mixture to the flour mixture and stir until almost combined, but a few dry spots remain.  Stir in the apple.

5.  Grease an 8-inch square baking dish or spray it with cooking spray.   Pour the batter into the dish and spread it evenly.  Sprinkle the streusel mixture evenly over the top of the batter.

6.  Bake at 350 F for 40-45 minutes or until a wooden pick (or other cake-tester) inserted in the center comes out free of wet batter.  Cool in the pan on a wire rack 10 minutes.  Serve warm from the pan.  Cover leftovers, which will keep for a few days.  Rewarm in the microwave.

Makes 9 servings.


Friday, October 4, 2013

Autumn Recipe Fantasies


There aren’t enough hours in the day. There aren’t enough hours in the day nor enough calories I can tolerate. That makes much of my fall cooking plans almost pure fantasy. But I am ever the dreamer when it comes to recipes and I tend to get a burst of ambition in the fall, partially driven by the cooler weather, partially by memories of the excitement I would feel at the beginning of a new school year. (What can I say? I liked school.)

Just as the school year isn’t really new, however, neither is the fall cooking and baking season. Sadly, even though an abundance of beautiful apples has been around for a few weeks, I haven’t tried any new apple recipes. I haven’t even made any of my favorite old apple recipes (although I’ve eaten many fresh apples.) And don’t get me started on pumpkins and squash. I have just begun to think of those.

Yes, it’s apples and pumpkins that seem to be forming the core of my autumn recipe fantasies. I have great hopes for trying out all kinds of delicious things containing these two fruits of the harvest. Most of them are sweet treats (observe my regrets in the form of the reference to tolerable calories in the first paragraph of this post), and many of them will take a bit more of those precious hours of the day than I really have available, but I’ve collected so many hundreds of tantalizing recipes and a girl must dream.

There’s Brown Sugar Apple Cheesecake, Apple Pie Ice Cream, Apple Cinnamon Scones and Caramel Apple Crumble Bars, plus countless variations on apple crisp and cobbler, and many, many apple cakes and pies. I have one of those mini-pie making contraptions that I haven’t even taken out of the box, and I thought perhaps I could adapt this apple turnover recipe into mini pies.

When it comes to pumpkin, I’m dreaming of Pumpkin Cheesecake (I’ve somehow acquired many recipes), Pumpkin Spice Scones, Chocolate Pumpkin Pie Bars, Pumpkin Biscotti and Pumpkin Pound Cake. While Grandmama’s Pumpkin Pie reigns supreme, I wouldn’t turn my nose up at the countless variations on pumpkin pie I seem to have accumulated, nor am I too proud for cupcakes or another version of pumpkin muffins besides this one, or other pumpkin cookies besides these. 

Even hoping and dreaming about these recipes should keep me busy until it’s time to think of Christmas cookies and candies, and for all this talk about fantasies, I really do plan to get to at least a couple of these recipes in the next few weeks.

But then there will also be pears and cranberries and winter vegetables of all kinds….