Monday, November 23, 2009

Hurrah for the Pumpkin Pie!


I enjoy pumpkin pie enough to eat it just about all year, but somehow it doesn’t taste quite right until at least mid-October. Then, one can come up with an excuse to make it just about any week (although I don’t, because there are so many other recipes to try and only so many calories I can handle!) There’s the nice, traditional autumn dinner after Halloween, say, that’s begging for a traditional autumn dessert. There’s that week or two before Thanksgiving when you just can’t wait, or you want to try that new pumpkin pie recipe before serving it on the big day. Then, of course, there’s Thanksgiving itself, when pumpkin pie is mandatory. No questions. No excuses. Pumpkin pie.


For the last several years, I’ve been making my pies from one recipe. Sure, I’ve got a stack of others I’d like to try, lighter pies, fancier, spicier pies, pies with different crusts, toppings and mix-ins. When it gets down to it, though, I usually say, “Why try another pie?” This one is the one

This recipe was given to me my by mother in-law (hi, Sherry!) and was the much-loved recipe of her mother in-law. This is the pie that everyone wants in Harry’s family (especially Harry), and not just because it’s Grandmama’s pie. It also happens to be very, very good. It’s just a little richer, just a little creamier, just a little more old fashioned than other pies. The filling stands up for itself without slumping and weeping, with a consistency somewhere pleasantly between custard and cheesecake that is never grainy or watery.

I had to call my mother in-law last week, in an emerging panic because I had lost this recipe. Lucky for me, she had it readily available (one of the million or so things to be grateful for this Thanksgiving). We discussed the recipe at some length, and I decided to use some more detail in its directions, and I have provided those here. I also added some spices, but those are really a matter of taste anyway. As long as you have some cinnamon, you probably don’t need to stock up on spices that you don’t think you’ll ever use again (although the allspice is in the original recipe and a real asset to the team).

This recipe is for one pie, but is easily doubled (in case, like me, you have friends who request you make their serving a double…you know who you are). This isn’t difficult, but it can be a bit messy if you’re like me in the kitchen.

It really is worth it, however, and when you serve this pie on Thanksgiving (or Christmas or any other day you see fit) they’ll be saying “Hurrah!” for you and “Hurrah!” for Grandmama’s Pumpkin Pie! Happy Thanksgiving!


Grandmama’s Pumpkin Pie Recipe
It is likely that you will have more filling than you can easily fit into the pie shell. If so, pour the excess in a ramekin and bake it alongside the pie. It will take less time than the pie to fully bake.

You could use any single-crust pastry recipe you like, although I recommend a traditional, plain crust. Store-bought crusts are fine. Adjust the spices in the filling as you like them.

1 ½ cups milk (375 ml)
3 tablespoons (about 1 ½ ounces or 40 g) butter
3 eggs
¾ cup (about 5 ½ ounces or 155 g) sugar
1 (15 ounce or g) can pumpkin or 15 ounces (425g) smooth pumpkin or winter squash puree
¾ teaspoon (3ml) ground cinnamon
½ teaspoon (2 ml) ground allspice
¼ teaspoon (1 ml) ground ginger
¼ teaspoon (1 ml) ground cloves
¼ teaspoon (1 ml) freshly ground nutmeg
1 unbaked pie crust, arranged in a pie pan
whipped cream for serving

1. Preheat oven to 450 F (230 C). Heat milk in a medium size sauce pan over medium heat until it reaches 180 F (82 C). This is just before the milk boils. (Do not bring all the way to a boil.)

2. Remove the milk from the heat and add the butter. Stir to melt the butter and set aside to cool somewhat.

3. Meanwhile, beat the eggs and the sugar together in a large bowl until they are fluffy and pale. Add the pumpkin and the spices and whisk together. Slowly add the milk mixture and whisk until very well combined.

4. Place the crust in the pan on a large baking sheet. (This will make the pie much easier to maneuver.) Pour the filling into the prepared, unbaked pie crust. Reserve any filling that does not fit and bake it separately in a ramekin for a treat for the cook.

5. Cover the exposed edges of the pie crust with strips of aluminum foil. Carefully transfer the baking sheet with the pie into the 450 F (230 C) oven and bake for 20 minutes.

6. Reduce the oven heat to 350 F (180 C). Bake 15 minutes. Remove the foil from the crust. Bake an additional 15 to 25 minutes. The crust should be golden brown and the center of the pie should wobble just a little when the pie is very gently shaken. Remove from the oven and cool completely before slicing. Serve with whipped cream.

Makes 8 to 10 servings. Eat leftovers within a couple days. Recipe is easily doubled to make two pies.

Thursday, November 19, 2009

Cranberry Sauce: Canning The Can


Several years ago, I was preparing to attend a big Thanksgiving dinner at my grandmother’s house. I asked my mom what I could bring. She got back to me a little while later with Grandma’s request that I bring the vegetables. Okay. I couldn’t think of a good recipe immediately, but my collection was growing on its way to the epic proportions it now has, and I could come up with something. But no. I was being asked to bring raw cut vegetables. It was the equivalent of being patted on the head and told, “Don’t worry your little self about cooking something. We know you can’t do that. Just bring some carrot and celery sticks.” And they didn’t even soften the blow by calling it a crudite' platter.

To add injury to the insult, when we sat down to Thanksgiving dinner, there was no cranberry sauce and *gasp* no pumpkin pie! (Harry, who loves them both, almost cried.) Both of these are dishes I can make well (I hope to post a pumpkin pie recipe soon), and I grumbled a bit to myself and vowed that such a thing would never happen again.


If you are about to find yourself in a similar predicament, here’s what you can do: before anyone tells you what to bring, volunteer to bring the cranberry sauce. Oh sure, they’ll be expecting you to bring The Can. The Can is iconic, predictable, comes in jellied or fancy-pants whole berry varieties. The Can is an American institution.
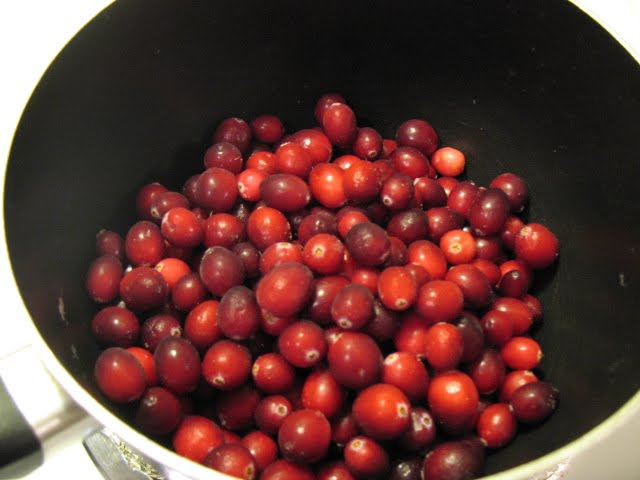
Phooey on the can! If you can boil water and use a measuring cup (you don’t even have to use it all that accurately), you can make cranberry sauce. If you can get your hands on fresh or frozen cranberries in a 12 ounce (340 g) bag (Ocean Spray brand should be just about everywhere), a cup of liquid and a cup of sugar, you’re in business. It will taste so fresh and delicious and will look so, well, not out of a can that its presence will be met with murmurs of awe. You will be the hero. No more of the perfunctory smear of deep red goo that gets pushed around the plate until it is dissolved into that last puddle of gravy and that tiny bit of stuffing that you just didn’t have enough extra notches on your belt to accommodate.

Maybe I’m getting carried away, but his is great stuff. We particularly like it made with orange juice or apple cider. The citrus punch of the orange juice compliments the sour acidity of the cranberries and helps cut through stodgy holiday fare like turkey, stuffing and mashed potatoes. Apple cider tames the acidity a bit and makes a mellower sauce. I’d also like to try pineapple or pomegranate juice. You could even use water for a cranberry-only taste. (I’ve also seen recipes using red wine, but I can’t remember if I ever tried one.)
This recipe can be made ahead, even a few days. Refrigerate it until an hour or two before you’re going to eat it, then let it come to room temperature where it tastes best. This really is easy and would probably take less effort than cutting up vegetable sticks. If you do decide to bring the vegetable tray, however, at least have the style to call it crudite'.
Cranberry Sauce Recipe
You can use just about any juice that you like, or even water to make this cranberry sauce. I particularly like orange juice and apple cider.
1 12-ounce (340 g) package fresh or frozen cranberries
1 cup (250 ml) sugar
1 cup (250 ml) juice or water

1. Combine cranberries, sugar and juice or water in a medium-size saucepan. Stir together and cook over medium-high heat.


2. Bring to a boil and reduce heat to medium. Cook 8-10 minutes or until the cranberries have all burst and the sauce has thickened. Remove from the heat. Serve at room temperature or store in the refrigerator for a few days. Let chilled sauce come to room temperature before serving.


Makes 6-8 servings.

Tuesday, November 17, 2009

Two Heads are Better


They say that two heads are better than one. I say that if they are heads of cabbage and cauliflower, you’re on the right track. Add an apple (to keep the doctor away), a creamy dressing, a bit of onion, and the Old World charm of caraway seeds, and you have a crunchy salad that takes slaw in from the picnic table and onto the autumn and winter dinner plate.

I like to make creamy dressings with a combination of mayonnaise and sour cream. The mayonnaise has the right body, while the sour cream provides some tang and keeps the dressing from feeling too heavy or gloppy. The addition of cider vinegar perks it up even more and provides an added bonus: it keeps the apples from turning brown.

The cool creaminess of the dressing contrasts very nicely with the creaky crunch of the chopped (not shredded) cabbage, the funky pop and crumble of the cauliflower and the tart crispness of the apple. The caraway…I don’t know. It was that flavor that was the most pleasant surprise to me when I first tried this recipe. Somehow caraway seeds just seem right in this salad, like they were born there (or are at least among a grouping of flavors that evolved together).

If you are serving a large group, I think this recipe could be easily doubled. Otherwise you don’t need two whole heads of vegetables to make this salad. It’s also quite easy to make, and the accuracy of measurements aren’t absolutely crucial, so it shouldn’t require two heads to figure it out. It tastes so good and is so much fun to crunch, however, you may just wish you had two heads so you could enjoy it twice as much!

Crunchy Cabbage, Cauliflower and Apple Salad Recipe
Modified from a recipe in Eating Well magazine.

1/3 cup (75 ml) mayonnaise
1/3 cup (75 ml) sour cream
2 tablespoons (30 ml) apple cider vinegar
1 teaspoon (5 ml) caraway seeds, coarsely crushed
½ teaspoon (2 ml) salt
¼ teaspoon (1 ml) freshly ground pepper
¼ cup (about 1 ounce or 30g) finely chopped red onion
8 ounces (250g or about 2 cups) chopped green cabbage
8 ounces (250g or about 2 cups) chopped cauliflower
1 chopped tart, crisp apple, cored (no need to peel)


1. Combine mayonnaise, sour cream, red onion, cider vinegar, caraway seeds, salt and pepper in a large bowl. Whisk to blend well.

2. Add onion, cabbage, cauliflower and apple to the dressing. Toss well to coat with the dressing.

Can be made a few hours ahead, since the vinegar in the dressing keeps the apples from getting brown. Keep chilled. Leftovers also last a few days in the refrigerator.

Makes about 6 servings.

Friday, November 13, 2009

Potato Frittata

I wish I could say this was a spontaneous dish made with lingering leftovers and some other things I just happened to have on hand, a great breakfast that I threw together with what I had laying around, the equivalent of a fabulous special occasion gown that you just brush off as, “Oh, this old thing?” It should have been, but it wasn’t. I planned this potato frittata in advance.


It all started with an abundance of potatoes (more bounty from our CSA) and an old podcast of The Splendid Table. Lynne Rossetto-Kasper was teaching a caller, step by step, how to make a Spanish-style frittata (or tortilla as it is known in Spain), and it made me hungry. I’ve made frittata before, such as this Zucchini Frittata back when zucchini was in style (now it’s so three months ago). This one, I would make with a bed of fried potatoes with bacon, green onions, and cheese. And so, a few days ahead, I boiled some extra potatoes when we were having mashed potatoes for dinner, and I went shopping for the bacon and onions.


I used all the same techniques as I did in the Zucchini Frittata, except that I first cooked the bacon, rendering the fat, some of which I used to cook the potatoes. I also used one less egg, which was due to bad memory and lack of record checking more than anything else. In hindsight, perhaps the added bacon and bacon fat may have made up for the missing egg, at least as far as fat, calories, and life span go. You could skip the bacon and just fry the potatoes in oil or butter.

This really could be a spontaneous dish, depending on what you have in abundance or left over. You could use leftover cooked pasta or vegetables in place of the potatoes. I’m even wondering how good leftover Roasted Vegetables would be. While we had this for breakfast, it really is appropriate for any meal. It is quite inexpensive and could be a last minute dish. Unexpected company? Don’t panic, just whip up a frittata with leftovers and you can greet the oohs and ahhs over your genius with, “What? This old thing?”


Potato and Bacon Frittata Recipe
Consider boiling, baking or roasting extra potatoes next time you serve them, and keep them on hand for quick frittatas.

3 strips thick-cut bacon
1 tablespoon canola or vegetable oil
3 medium cooked potatoes, peeled and coarsely chopped (about 2 cups)
1 teaspoon salt, divided
4 eggs
¼ cup milk
¼ teaspoon pepper
4 green onions, finely chopped
¾ cup shredded Colby-Jack or other easy-melting cheese, divided
2 tablespoons minced parsley

1. Cook the bacon in a 10-inch nonstick skillet with an oven-proof handle over medium heat until crisp. Remove the bacon from the pan and drain on paper towels. Remove all but 1 tablespoon rendered bacon fat from the pan.

2. Add canola oil to the pan. Add the potatoes and ½ teaspoon salt. Cook the potatoes over medium heat until they are golden brown. Stir or turn the potatoes occasionally to brown on all sides. This will take some time, perhaps 15 to 20 minutes.

3. Meanwhile, in a medium-size bowl, beat the eggs with the milk using a whisk or a fork until well blended. Stir in remaining ½ teaspoon salt, pepper, green onions, and ½ cup cheese. Crumble the bacon and stir that in also.

4. Preheat the broiler and place an oven rack in the middle of the oven. When the potatoes are golden brown, reduce the heat under the pan to medium low. Add the egg mixture. Stir gently and cook until the eggs are set around the edges of the pan. (The middle will still be runny.)


5. Top the egg mixture with the remaining ¼ cup cheese and place under the broiler on the middle rack in the oven (this allows the frittata to be heated from the top, but not too intensely). Broil about 5 minutes or until the top is set and beginning to brown.

6. Remove from the oven and sprinkle with parsley. Allow to stand about 10 minutes. Cut into wedges and serve.

Makes about 6 servings