Wednesday, April 29, 2009

Study Food: Apricot Almond Oatmeal Cookies

It's the end of semester
For college professors
As well as for those whom they teach.

It's final tests
And little rest
And lots of work for each.

I began a tradition
To help this condition
Though it makes my apron a mess:

Cookies I'll bake
For the students to take
To aid in relieving their stress.


Harry (my husband) teaches astronomy and physics at St. Mary's University of Minnesota here in Winona, and at the end of the semester, I bake cookies for his students (and for him.) These Apricot and Almond Cookies with White Chocolate are some of his favorites. They also go over well with the students, but then again, college students are usually hungry and tend to be grateful for any homemade foods.

Classes at St. Mary's are small, so there are always leftover cookies that Harry shares with me (one for you, two for me...one for you, three for me.) We like California dried apricots in this recipe, which are quite tart and offer a nice contrast to the sweet white chocolate. (Sun Maid brand markets them, and you can find them at the supermarket with the other dried fruit.) Turkish apricots are a fine, if sweeter, substitution, and you're sure to be able to find them.


I offer instructions here for using a heavy-duty stand mixer, but there is no reason you couldn't make cookies with a bowl and a spoon. Stirring cookie dough by hand probably builds character anyway!


Apricot and Almond Cookies with White Chocolate
adapted from Cooking Light Magazine

1 cup all purpose flour
1 cup regular oats
½ tsp baking soda
¼ tsp salt
¾ cup packed brown sugar
6 tablespoons butter (3/4 stick), softened
1 tsp almond extract
1 large egg
¾ cup chopped dried California apricots
½ cup chopped white chocolate (or white chocolate chips)
½ cup chopped almonds


Preheat the oven to 350 F

1. Combine flour, oats, baking soda and salt; stir together with a whisk.

2. Place sugar and butter in the bowl of a stand mixer; beat at medium speed until well blended. You want this to be nice and creamy-looking, with no large lumps of butter.

3. Add the almond extract and egg. Beat until well combined. Gradually add flour mixture, beating until blended. Stir in the apricots, white chocolate, and almonds.

4. Form balls out of the dough, about 1 tablespoon each and place them 2 inches apart on lightly greased cookie baking sheets. Bake at 350 F for 12 minutes or until lightly browned.


5. Place the cookie sheet on a wire rack and cool the cookies on the pan for 1 minute. Remove the cookies from the pan and cool completely on wire racks. Well, okay, you’re probably going to want to eat some while they’re still warm. They need to be quality-tested before you share them with anyone else, right?

Makes about 30 cookies.


Monday, April 27, 2009

Bread from Home


Not so long ago, when gasoline prices were hovering around four dollars per gallon, we decided to drive the car less, and Harry stopped coming home for lunch. That meant he would be brown-bagging it (okay, so he uses a blue and white cooler, but you get the point), and that meant lots of sandwiches. And for those sandwiches, I would be trying to bake the bread as much as possible. Now, bread baking is a regular thing in our home, and I make at least one loaf a week. We almost never buy sandwich bread in a bag.

There are untold resources for baking the perfect loaf, and I have picked and chosen techniques and ideas from many of them over the years. While I don’t mind fiddling around the kitchen, my patience is not infinite. (I can almost hear those of you who know me laughing at the understatement.) My loaf needs to be the result of a relatively straight-forward process (I’m not very good at kneading by hand, and like to use the dough hook on my heavy-duty stand mixer) with easy-to-acquire ingredients (I’m not ordering dough conditioners or artisan starters, and that’s all there is to it).

Here are a few things I think go a long way toward helping to make a good loaf of bread.

Use good quality flour. Recently, with the price of wheat going as high as an elephant’s eye, some manufacturers have chosen to use lower-protein flours to keep their costs (and, therefore, your costs) down. Believe me or don’t, but I could tell the difference, especially when making bread. King Arthur Flour has vowed to keep their product quality consistent, and I have been having excellent results with their flour. You can order directly from the Baker's Catalogue, and I have been able to get at least some of their flours locally(at a pretty reasonable price) here, here, and here. Be prepared to pay more for these products.

Make a mini-starter. Usually when we think of a starter (or biga, ferment, etc.) for bread, we think of artisan sourdoughs and European breads that take weeks to result in an edible loaf. The starter does, however, have its place in the everyday sandwich loaf. I began using what I think of as a mini-starter after seeing this technique in good bread baking books, my favorite being Whole Grain Breads by Machine or Hand by Beatrice Ojakangas. I think the flavor of the bread is improved by taking the time for this step, and I believe the yeast growth is more reliable.

It basically involves mixing up the yeast, liquid, and some of the flour and letting it ferment for at least 15 minutes, although I tend to go 30 minutes. Salt controls the growth of yeast, and I like my yeast to really take off in the starter, so I leave the salt out until I’m ready to add the remaining flour. I have forgotten to put the salt in, which didn’t seem to affect the yeast, but had a huge effect on the flavor of the bread. (Ugh!)

The best way to get a good loaf is through experience. Know your strengths and know your equipment. For instance, I know I’ll make better bread if I knead it with a heavy-duty mixer than by hand. I know it works for me to knead in the flour at low speed (#1) and then knead at speed #2 for about 10 minutes. I know that the loaf is baked properly in my oven at 375 F for 32 minutes. (I haven’t checked the accuracy of my oven temperature. It is a good idea to do this, by the way. Oven thermometers are easy to come by and inexpensive.) The best way to bake good bread is to bake a lot of bread. Try different recipes. Take notes. I wasn't always good at baking bread. Some of my loaves would have been best used as doorstops. I got better.

Well, perhaps that’s more than you ever cared to read about baking bread. I could go on, of course, but instead here’s the recipe and method I use for our everyday wheat sandwich bread.

Note (January 19, 2010): I've been kneading my breads by hand and, in many cases, making better loaves as a result...plus I'm burning more calories in the process! I used to be terrible at this, but I think experience has once again proven to be a good teacher.


Wheat Sandwich Bread

1 tablespoon honey (you could use sugar)
2 teaspoons active dry yeast (or 1 envelope of yeast)
1/3 cup warm water (about 100 F; it should feel warm to the touch, but not hot)
1 cup milk
1 tablespoon butter
1 cup whole wheat flour
2 cups bread flour, divided
1 tsp salt

1. Place the honey and yeast in the bowl of a heavy-duty stand mixer (or another large bowl if you wish to mix by hand). Pour the water over them and swirl the mixture around to combine. Let stand for 5 minutes or until the yeast is bubbly.


2. Put the milk and butter in a microwave-safe container or measuring cup. Microwave on high for 1 minute.

3. Add the whole wheat flour and 1 cup of bread flour to the yeast mixture. Add the milk and butter mixture. Beat until well combined, using the paddle attachment of the mixer (or a hand mixer or a large spoon). Let this starter stand for at least 15 minutes or up to 30 minutes.

4. Add about ½ cup of the remaining bread flour. Using the dough hook for the mixer, knead in the flour (or knead by hand if you are of stronger stuff than I am). Continue kneading, for about 10 minutes, adding as much of the remaining flour as the dough will “take.” (Here is where experience will be your best friend). The final product should be a little tacky to the touch, but smooth and stretchy.

5. Form the dough into a ball and place it in a greased (I seem to be addicted to cooking spray) bowl. Grease the top of the dough ball and cover it loosely with plastic wrap. (This will keep the dough from drying out.) Cover it all with a clean towel and leave it alone to rise for about 1 hour. It should roughly double in size, and if your kitchen is warmer than mine usually is, it might take less time.

6. Carefully deflate the dough and rearrange it. This redistributes the yeast and the gases, so the party can continue. Don’t squash it completely flat. You want to leave a little balloon-ness to the dough. Let stand a few minutes while you grease an 8” bread pan. (Once again, I use cooking spray.)

7. Gently flatten out the dough into a rectangle, then roll it into a loaf from the long side of the rectangle. Place the loaf in the prepared pan, cover it with a towel and let it rise. It should roughly double in size again. If you gently press a finger into the dough and it springs back easily, let it rise longer. If it leaves a depression, it should be properly risen.


8. Preheat the oven to 375 F. When the bread has fully risen, bake it at 375 F for 30-35 minutes (32 minutes in my oven). To know for sure when bread is done, stick an instant-read thermometer probe into the middle. It should read about 200 F. You could also tap the bread, and if it sounds hollow, it’s done. (Considerably less scientific!)
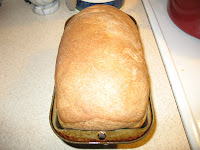
9. Remove the bread from the pan and cool it completely on a wire rack. Slice and devour as desired.

Saturday, April 25, 2009

Morning is Broken

It is safe to say that I am not a morning person. While some people hate being awake early in the morning, I hate being alive early in the morning. Sure, I’ve had jobs in bakeries that required me to be at work at 3:00 or 4:00 am, but that’s practically the middle of the night, which is easier for me to handle. Oh, and there was food involved.

I love breakfast foods, but have a really hard time making anything that involves significant preparation (that is, more complicated than spreading things on toast or pouring milk on cereal) when I’m bumbling around before my hands, feet, and brain are fully awake and engaged. That usually means that omelets, pancakes, waffles, quiche and the like are pushed to the weekends and become brunch.

This Saturday, however, I found myself up early with Harry, who had a work function to attend, and I thought it would be nice of me (really, really nice of me) to make him brunch for breakfast. Usually, I make him an egg sandwich on a bagel, which he loves, but this day, I would be bold and make pancakes (and blog about it). I strapped my apron over my pajamas and poured myself a cup of coffee.

I based these pancakes on the Better Homes and Gardens basic recipe for buttermilk pancakes. Since I’ve been making yogurt, I usually have plenty on hand, and have been substituting it for buttermilk, which I am less likely to have in the fridge. (This works well, since they both have acidity and tanginess.) I also had some organic bananas, which had become non-green at least and seemed ready enough for cooking and baking. I mashed one banana into the batter, and diced another and folded it in to make little banana pockets in the pancakes. I like walnuts with banana flavor, so I sprinkled those in too. I like to sprinkle nuts (and/or berries) onto pancakes as they cook on the first side. That way each pancake gets just the right mount of nuts, and there isn’t a blob of batter at the bottom of the bowl sans crunchy goodness.

Of course I knocked something out of the cupboard onto my electric frying pan (my preferred weapon for pancakery), putting a nick in it; I almost switched the measurements for the baking soda and baking powder (they’re not interchangeable!); and I forgot to fold in the diced banana until I had poured the first panful of pancakes. (I used a few choice words when I discovered this.) The pancakes were good, but tasted a little flat to me. It wasn’t until later when I was lying around watching the Food Network that I realized I had forgotten the salt. (Although the salty language I used when I discovered the left-out banana should have made up the difference.) *Sigh* Oh well, it was pretty early in the morning, and I’m clearly not a morning person. That’s my story and I’m sticking to it!


Double Banana Walnut Pancakes

½ cup chopped walnuts
2 medium bananas, peeled (of course)
1 cup all-purpose flour
1 tsp baking powder
¼ tsp baking soda
¼ tsp salt
1 egg
2 Tbs walnut oil (or a neutral cooking oil like vegetable or canola oil)
1 Tbs brown sugar
6 ounces plain yogurt
milk as needed (about ½ cup)
¼ tsp vanilla extract

1. Heat a griddle or frying pan over medium heat, or, as I prefer, heat an electric griddle or frying pan to 350 F.

2. To toast the walnuts, put them in a small skillet over medium heat until they just start to brown a little, and you can smell them. Stir them around the pan often. (I only let mine brown a little, because I’m always afraid to burn them.) Remove from the heat and cool.

3. Mash one banana with a fork or potato masher. Cut the other banana into small cubes.

4. Combine the flour, baking powder, baking soda and salt (don’t forget the salt!) in a large bowl. Whisk together to combine well.

5. Beat the egg with the oil in a medium bowl until well blended. Beat in the brown sugar and vanilla. Beat in the mashed banana.

6. Spoon the yogurt into a liquid measuring cup. Pour in enough milk to make 1 cup total. Stir to combine well. Add the yogurt mixture to the egg and banana mixture.

7. Pour the egg mixture into the flour mixture. Stir until just combined. You don’t want to beat the heck out of this batter. There can be a few small lumps, but don’t leave big pockets of dry flour. Fold in the chopped banana. Be fairly gentle. You neither want to smash up the banana pieces nor whip up the batter.

8. Oil or butter the heated pan, or spray it with cooking spray. (I use the spray.) Pour the batter into the pan in blobs of the size you desire. I make about 6” pancakes, which is about 1/3 of batter each. (I really should measure that some day!) Sprinkle the toasted walnuts evenly over each pancake.

9. Cook the pancakes until they are golden brown on the underside and starting to bubble on the top (this is the leaveners working.) Carefully flip them over with a spatula and cook on the second side until golden brown. If your pancakes are getting crunchy before they are cooked in the middle, cook them on a lower heat.

10. Serve hot with butter and (real, of course) maple syrup. You can hold them in a 200 F oven until they are all done if your dining companions are kind enough to want you to join them. You did just make them pancakes, after all!

Makes 8 6-inch pancakes. (2-3 servings) Serving more? Double the batch or just make a second batch.

Thursday, April 23, 2009

Earth Day for Food Lovers

Don’t you want the earth to be a nice place to live, at least for the rest of your life? Sure, we all do. Are you at least a little confused about what exactly you can do to help that effort along? Sure, we all are. There’s no denying that what we eat and how we come by it affects the world around us for better or for worse. There’s also no denying, however, that we gotta eat something.

Yesterday was Earth Day, that one day of the year when “It’s not easy being green,” takes on a whole new meaning. You can find any number of doomsayers in any number of sources telling you what you shouldn’t do, what you should give up, what you should boycott, and what you should write to your congressperson about. If you care at all, you can quickly feel like the weight of the world (or the fate of the world) is on your shoulders. At least I do. And depending on what kind of person you are, you will either go out and build a home-powered dugout with a composting toilet, or run around in a depressed panic, worrying whether you have enough reusable shopping bags, and wondering if it’s okay to use the car to pick up 20 pounds of flour, or if you should try to lug it home on foot. I tend to be in the latter, slightly frazzled camp, but I’ve recently learned to calm down a little bit, and try to see what I can do, rather than what I can’t or shouldn’t do.

Here are 5 things I think are good, affirmative starting points for improving our foodie footprint.

1. Use those reusable shopping bags I mentioned above for groceries, or bring out those tote bags you got “free with purchase” somewhere or as swag at a conference. If you can sew, make some, especially if you have some old clothes or something from which you can recycle the fabric. (Sewing tote bags out of recycled fabric is at about mile 20 on my to do list….some day!) I don’t have to tell you about the negative environmental effects of plastic bags. You’ve heard it all before. (I lived across from a Wal Mart in Kingsville, TX. It was windy there and the plastic bags were blown all over and everywhere. We called them “Kingsville Tumbleweeds.”)

2. Buy locally and seasonally when you can. Farmer’s markets are coming soon (or may have already landed in your area). Consider joining a Community Supported Agriculture (CSA) program. To find a CSA, farmer's market or similar food sources in your area, try Local Harvest. Enjoy peak freshness, peak ripeness, and peak bounty. You may be surprised to find how good your favorite foods really can be when they’re ultra-fresh, and required less energy and fuel to get to you.

3. Eat more plants. The more fruits, vegetables, beans and grains we eat, the less room we have on our plates and in our stomachs for feedlot/factory meats, unpronounceable chemicals, and high fructose corn syrup. We’ve probably all heard of the benefits of a plant-rich diet and the health and environmental drawbacks of too much meat. I’m not saying go without meat (although I wish I could do so myself). Just try some more plants. Read some vegetarian cookbooks for inspiration. Here are my current favorites.

How to Cook Everything Vegetarian, by Mark Bittman
Vegetarian Cooking for Everyone, by Deborah Madison
World Vegetarian, by Madhur Jaffery

4. Keep your Whole Foods Quotient (WFQ) high. Whole foods have less packaging and involve less processing. Foods such as dried beans and grains are also good gateways for introducing more organically grown foods into your diet. While organic fruits, vegetables, and packaged foods, such as cereals and cake mixes, can be quite pricy, beans and grains, while more expensive than those that are conventionally grown, are usually still affordable. The same goes for Organic, Fair Trade bananas.

5. Appreciate your food. Know where it comes from, who grew it or raised it and how it was prepared. Get your apron messy. Cook your own food and grow some of it yourself if you can. I know everyone can't plant a garden. I can’t, since I live in an apartment, but I do plant pots with herbs and cherry tomatoes on our patio. My messy apron tends to go from kitchen to porch, pulling double duty protecting my clothing from spilled sauces and potting soil.

Earth Day can be like a New Year’s Day complete with resolutions for making ourselves better citizens of this planet. Too often, however, our New Year’s resolutions force denial and lack upon us, setting up a cycle of failure and resentment. How about for Earth Day, instead of resolutions that leave us crying in a bland organic-tofu-and-fair-trade-turnip stew, we make affirmations like “I shall rejoice in a perfect pint of ripe strawberries grown just down the road and carried home in the bag my grandma made from old blue jeans.” Sounds good to me…and green…and delicious!

Here are some suggestions for further reading.

In Defense of Food by Michael Pollan
The Omnivore’s Dilemma by Michael Pollan
Animal, Vegetable, Miracle by Barbara Kingsolver
Food Matters by Mark Bittman (I haven’t read this one yet, but, hey, it’s Mark Bittman.)