Friday, January 29, 2010

Roasted Red Pepper Dip

I’m a big fan of snacking. I even wonder if I enjoy things like televised sporting events and movies because there’s often snacking involved: buckets of popcorn, nachos, fried cheese, hot wings, and lots of offerings from the brown and crunchy food group. And for the more plain among the crunchy things, a dip like Roasted Red Pepper, Garlic and Onion Dip in which to dunk them.

If you’re intimidated by roasting your own peppers, you can use roasted red peppers in a jar for this recipe (in fact, with the price of red bell peppers being what it usually is, those in the jar can be more economical). Roasting peppers isn’t difficult, though. Just place whole peppers under the broiler and let them get black all over. You could also do this on a grill. The smoky flavor they get is even better than what the oven broiler has to offer. The method is the same. The heat just comes from the opposite direction.

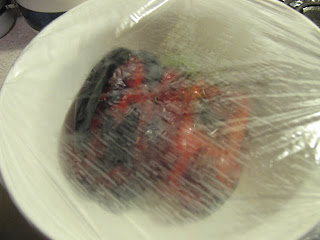
You may think you’ve ruined your peppers at this point, that you’ve charred them beyond redemption. Trust me, they’re just fine. Place them in a large bowl, cover with plastic wrap and leave them to their steam bath for about 20 minutes or so (you could also put them in a paper bag). When they’re cool enough to handle, the charred skin peels right off, and you have tender pepper flesh ready for whatever application you have in mind.


Roasting garlic is another useful technique with many applications. You just wrap a whole head of it up in foil and bake it until it’s soft enough to be squeezed from its skin like a paste. I just used a small head of garlic in this recipe, but you could use more, or roast a larger head, use part of it, and refrigerate the rest to use later.

Since it starts with a vegetable, this might be little more healthy than many of the offerings in my dip repertoire (or Dip-ertoire?). I even tend to use reduced fat cream cheese and sour cream, because I find them to be a reasonable compromise between flavor and calories. I like to serve this dip with crackers or tortilla chips but celery sticks are also good if you like to take that health thing a little further. Pita chips would also be good, as would pretty much anything mildly-flavored but dippable that you might keep around to accompany your own Dipretoire. Snack on, good people, snack on!

Roasted Red Pepper, Garlic, and Onion Dip Recipe
You could use jarred roasted red peppers and skip the roasting steps.

2 large red bell peppers
about ¼ large yellow onion
1 small whole garlic head
1 ¼ teaspoon olive oil, divided
½ cup sour cream or plain yogurt
½ cup cream cheese (4 ounces)
1 teaspoon ground cumin
¼ cup chopped parsley
1 tablespoon lemon juice
½ teaspoon salt
¼ teaspoon black pepper

1. To roast the peppers: preheat the broiler. Place the whole peppers on a baking sheet and position them in the oven rack position closest to the broiler. Broil, turning the peppers as each section gets charred until the skin of the peppers is blackened all over.

2. Place the peppers in a bowl and cover the bowl tightly with plastic wrap. The peppers will steam themselves, allowing the skin to be removed. Let stand for 20 minutes or until the peppers are cool enough to handle easily.

3. Remove the peppers from the bowl and peel off the blackened skins. Remove the stem, seeds, and any tough membranes from the peppers. Place the roasted pepper flesh in a food processor.

4. To roast the garlic and onion: reduce the oven temperature to 400 F. Chop the onion coarsely and place on a piece of aluminum foil large enough to wrap it. Drizzle with 1 teaspoon olive oil and wrap in the foil. Remove the outer, papery skin from the garlic head. Keep the cloves intact and attached to each other. Place the garlic on a piece of aluminum foil large enough to wrap it. Drizzle with remaining ¼ teaspoon olive oil. Wrap in the foil.

5. Place the wrapped garlic and onion in the oven and roast at 400 F for 45 minutes, or until the garlic is very soft. Unwrap and set aside until cool enough to handle. Place the onion in the food processor with the peppers. Squeeze the roasted garlic out of the cloves and into the food processor.

6. To make the dip: process the peppers, onion and garlic in the food processor until well chopped.


7. Add the remaining ingredients and process until smooth. Taste and adjust seasonings if necessary. Transfer to a bowl and chill until ready to serve (it’s also good at room temperature). Serve with chips, crackers or vegetable sticks.


Wednesday, January 27, 2010

Gifts that Keep on Giving

It’s so exciting in the height of the harvest season when you pile up your winter squash and dream of how well-stocked you’ll be for nutritious, high WFQ* meals in the dark days when there will be little or nothing that is fresh and locally produced.


You make and freeze bags of Roasted Winter Squash Puree with an old fashioned sense of preserving the bounty and “putting up” for the winter. You’re thrilled by the Christmas gift of a chest freezer from your parents that just fits in your apartment but makes this all so much easier.


At least I do all these things. And in the last week of January, I finally admit that I’m getting a little (just a little) tired of eating squash. This recipe, however, is one of our favorites. It’s just some flavored-up squash puree poured over hot pasta and topped with a blue cheese sauce.


I was probably pretty skeptical when I saw the combination of sweet squash and blue cheese in a recipe, but I have since become quite converted. The sharpness of the cheese cuts through the sweetness of the squash, which can be downright cloying, let’s admit it here and now. While these two flavors go well together, neither is hidden in this dish (the way I try to hide beets in other dishes), so if you don’t like squash or you don’t like blue cheese, you probably won’t like this dish. Save your spaghetti for another sauce.

I like sage with squash, so used it here, but you could use other herbs if you like. I also have been known to add a pinch of crushed red pepper to the squash for some extra kick. Adding a little white wine or broth to the squash as it heats up, then cooking until it is pretty much evaporated adds some nice flavor as well. I happened to be without either of those this time, and the dish was just fine.

There are a few parts to this recipe, but you can give each your undivided attention. Just keep whatever you’ve finished warm until it’s time to put everything together. I’ve made this recipe enough times to be quite familiar with it and I tend to play dueling burners, getting everything done without much incident.

Well, my new little freezer is going to keep gifting me with squash puree for a little while yet, so next time you see me, don’t be surprised if I appear a little more orange than you remembered.

Pasta with Squash Puree and Blue Cheese Sauce Recipe
This makes two fairly large servings. I believe it could be doubled fairly easily if you wish to serve more.

6 ounces dry spaghetti or other pasta of your choice

For the Squash Topping
1 tablespoon olive oil
¼ cup finely chopped onion
½ teaspoon salt, divided
2 garlic cloves, minced
2-3 minced fresh or crumbled dry sage leaves
1 cup Roasted Winter Squash Puree or canned or frozen squash puree
2 tablespoons dry white wine or broth (optional)

For the Blue Cheese Sauce
1 tablespoon butter
1 garlic clove, minced
1 tablespoon all purpose flour
½ cup milk
¼ teaspoon salt
pinch black pepper
2 heaping tablespoons crumbled blue cheese

fresh herbs for garnish (optional)

1. Cook the pasta in boiling salted water until al dente (just a bit firm to the bite). Drain and keep warm.

2. To prepare the squash: heat the olive oil in a medium-size skillet over medium heat. Add the onion and ¼ teaspoon salt. Cook until the onion is tender and just beginning to brown, about 8-10 minutes, stirring frequently. Add the 2 minced garlic cloves and sage and cook 1 minute, stirring frequently.

3. Add the squash puree and wine or broth if using. Mix thoroughly with the ingredients in the pan and cook until heated through and any liquid had mostly evaporated. Keep warm.

4. To prepare the blue cheese sauce: melt the butter in a small saucepan over medium-low heat. Add the 1 minced garlic clove and cook about 30 seconds. Add the flour and whisk to blend it well with the butter without any lumps. Cook for about 1 minute, whisking frequently.

5. Gradually whisk in the milk. Cook, stirring frequently, over medium-low heat until the sauce begins to boil. Boil and stir about 1 minute, or until the sauce thickens. Remove from the heat and stir in the ¼ teaspoon salt, pepper and crumbled blue cheese. Keep warm.


6. To serve: place half the pasta on each of two plates. Spoon half the squash mixture over the pasta. Top with half the blue cheese sauce. Garnish with chopped fresh herbs, such as parsley, sage or chives if desired.

Makes 2-3 main dish servings. Could also make 4-6 side dish servings.


*WFQ = Whole Food Quotient

Monday, January 25, 2010

Indoor Pulled Pork

I believe this is a first on The Messy Apron. I’m going to write about having cooked a large piece of meat. There have been a few stir fries with chicken or with beef, some ground pork here, and a hoisin marinade for various proteins here. Of course I also sprinkle in some flavorful bacon now and then, but a big piece of animal protein as the center of the meal just doesn’t happen particularly often around here.


But it’s coming to the end of the professional football season and I had yet to make a barbecue-flavored shredded meat. I say barbecue-flavored because I have neither the equipment nor, frankly, the know-how to make real barbecue, especially in Minnesota in January. I can still, however, make a flavorful pulled pork, the kind that will fall into tender, savory bites if you just stare at it hard enough, as long as I allow my slow cooker to do all the work.


I made an adaptation of a recipe my mom used to make, often for big family parties like the one she put together when Harry and I were moving from northern Michigan to southern Texas. The meat was very popular, so when we missed our own going-away party because of problems with getting a rental truck for moving (I won’t go into it…you’ll just lose your appetite) it was the one dish that was entirely gone when we finally arrived.

This pulled pork is easy to put together. It requires time, but not your time. You can just dump everything into a slow cooker (aka a Crock Pot) and let it do its thing all day or overnight. The braising liquid is quite flavorful, but the finished product still has good pork flavor, in case you like that sort of thing. It isn’t spicy, but I suppose you could make it so with the addition of some chiles or hot sauce.

For me, most meat is really just a vehicle for spices and seasonings, or a flavorful sauce, so I like to mix this pork with a little more barbecue sauce and serve it on sandwich buns with a side of coleslaw, I suppose it would also be good eaten with a fork in one hand and a chunk of cornbread in the other. This recipe makes a lot, so you can feed a whole crowd of carnivores. Leftovers freeze well, however, so you could also keep a meat-lover or two happy for several days.


Slow Cooker Pulled Pork Recipe
You can also make this with a beef chuck roast of similar size. Use beef broth in place of the chicken broth. If you do not have a slow cooker, this can be made in a covered roasting pan in the oven, but I have not done this, so am not sure about the temperature or time required.

1 cup (250ml) chopped celery
1 cup (250ml) chopped onion
5 garlic cloves, finely chopped
1 cup (250 ml) ketchup
1 cup (250 ml) barbecue sauce
2 cups chicken broth
2 tablespoons (30 ml) cider vinegar
¼ cup (50 ml) brown sugar
2 tablespoons (30 ml) Worcestershire sauce
2 tablespoons (30ml) liquid smoke (optional)
1 teaspoon (5 ml) salt
1 4-5 pound (about 2 kg) boneless pork shoulder roast
additional barbecue sauce for serving, if desired

1. Place half of the measurement of each ingredient except the pork in a large slow cooker. Place the pork roast in the slow cooker and cover with the remaining ingredients.

2. Cover the cooker and cook on low heat for 8-10 hours, or until the meat can be pulled apart very easily.

3. Remove the meat from the cooker and place on a large platter. (Discard the cooking liquid.) Shred the meat with forks until it is all pulled apart. Serve on sandwich rolls and with additional barbecue sauce if desired.

Makes at least 10 generous servings. Leftovers can be frozen in a freezer-safe container or wrapping for a month or so.

Thursday, January 21, 2010

The Still-Great Pumpkin

“There are three things I’ve learned never to discuss with people: religion, politics, and The Great Pumpkin.” –Linus Van Pelt (from Peanuts by Charles Schulz)

Religion and politics are too hot for me to touch right now (there are plenty of other blogs to get your fix if you need it, I’m sure), but I’m still talking about The Great Pumpkin. Well, maybe not the Great Pumpkin, but pumpkin, and how I think it’s great. Or maybe the great quantities of it that I still have in my kitchen.

I seem to have overachieved in my accumulation of pumpkin in October, November and December, and I had to get back to using it. I think I’m still wearing some of the Pumpkin Pies I consumed over the holidays (specifically around my waist, hips and thighs), so I decided to go with something sweet, but perhaps a bit healthier and less caloric. I was thinking more afternoon tea than dessert and made pumpkin quick bread.

I started with a recipe from Cooking Light Magazine that I’ve been using for years and bumped up the WFQ* with some whole wheat pastry flour (you could use only all-purpose flour if you want). I quite like dates and pecans with pumpkin, so I loaded these loaves up with them. There’s something about the richness and caramel-y sweetness of the dates that make them mesh well with the pumpkin. You could use raisins if you prefer.

Since I felt like I was being so good with this high WFQ pumpkin bread batter, I decided to add just a little bit of bad in the form of a splash of bourbon. Its contribution to the final product is subtle, but I think it adds some complexity, especially with a bite of gooey date. You could leave it out and probably not miss it, and it would be ludicrous to go out and by a bottle of bourbon just to make this bread. Or perhaps a bottle of bourbon would be just the right thing to accompany a daring discussion of religion and politics with a side of pumpkin bread.


Pumpkin Oatmeal Quick Bread with Dates and Pecans Recipe
based on a recipe in Cooking Light Magazine

2 tablespoons canola or other neutral-tasting oil
3 large eggs
15 ounces (about 425 g) pumpkin puree (canned is fine)
1/3 cup milk
2 tablespoons (30 ml) bourbon (optional)
1 cup (about 4 ounces or 125 g) all-purpose flour
1 cup (about 4 ounces or 125 g) whole wheat pastry flour
1 cup (about 4 ounces or 125 g) rolled oats
1 cup (about 7 ounces or about 200g) brown sugar
2 teaspoons (10 ml) baking powder
½ teaspoon (2.5 ml) baking soda
2 teaspoons (10 ml) ground cinnamon
½ teaspoon (2.5 ml) salt
1 cup (about 250 ml) chopped pitted dates
1 cup (about 250 ml) chopped pecans

1. Preheat oven to 350 F (180 C). Grease or oil two 8 x 4-inch bread pans or spray them well with cooking spray.

2. In a medium-sized bowl, whisk together the eggs and oil until well combined. Add the pumpkin, milk and bourbon if using. Whisk until well combined.

3. In a large bowl, combine the all-purpose flour, whole wheat pastry flour, oats, brown sugar, baking powder, baking soda, cinnamon and salt. Stir together with a whisk until the ingredients are evenly distributed and there are no large lumps of brown sugar.

4. Make a hole or well in the middle of the flour mixture and pour in the egg mixture.


Stir with a large spoon or rubber spatula until most of the dry ingredients are moistened. (Some unmoistened flour is okay, since the batter will get stirred further when you add the remaining ingredients.)

5. Add the dates and pecans and stir to evenly distribute them. Try not to mix too vigorously or the bread may become tough.

6. Spoon the batter into the prepared bread pans, evenly distributing it between them.

Place them in the preheated oven and bake at 350 F for about 50 minutes. If you wish, you can insert a wooden pick into the bread to test for doneness. It the pick comes out with no wet batter on it, it is done.


7. Cool the loaves in their pans on a wire rack for 10 minutes. Remove the loaves from the pans and cool on the wire racks. They are pretty good when still a little warm.

This recipe makes two loaves, but they are shallower than a standard loaf. To freeze a loaf or part of a loaf, wrap it well in plastic wrap and place in a freezer bag or other freezer safe container.


* WFQ = Whole Food Quotient

Tuesday, January 19, 2010

To Thine Own Self Be True

“This above all: to thine own self be true.”
–Polonius to Laertes Hamlet Act 1, Scene 3

One bite of something like “mock” crab, a soy dog, or textured vegetable protein masquerading as a beef burger, and you quickly learn the meaning of the word ersatz, or in many cases the phrase big fat phony. That doesn’t necessarily mean, however, that these imposters have no value of their own. If you live in Minnesota which is not known for its seafood (shockingly!), fake crab might have to do. If you’re vegetarian or are just cutting back on meat, you might miss sausage- or patty-shaped sandwiches. I find many veggie burgers to be pretty tasty (especially homemade ones like these, which actually contain real vegetables). I have insufficient experience, however, to comment on tofu dogs. The point is most of these foods won’t be so disappointing if you don’t try to convince yourself that you’re eating something you are not. Self-delusion is a pathetic thing.


And then there’s spaghetti squash, so called because its cooked flesh doesn’t turn into a soft pulp like other winter squash. It separates into strands which are vaguely spaghetti-like in shape, but that is where the similarity to pasta ends. Spaghetti squash doesn’t taste anything at all like spaghetti. It does, however, (and here’s where I write myself into a big hole), taste pretty good with standard pasta accompaniments. You can bake it as described below and toss it with a tomato sauce, garlic, olive oil and Parmesan cheese, or pesto. It has a more neutral flavor than other squashes like butternut or pumpkin and keeps a little bit of bite to it. The strands hold these sauces and flavors and it’s all pretty good….But it’s still not spaghetti.

And so with my last spaghetti squash of the season, I decided to try to find something different, something that didn’t look like a fake pasta dish. I came across an old recipe from Cooking Light magazine for a Greek-style spaghetti squash salad. The recipe called for tomatoes and cucumbers. Those are definitely not in season (and those in the supermarket right now give further meaning to the word ersatz), so I pared it down to what I had on hand. Since that included kalamata olives, feta cheese, red onions, and the ingredients for a red wine vinaigrette, this turned out quite well.


This salad is light, and just a bit crisp. I was enjoying it, proud that I had made something that didn’t require dishonesty or masquerading ingredients. This wasn’t squash pretending to be spaghetti. Then I realized there was something familiar about it. It reminded me of …ahem…pasta salad.

Oh well. The squash is true enough to itself in this salad. It’s not my fault it happens to go well with so many things that also go well with noodles. There are probably many other foods to which that applies as well….I just can’t think of any right now.


Spaghetti Squash Salad with Greek Flavors Recipe
inspired by a recipe in Cooking Light Magazine

1 (2 ½ -3 pound or about 1.25-1.5 kg) spaghetti squash
¾ teaspoon (3 ml) coarse (kosher) salt, divided
1 ounce (about 30 g or 1/3 cup) chopped pitted kalamata olives
½ cup (about 125 ml) finely chopped red onion
2 ounces (about 50 g) crumbled feta cheese
1 tablespoon (15 ml) chopped fresh oregano or 1 teaspoon (5 ml) dried oregano
1 clove garlic
2 tablespoons (25 ml) red wine vinegar
2 tablespoons (25 ml) olive oil
¼ teaspoon (1 ml) sugar
pinch black pepper

1. To prepare the squash: Preheat oven to 350 F (180 C). Pierce the skin of the squash liberally with a knife. (Be sure to do this or the squash can explode in the oven.) Place the pierced squash in a baking dish. Bake at 350 F for about 1 hour. Set aside to cool. When cool enough to handle cut the squash in half and scoop out the seeds and their membranes. Using a fork, find the “grain” of the strands of squash flesh and scrape the flesh into a large bowl. Discard the skin.


2. To make the salad: Toss the squash with ½ teaspoon salt. Add the olives, onion and feta cheese to the bowl with the squash and combine.

3. Finely chop the garlic. On the cutting board, add the remaining 1/4 teaspoon salt to the garlic. Continue to chop, then make a paste by pressing and scraping the salt and garlic together with the flat side of the knife. Place the paste in a small bowl or in a jar with a tight-fitting lid.


4. Add the vinegar, olive oil, sugar and black pepper to the garlic paste. Whisk vigorously, or shake vigorously if using a jar, until the mixture is very well combined. Pour over the squash mixture and toss to coat. Cover and chill until ready to serve.

Makes at least 6 salad servings. Will keep in the refrigerator for several days.

Thursday, January 14, 2010

Comforting Noodles and Cabbage

I can’t stop eating this stuff. Okay, so I do stop, but only because I have to. Reason eventually takes over…or it’s all gone.


It’s not that pretty, but it’s simple and delicious in an Old World, comfort-food style. It’s noodles and caramelized onions and sautéed, vinegary cabbage. Then there’s the bacon. Pretty much everything is better with bacon.

I use dried spaetzle noodles in this dish. They are more convenient than making spaetzle from scratch (something I don’t even know how to do) and I think they probably hold together better. You should be able to use an Italian-style noodle, like spaghetti, if you cannot find dried spaetzle. I would suggest looking for spaghetti with a bit more coarse texture (like those shaped with old-fashioned copper dies) and breaking the noodles into about 4-inch pieces before cooking.

I’ve made this dish with all green cabbage and with a combination of green cabbage and kale, and both are very good. (I’ve included some photos of each.) It’s likely that you’ll have some cabbage left if you buy a head just to make this. Beware! That will just give you an excuse to make it again!


Spaetzle with Cabbage, Bacon and Onions Recipe
Inspired by a recipe in The Bon Appetit Cookbook
This can be made without bacon. Just cook with 2 tablespoons oil or butter instead of bacon drippings.

4 slices thick-cut bacon
4 ounces (125g) dry spaetzle
1 large yellow onion, peeled, halved lengthwise and thinly sliced
1 ½ teaspoons (7ml) salt, divided
8 ounces (250g) thinly sliced green cabbage or 4 ounces (125g) each sliced cabbage and sliced kale (tough stems removed)
¼ cup (50ml) cider vinegar
1 teaspoon (5ml) caraway seeds
¼ teaspoon black pepper

1. Cook bacon in a large skillet (I use a nonstick skillet) over medium heat until crisp. Remove bacon and set aside to cool. Pour off the rendered bacon fat, reserving 2 tablespoons (30ml) in the pan. Crumble or chop the bacon.

2. Cook the spaetzle in boiling salted water until almost completely tender. There should still be some bite to it. (It will finish cooking later when added to the rest of the ingredients.) Drain the spaetzle, reserving ¼ cup (50ml) of the cooking water.

3. Add the onions to the hot bacon fat. Add 1 teaspoon salt and cook over medium heat for 5 minutes, or until soft and beginning to brown, stirring frequently.

4. Add the cabbage and cook 5 minutes, stirring frequently. Add the remaining ½ tsp (2.5ml) salt, vinegar, kale (if using), caraway seeds and pepper. Cook 5-8 minutes more or until the cabbage is tender.


5. Add the cooked noodles, reserved cooking water, and crumbled bacon. Cook and stir until the liquid has mostly evaporated and the noodles are heated through, about 1 minute.

Makes about 4 main dish servings.

You could also serve smaller portions as a side dish (perhaps without the bacon). It might go well with kielbasa or ham.

Tuesday, January 12, 2010

Casse-Rosti

I don’t much go for mushy noodle casseroles that star cans of cream of whatever soups, even if at this point in history, they could actually have been passed down for a few generations. Off the top of my head, I really don’t know how to make any of these, which might just make me a woefully inadequate Midwesterner. That doesn’t mean, however, that I’m not going to warm up my kitchen (and my tummy) with a hot casserole on these cold January days.


Recently, I tried this one, which was based on a recipe in Cooking Light magazine. It is a play on the Rösti, which is usually sort of a big hash brown cake made in a pan on the stove. Typically, it gets flipped over when the bottom gets golden brown to be fried on the other side as well. I’ve made them, and I like them, but they do require a bit of strength and dexterity in the flipping step. I was happy to see that I could cheat by making similar ingredients into a casserole.

I substituted some shredded celeriac (also known as celery root) in the recipe (the original called for some turnip). If you’re not familiar with it, celeriac is a brown, knobby, sort of hairy, dirty-looking thing, perhaps not the kind of vegetable you’d want to meet in a dark alley. Once you peel off its gnarly skin, however, this vegetable redeems itself. It tastes strongly of celery with perhaps a bit of turnip to it. I’ve just started cooking with it myself, and I’m hooked.


The baked eggs nestled into the top of this casserole give it main-dish power. (You could leave them out if you just want a side dish.) I baked mine until the egg whites were firm and opaque and the yolks were just firm as well. It think stopping a bit sooner so that a punctured, still-soft yolk would coat the baked potato-celeriac mixture like a luxurious sauce might be especially fantastic.

This casserole has a great savory and tangy flavor from the yogurt and green onions and a bit of nutty zing from the Gruyere cheese. It gets brown and crunchy on the top and in the corners, just like a proper potato and cheese dish should. I might have gone back to the casserole dish after supper and scavenged a few of the brownest, crunchiest, stuck-on bits without sharing, but I’ll never admit it.


Potato and Celeriac Casserole with Baked Eggs Recipe
based on a recipe in Cooking Light Magazine
In this recipe, regular plain yogurt is drained to make it thicker. You could substitute with Greek-style yogurt and eliminate the draining step.

¾ cup (about 175 ml) plain yogurt
1 tablespoon all-purpose flour (about 15 ml)
8 ounces (225g) peeled potato
8 ounces (225g) peeled celeriac
¼ cup (about 50ml) finely chopped green onions (scallions), divided
3 ounces (about 90g) shredded Gruyere cheese (about 1 cup, packed)
2 tablespoons (30ml) butter, melted
1 teaspoon (5ml) coarse (Kosher) salt
¼ teaspoon (1ml) ground black pepper, plus more for garnish
¼ teaspoon (1ml) freshly grated nutmeg
Cooking spray, oil or butter to grease the casserole dish
4 large eggs

1. Place the yogurt in a sieve lined with paper towel or several layers of cheesecloth. Place the sieve over a bowl and allow to drain for at least 30 minutes. This will allow the yogurt to thicken as some of its excess liquid drains away. You can skip this step if you use the thicker Greek-style yogurt, or if you’re just not that picky.


2. Preheat the oven to 400 F (200 C). Shred the potato and celeriac with the shredding blade of a food processor. You could also grate them by hand on a box grater. If you do, I would recommend shredding the celeriac first, since the potatoes may turn brown quickly.

3. Set aside about 2 tablespoons (30ml) green onions for garnish. In a large bowl, combine the shredded potato, celeriac, cheese, melted butter, remaining green onions, salt, pepper and nutmeg. Mix well.

4. Coat a 2 quart casserole or baking dish with cooking spray (or oil or butter). Spread the potato mixture in the dish. Bake at 400 F for 30 minutes.

5. Remove the casserole from the oven. Create 4 evenly spaced indentations in the top with the back of a spoon. Crack and gently pour 1 egg into each indentation.


6. Return to the oven and bake about 10 minutes or until the egg whites are firm and opaque and the yolk is done to your liking. Garnish with reserved green onions and a few grinds of black pepper. To serve, cut into four sections, each containing an egg.

Makes 4 main dish servings.

If there are any leftovers, cover and store in the refrigerator. Reheat in the microwave and serve. The egg will probably cook to a more firm point upon reheating, but if you’re okay with that (as I am) the leftovers are mighty fine for breakfast the next day, and are probably best not left much longer than that.

Thursday, January 7, 2010

Shattered Dreams

What do you do when the Pyrex bowl (age 12 years) of leftover Wheat Berry Salad with Roasted Vegetables and Maple Walnut Vinaigrette leaps out of the refrigerator, as if it was fleeing from something (probably the beets) and shatters on the floor, ruining your plans for lunch? Well, if you’re like me, you clean up the mess (carefully…have you ever seen how Pyrex shatters?), express gratitude to the people who gave you a Target gift card for Christmas (so you can replace the extremely useful bowl), and make something else for lunch. You could also mutter coarse language under your breath, but I’ll leave that part out.


I had a cute little red cabbage (actually, it’s really quite purple in color), lots of carrots, and apples. I thought green onions and dried cranberries might work with these, too. If nothing else, they’d probably make a pretty mixture. (Then again, anything would be prettier than that woeful slumping mass of wheat berries and glass shards.) I was on my way to slaw.
I know there was a cabbage slaw that I made a long time ago that had apples in it. I never made it again, but I think the apples were sliced, and didn’t match the shape of the shredded cabbage, and that was unappealing to me. This time I julienned the apple (actually about half a large one). I also sliced up some green onions, trying to make them of similar shape. I shredded the cabbage and carrot using a food processor (actually using the slicing blade on the cabbage, which I think gives better results). I decided there wasn’t much I could do about the shape of the cranberries, and just shrugged and tossed them in.


I don’t know where I got the idea to put apple jelly in the dressing. It just sort of popped in there, then wandered around with its hands in its pockets, whistling, as if it had always been there. Anyway, I really liked it. The homemade jelly I used is significantly more liquid than anything store-bought is likely to be, so I sort of guessed on the warming and liquefying step in the recipe below. My jelly also has a lot of cinnamon flavor to it, which came through in the slaw, but not overwhelmingly so. I really liked that, too. If your jelly isn’t kissed with cinnamon, but it sounds good to you, you might want to try adding a pinch (just a pinch) of ground cinnamon to your vinaigrette.

And so, crisis averted, lunch saved and lots of slaw left for supper, I was tempted to bound away victorious, my messy apron flapping in the wind. Then I remembered it was entirely my fault that the bowl got broken in the first place. I had to admit that I had placed it precariously in the over-full refrigerator. I was the villain before I was the hero. Appropriately contrite, I stored the leftover slaw in an unbreakable plastic bowl.


Red Cabbage Slaw with Apple and Cranberries Recipe

3 cups shredded or finely sliced cabbage (about 8-10 ounces or 225-250 g)
1 cup shredded carrot (about 3 ounces or 75 g)
½ large apple, cut into julienne strips
4 green onions (scallions) finely sliced diagonally
½ cup (about 2 ounces or 50 g) sweetened dried cranberries, such as craisins
2 tablespoons (30 ml) apple jelly
2 tablespoons (30 ml) cider vinegar
2 tablespoons (30 ml) extra virgin olive oil
¼ teaspoon (1 ml) salt
1/8 teaspoon (0.5 ml) cayenne pepper

1. Combine the cabbage, carrot, apple, green onions and dried cranberries in a bowl that is large enough to allow for mixing the ingredients.


2. Gently heat and stir the apple jelly in the microwave or on the stove until it becomes a pourable liquid.

3. Combine the liquefied jelly, cider vinegar, olive oil, salt and cayenne pepper in a small bowl and whisk until well combined. Alternatively, combine these ingredients in a small jar with a tight-fitting lid and shake vigorously until well combined.


4. Pour the jelly mixture over the cabbage mixture and mix well until the slaw is well coated with the vinaigrette.

Makes 6-8 side dish servings and can be refrigerated for several days, although the slaw may eventually become somewhat soggy and the red color from the cabbage is likely to run onto the rest of the slaw.